
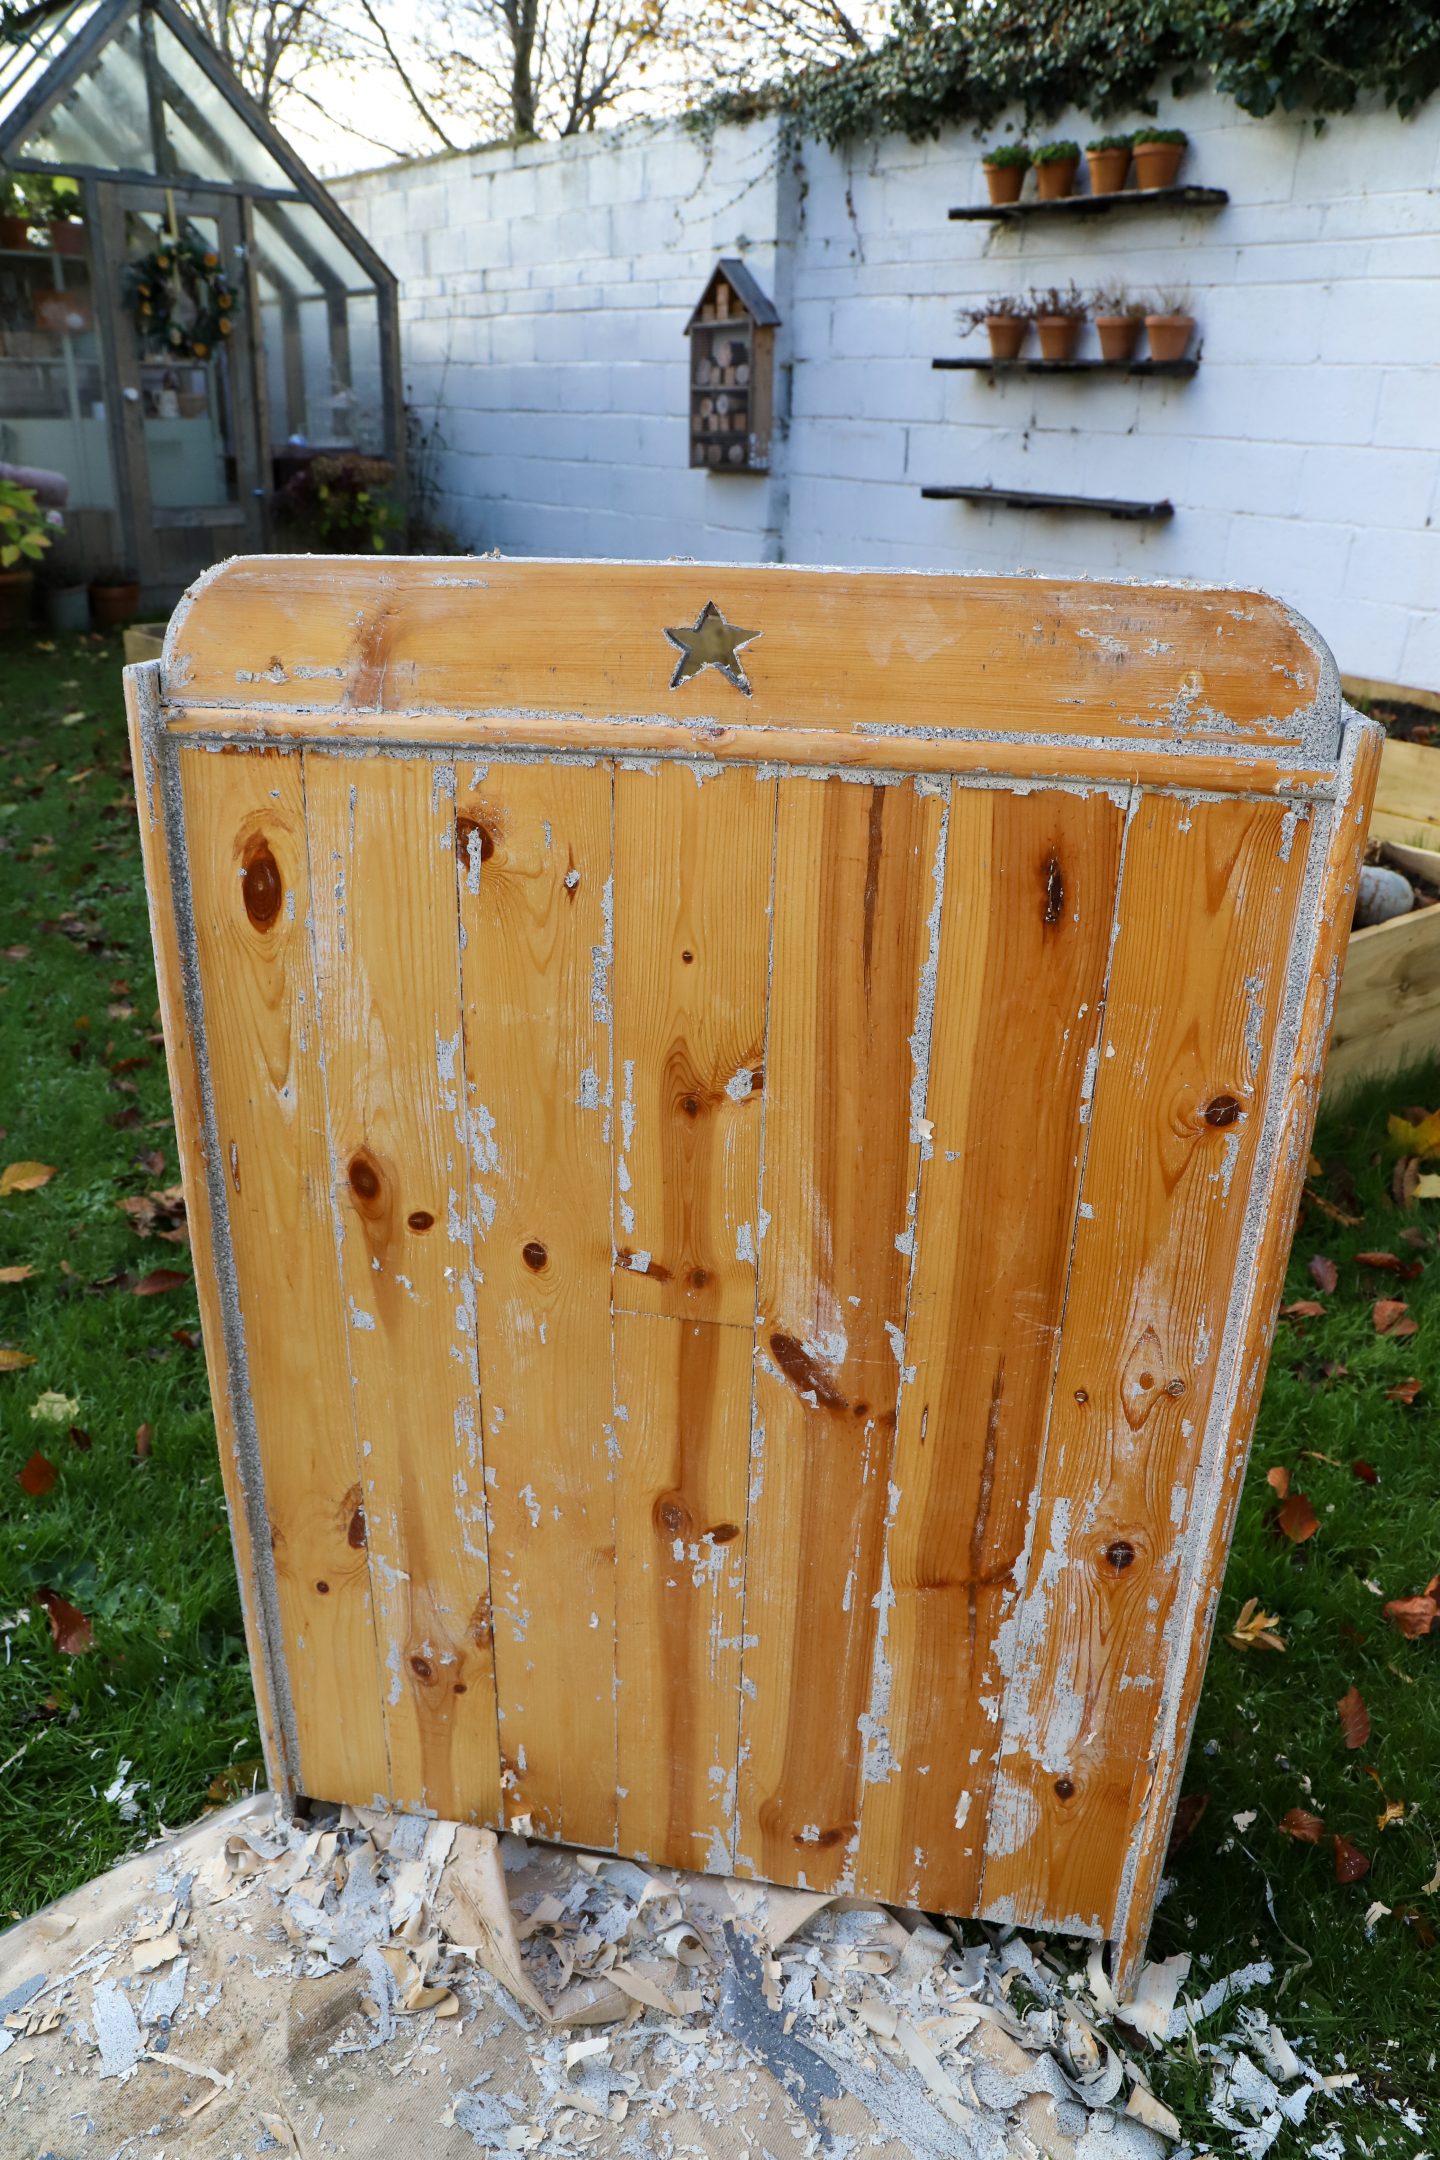
One of my favourite things to do is flip toys! Maybe it’s because my inner child gets to play. This Christmas, I upcycled this kids kitchen as a present for my niece. I got it for free on a second-hand site, and I was delighted with my thrifted find even if it was full of pebble spray paint.
As you can see from the before pic, it was covered in layers of pebble spray paint. I knew by looking at the kitchen that there was solid wood underneath. So, I knew it would be worth the effort to strip the pebble spray paint.
*This post contains affiliate links


How I removed pebble effect spray paint from the wood
To remove the pebble spray paint, I used my heat gun. I try to avoid using harsh chemical strippers. However, they would have made the job easier.
As the weather was cold, I decided against using a striper as I would have had to use it outside, and the cooler temp may have taken longer to work. It is also really messy to clean it off.
If you are looking for a more environmentally friendly paint stripper, Check out this post, where I used the Autentitco Bio Strip to remove chalk paint.
It took me a few hours to remove the pebble spray paint. I brought my piece outside and gently heated the paint until bubbles appeared. Then I scraped the old pebble pant off.
Take care when scraping off the old paint as you may scratch the wood underneath.
Also, when using a heat gun, I always wear a mask to protect my lungs from any toxins from striping the paint.
Paint stripping is messy work, but it’s worth it when there is good wood underneath.

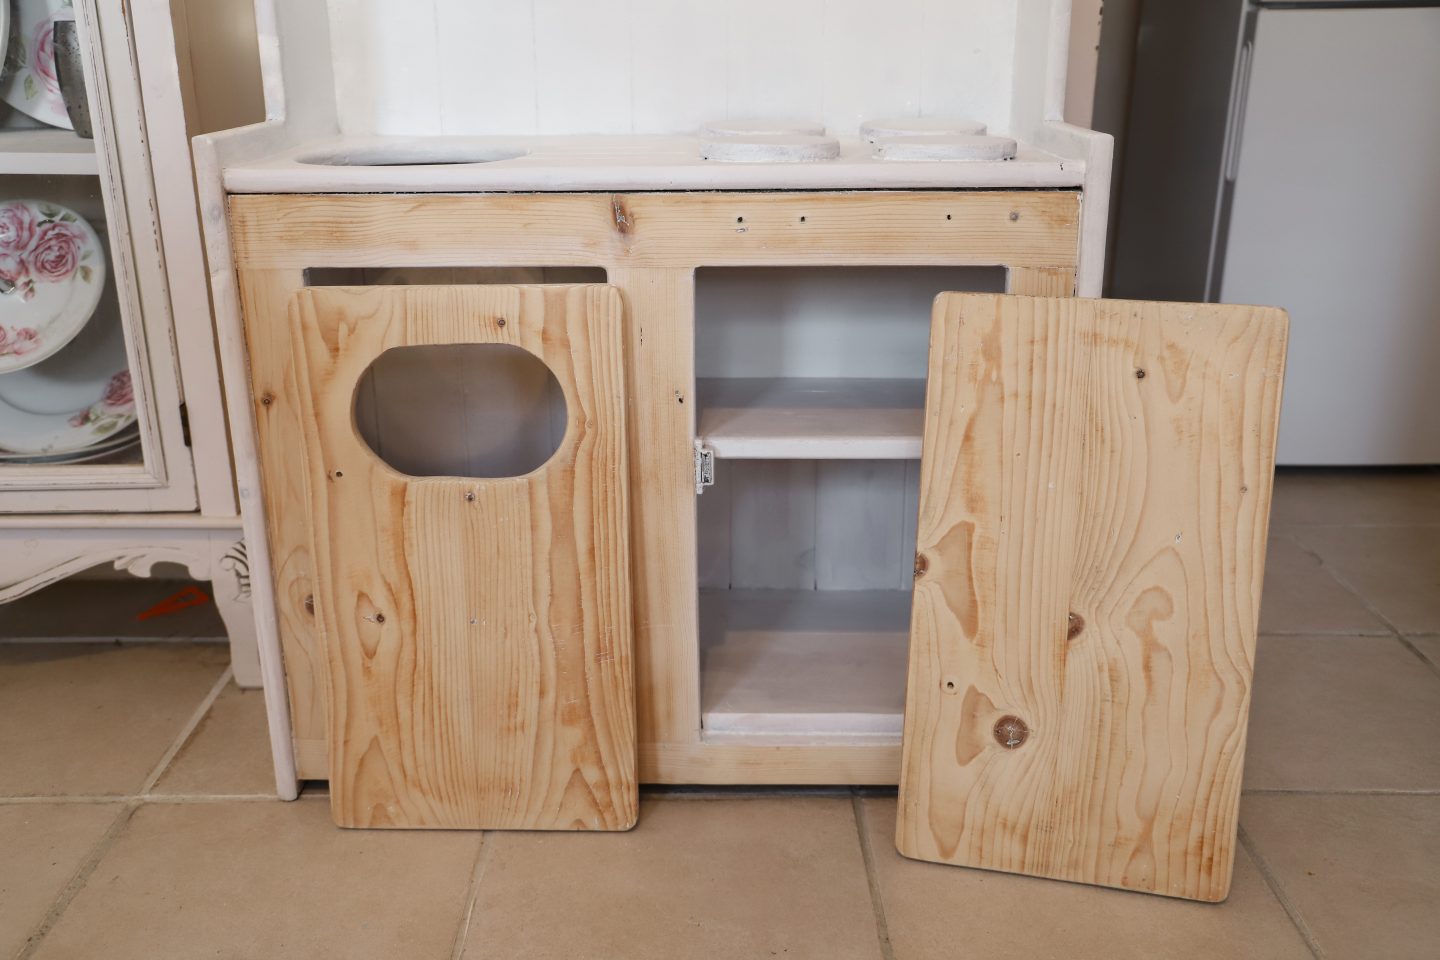
Finishing the wood on the Kids kitchen
When I removed the old paint, there was pinewood underneath. The pine had its notorious orange hue. So, using my sander, I sanded the wood.
I started with medium-grit sandpaper and finished with fine-grit paper.
I wanted to keep some of the wood exposed as I loved the details in the grain. On the inside, I painted the wood using a light shade. In my stash, I had some leftover Benjamin Moore paint in the shade Pale Oak. (I used it on this project here)
On the painted areas, I applied a coat of primer to stop the knots in the wood from bleeding. Then I applied two coats of Pale Oak.

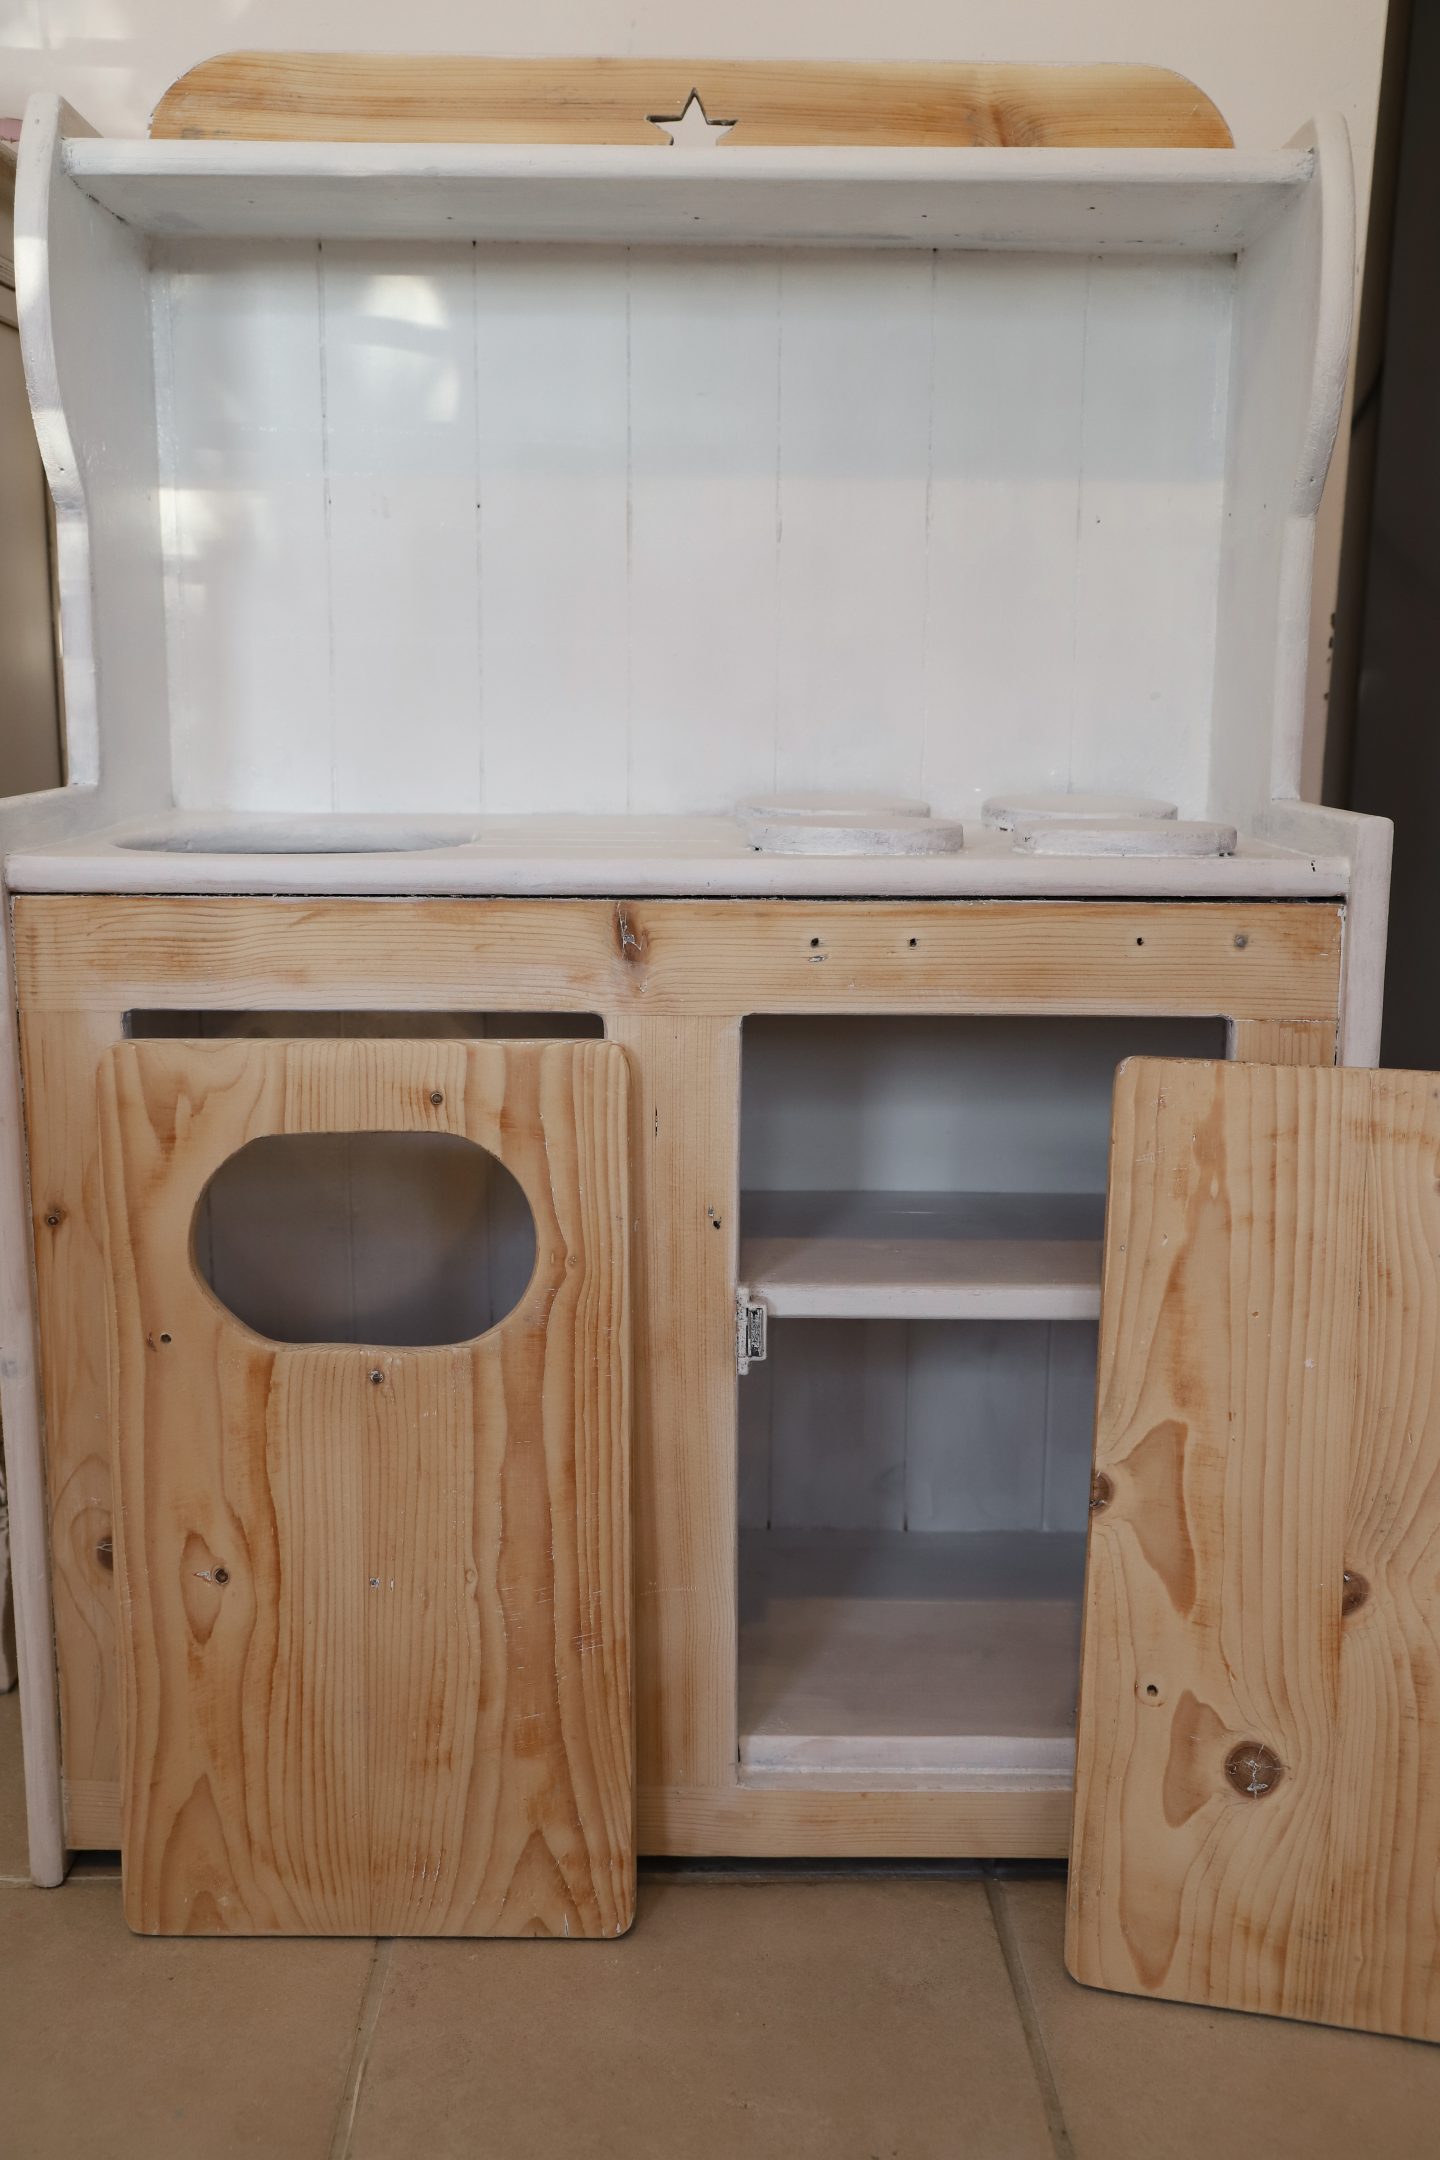
Whitewashing the wood to get a bleached effect
To lighten the wood, I watered down the Pale Oak paint. Using an old carton, I mixed 50/50 with water and paint.
I then used a sponge to wash the paint into the wood and worked it into the grain.
On a previous furniture makeover, I did try bleaching the wood, but it took many layers and smelt harsh. By doing a wash of paint, you get the same bleached wood effect ( only if previously sanded).
To seal the wood, I used two layers of clear polyurethane varnish.


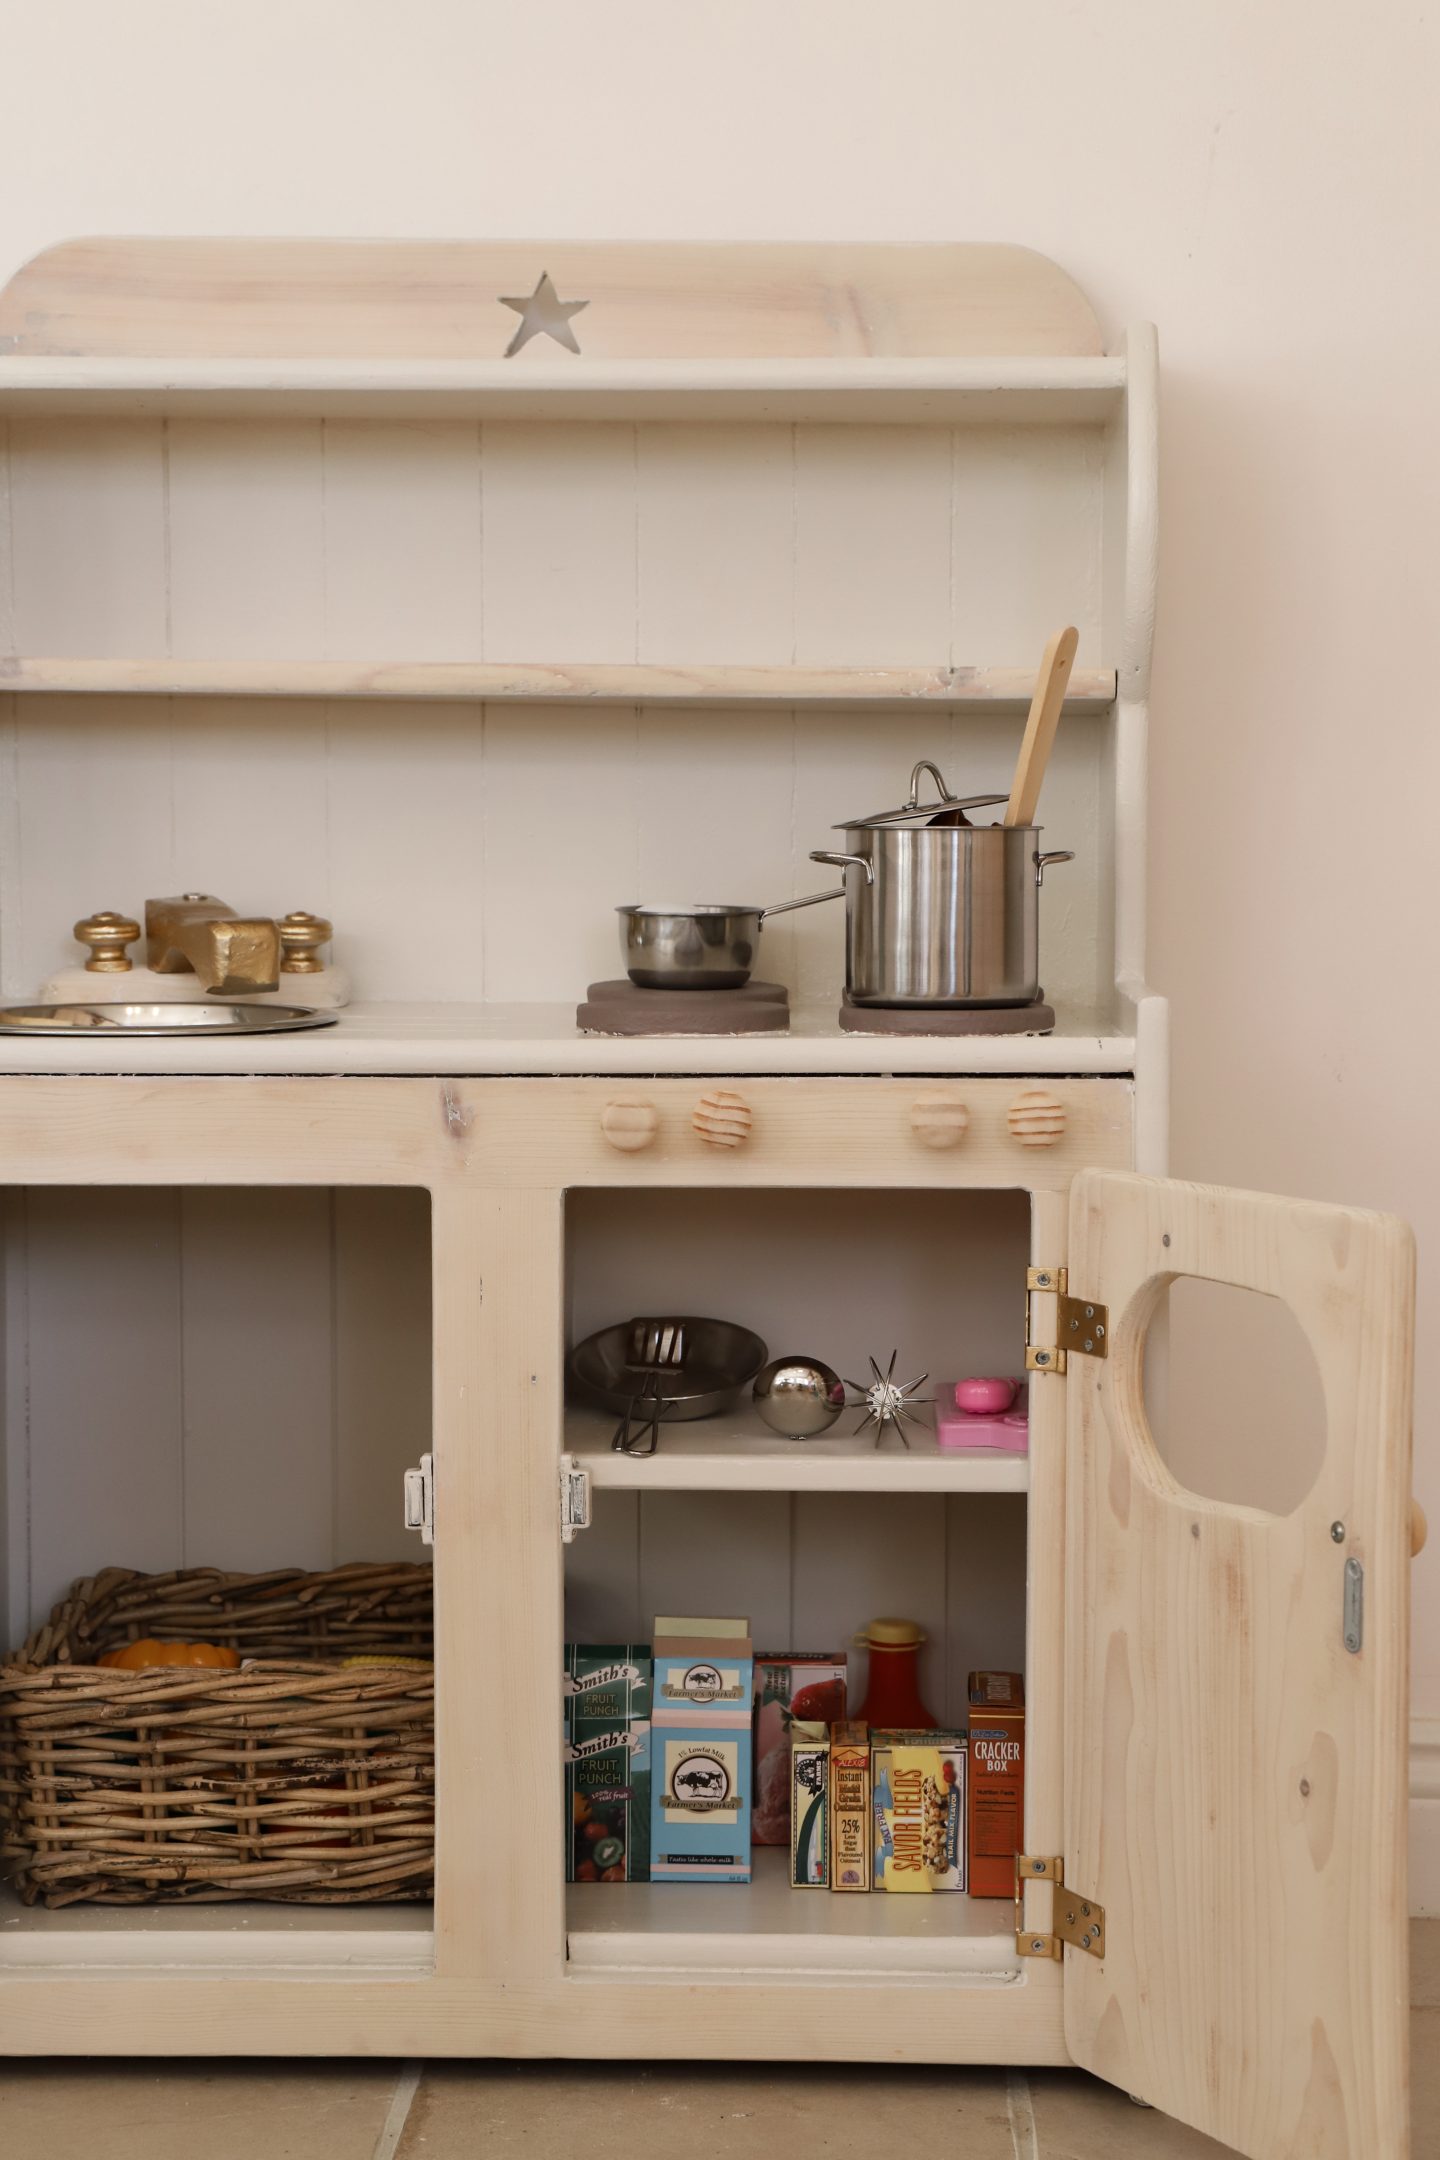
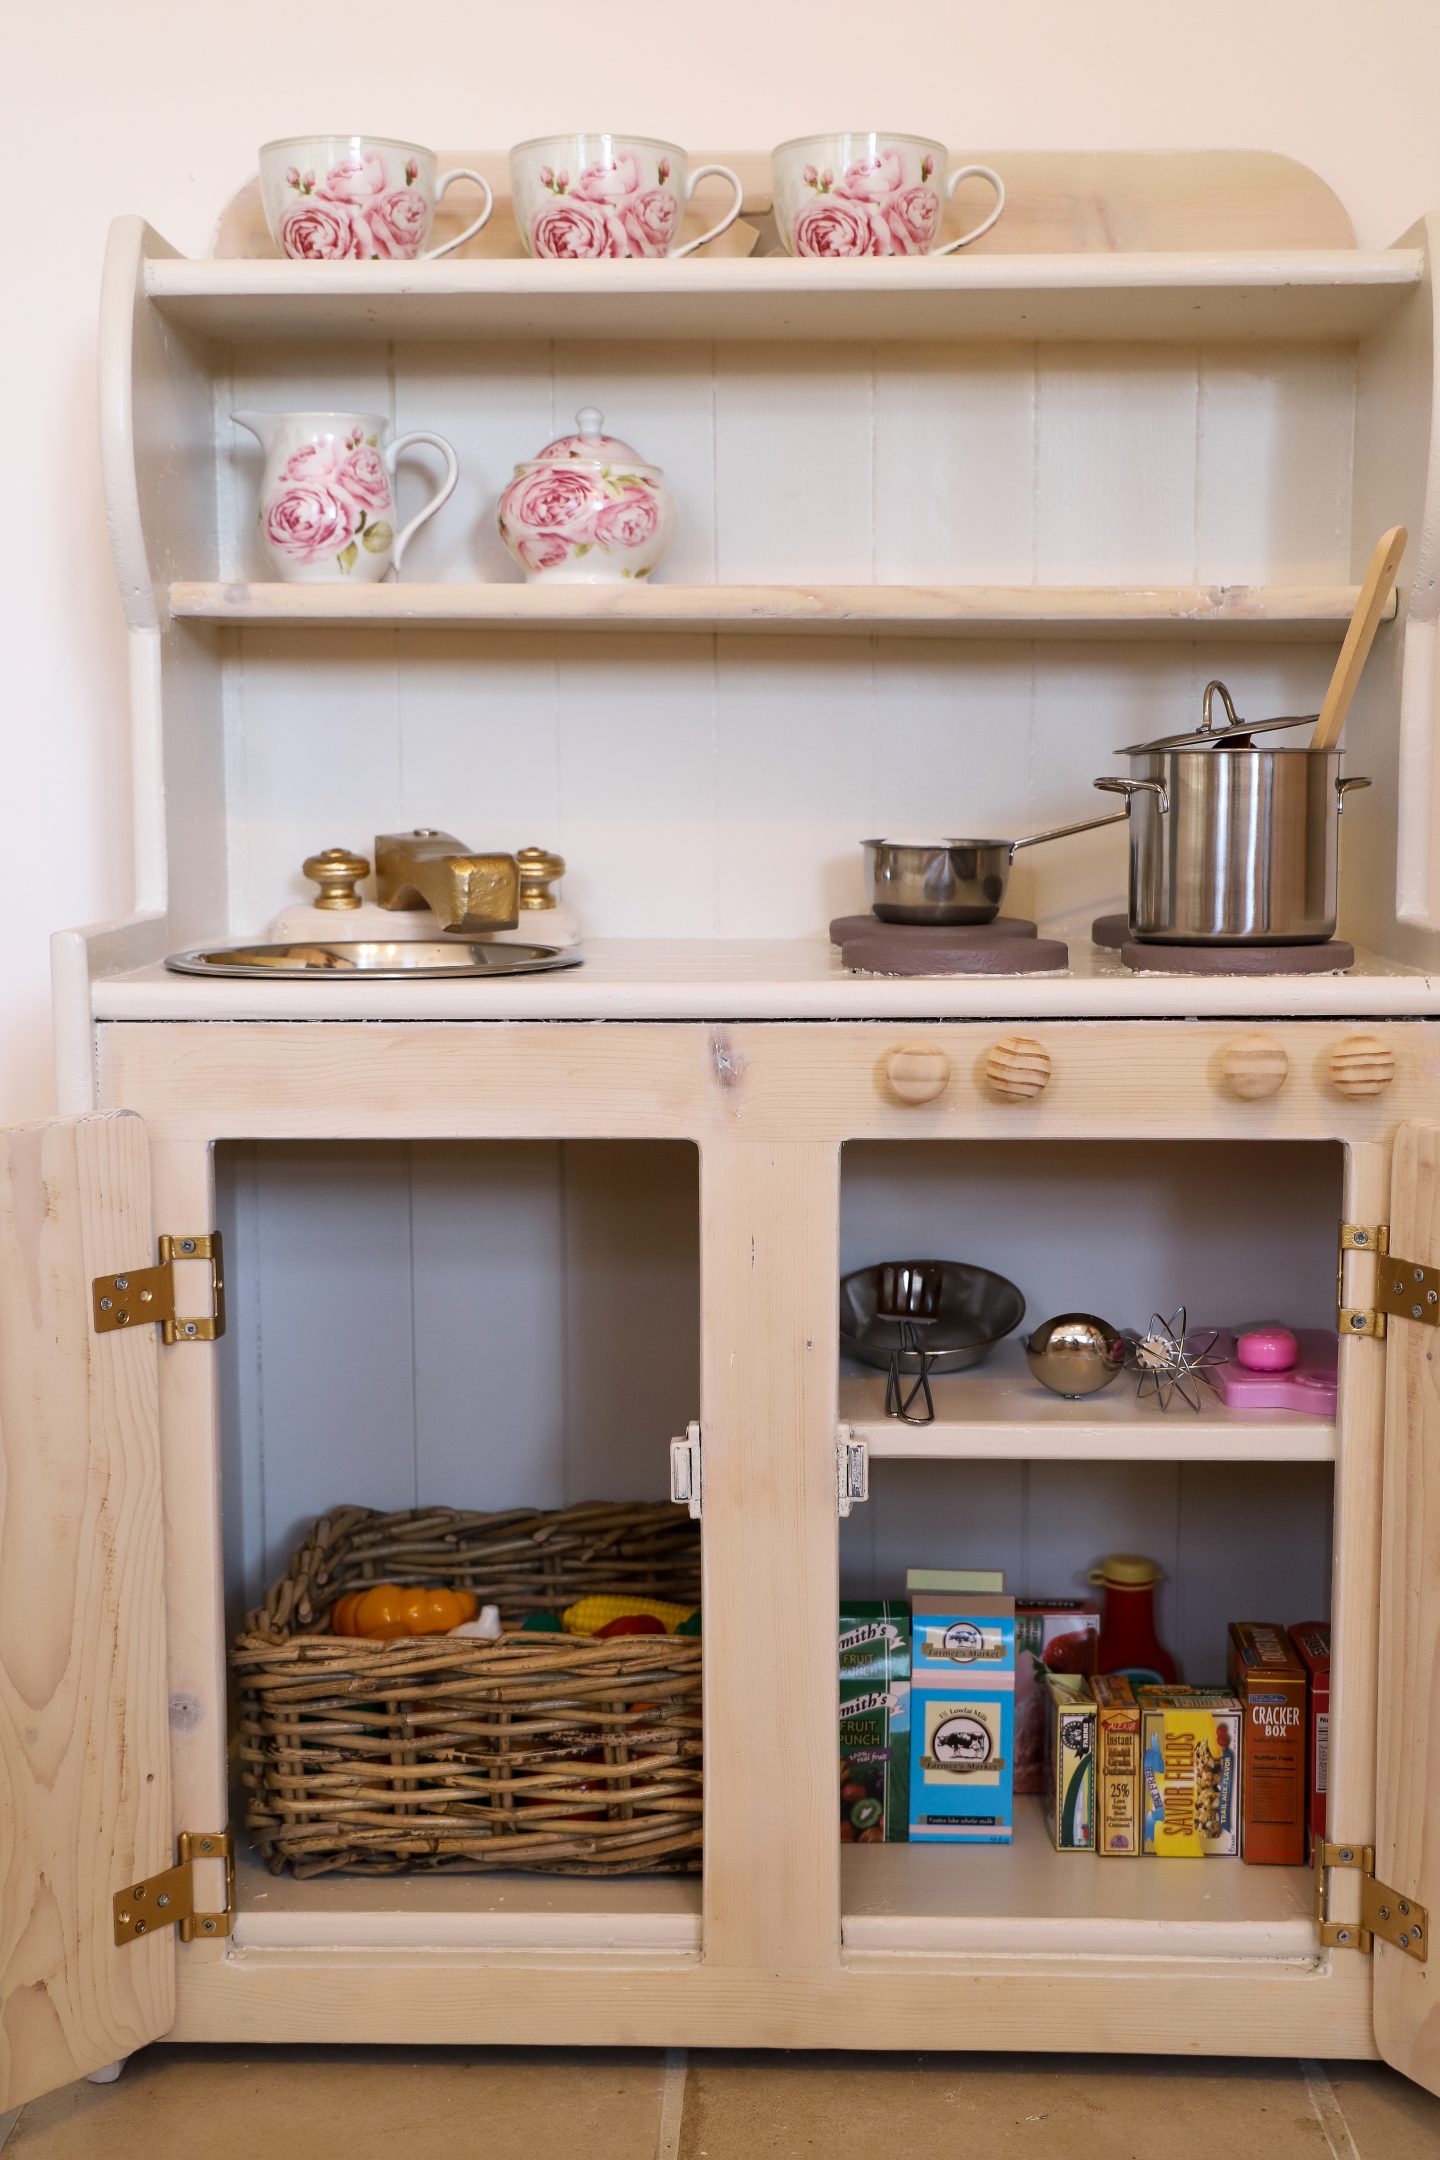
Styling the finished upcycled kids kitchen
Now, this was the fun part! I bought pretend food from Smyths so that my kitchen was fully stocked. I added an Ikea basket to the bottom, and I replaced the old knobs with wooden ones I bought from woodies.
I am excited to see my nieces reaction to the upcycled kitchen. Some of you might remember last years dollhouse makeover, and you can catch that here.
Also, if you want more toy flip inspiration, check out this playlist full of toy makeovers.


Click here to watch the YouTube video for this upcycle
I hope you got some inspiration from this post. So many toys get thrown away, and one of my guilty pleasures is making them new once again.
Thanks for reading, Chat soon, Catherine.


Hello Catherine!
I just stumbled across your YouTube channel and of course subscribed!! My name is Barbara and I write the blog French Ethereal here in North Texas, USA. I do make a lot of crafts and sewing projects but lately it’s been all about the garden (which is how YouTube found your site!). Love your new garden/potting shed and how you put in lights for Christmas, the makeover in front with the gravel and the new pond. If you do put in fish, DON’T put in the cement pieces you were thinking of using (they are okay around the outside, just away from the water) because it can kill them (some kind of off-gases, I guess). Might hurt frogs, too. Not sure… We had fish in our kitchen in California for five years when my kids were growing up and if you do get fish, any water with chlorine put in to “top off/start a pond” has to sit for 24 hours to let the chlorine evaporate. It smothers fish otherwise. Thought you’d want to know. 🙂
Anyway, I love your videos and am having fun on Christmas holiday from teaching school (I’m a paraprofessional, but do teach!) watching my way through them. Your brothers are wonderful to help you with your projects when needed!! On a later compilation video, where you refinished a trunk and a Shabby Chic headboard, can I ask you who created and what is the name of the GORGEOUS roses wallpaper in the background of your spare bedroom? It would be perfect to put up somewhere in my new Texas home. Hopefully it is still available! 🙂
We have similar tastes, I think, though I’m probably twice your age. <3 I have loved Rachel Ashwell's Shabby Chic lines since I found her in the early 1990's. If you haven't watched her old videos/DVD's when she had a tv show back then (maybe early 2000's, not sure), I'm pretty sure you'll love them! They can be found online sometimes. Okay, way off topic, but it's nice to say hello! If you'd like to link up any posts, please stop by to my site at: http://www.frenchethereal.net and link up to Share Your Style (Wednesdays through Monday eves, 6:00pm Central time/USA; about 8 hours behind your time, I think). My brother was stationed at RAF Molesworth, England back about 12 years ago now. I was able to take my kids over during Easter/Spring break in 2005 and we had the best time! Didn't get over to Ireland sadly, but have lots of Irish and Scots in my ancestry. (last names: Blades, Gross/LeGross, Farmer, Nickerson, Nicholson) I'm 96% Scottish/Irish/English per Ancestry.com (ancestors on my mother's side emigrated to Nova Scotia and were on both sides of the Revolutionary War). Okay, WAY off topic, lol!! Way more info than you probably wanted to know. ;)'
Hope you had a wonderful Christmas break and Happy New Year to you!
Hugs,
Barb Chapman
Author
Thanks Jo, yes it was so hard to remove it x
Boy, whoever sprayed the pebble finish on that should have been forced to come to your house and scrape it all off! But it turned out gorgeous so … bravo! Be sure to let us know how your niece liked it.