
I have a really fun DIY today. I am transforming and up-cycling an old broken chair and giving it a new lease of life. Normally when people have a broken chair they will throw it away or use it for firewood. I got these broken chair backs from a local lady who didn’t want to throw them away. I decided to give them a new lease of life and they have a new purpose and place in my home. I also have a video sharing how I up-cycled these pieces an I will leave it below for you to check out.

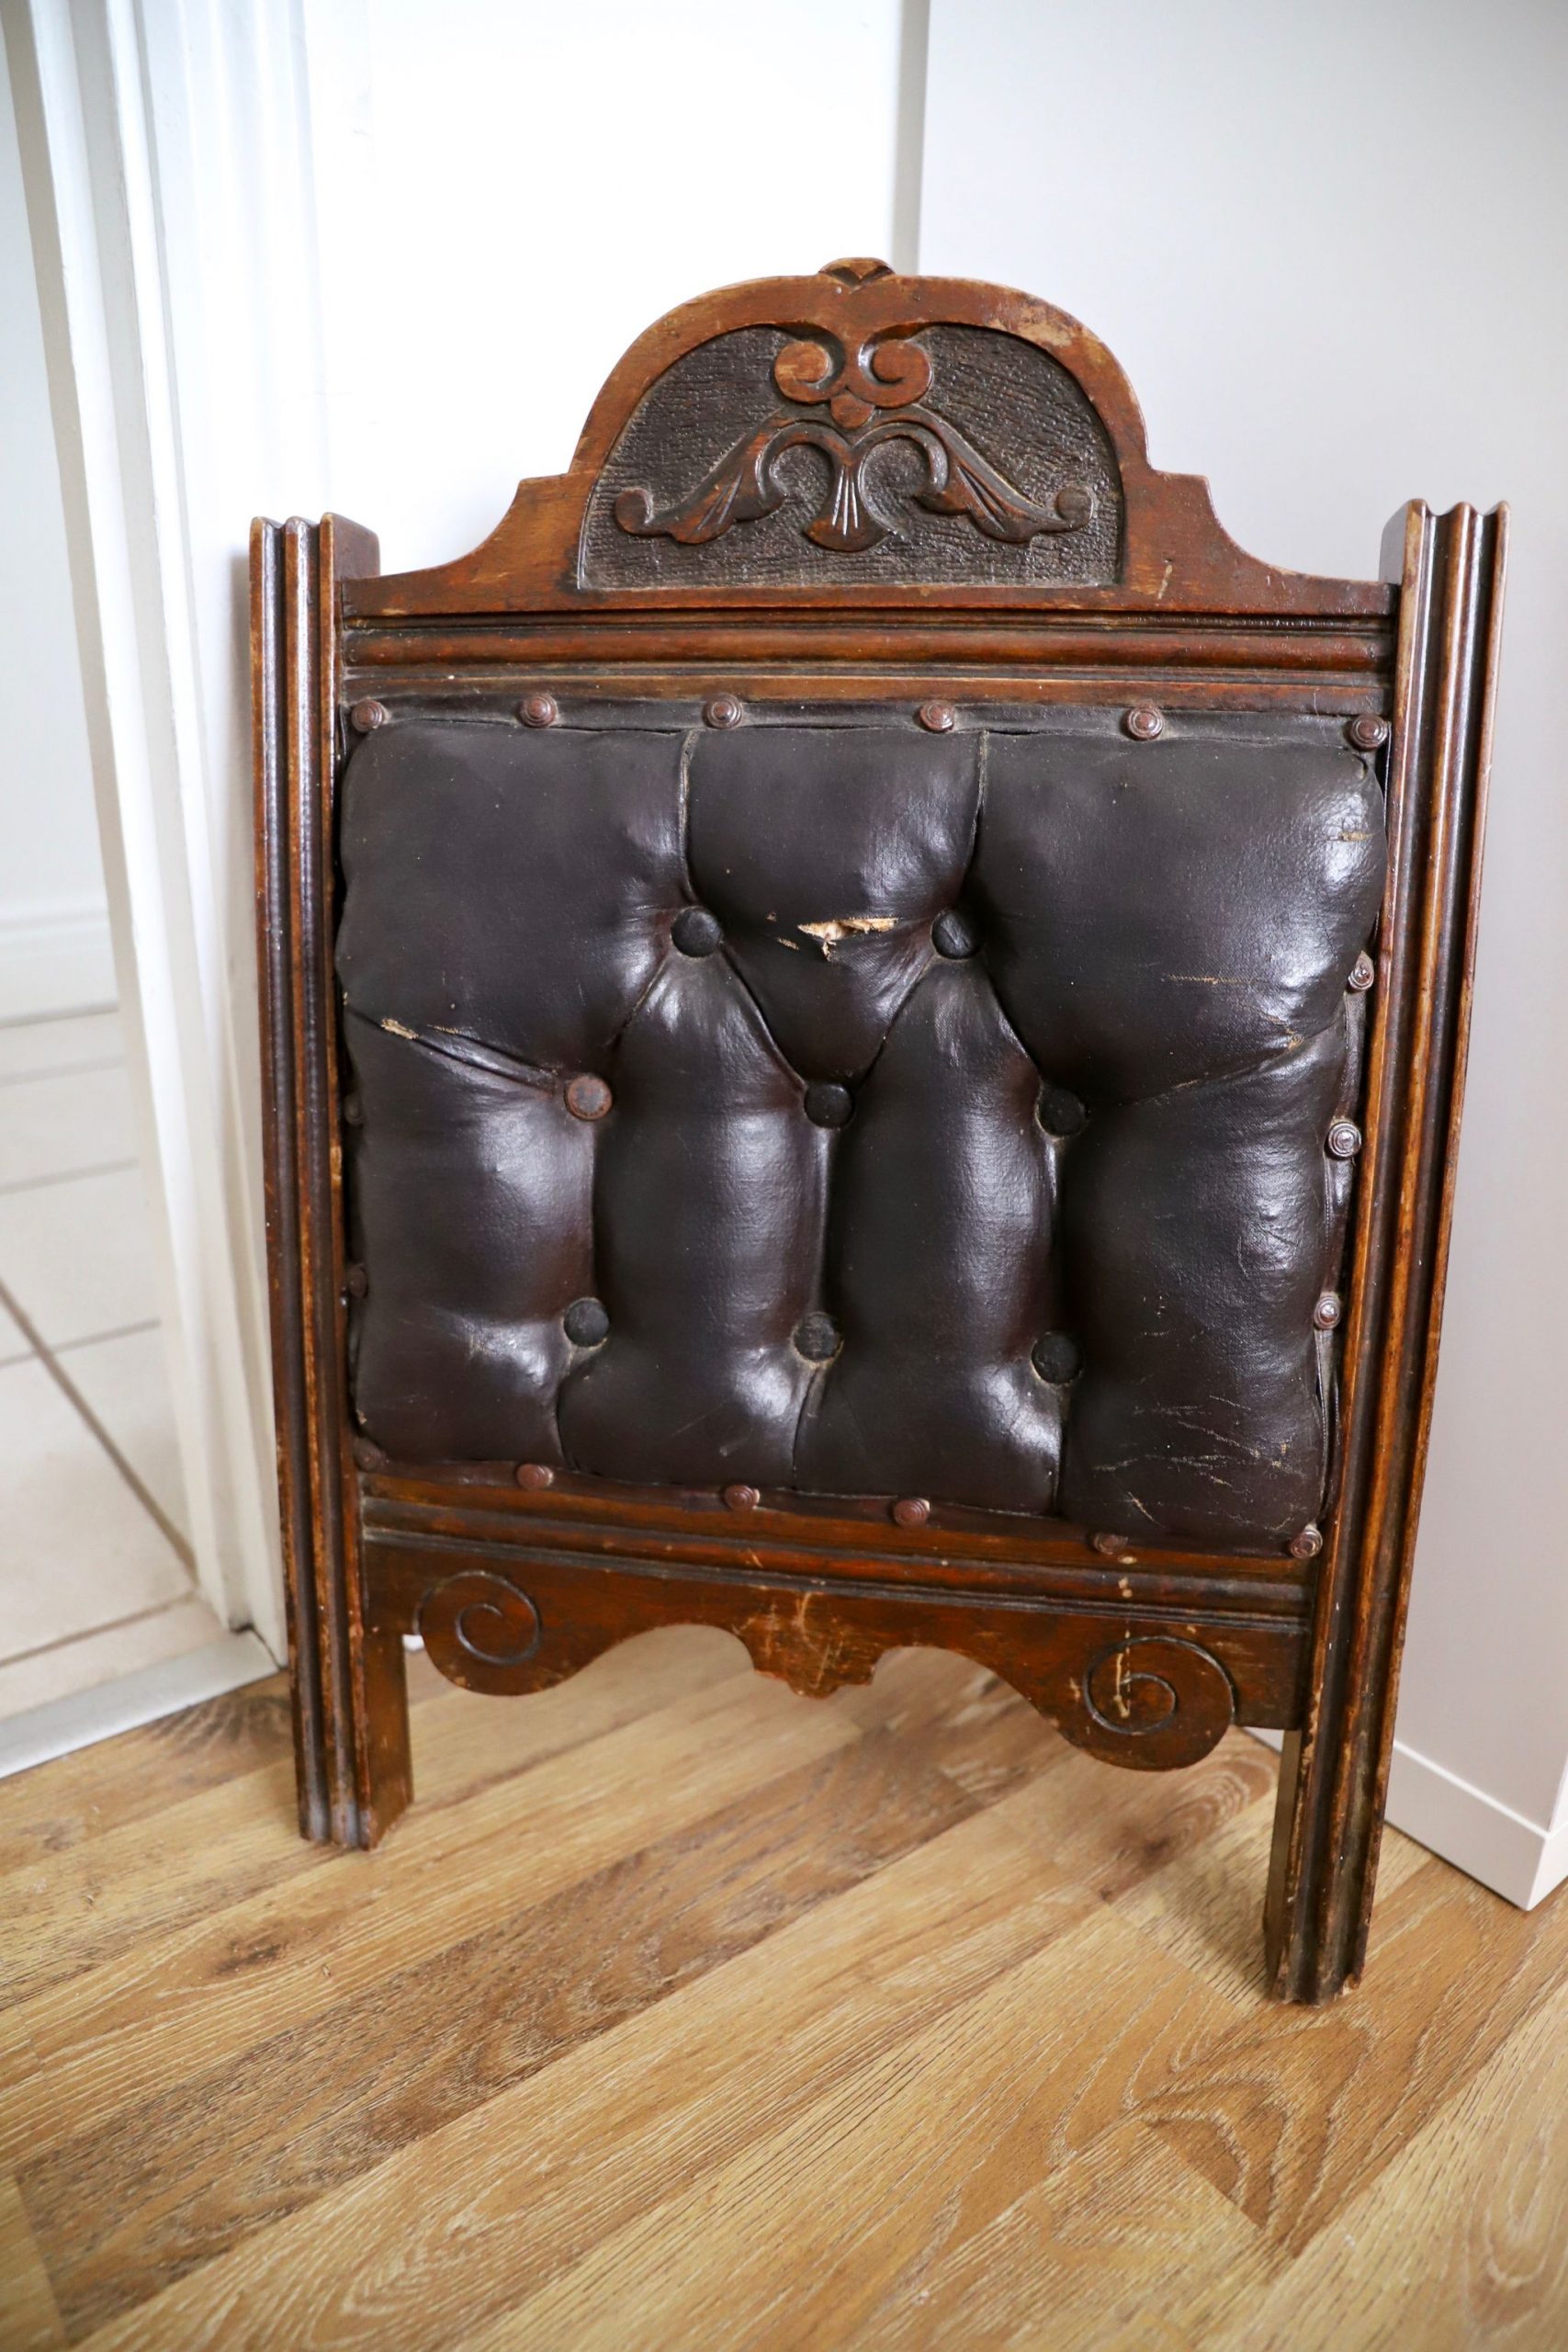
The Before
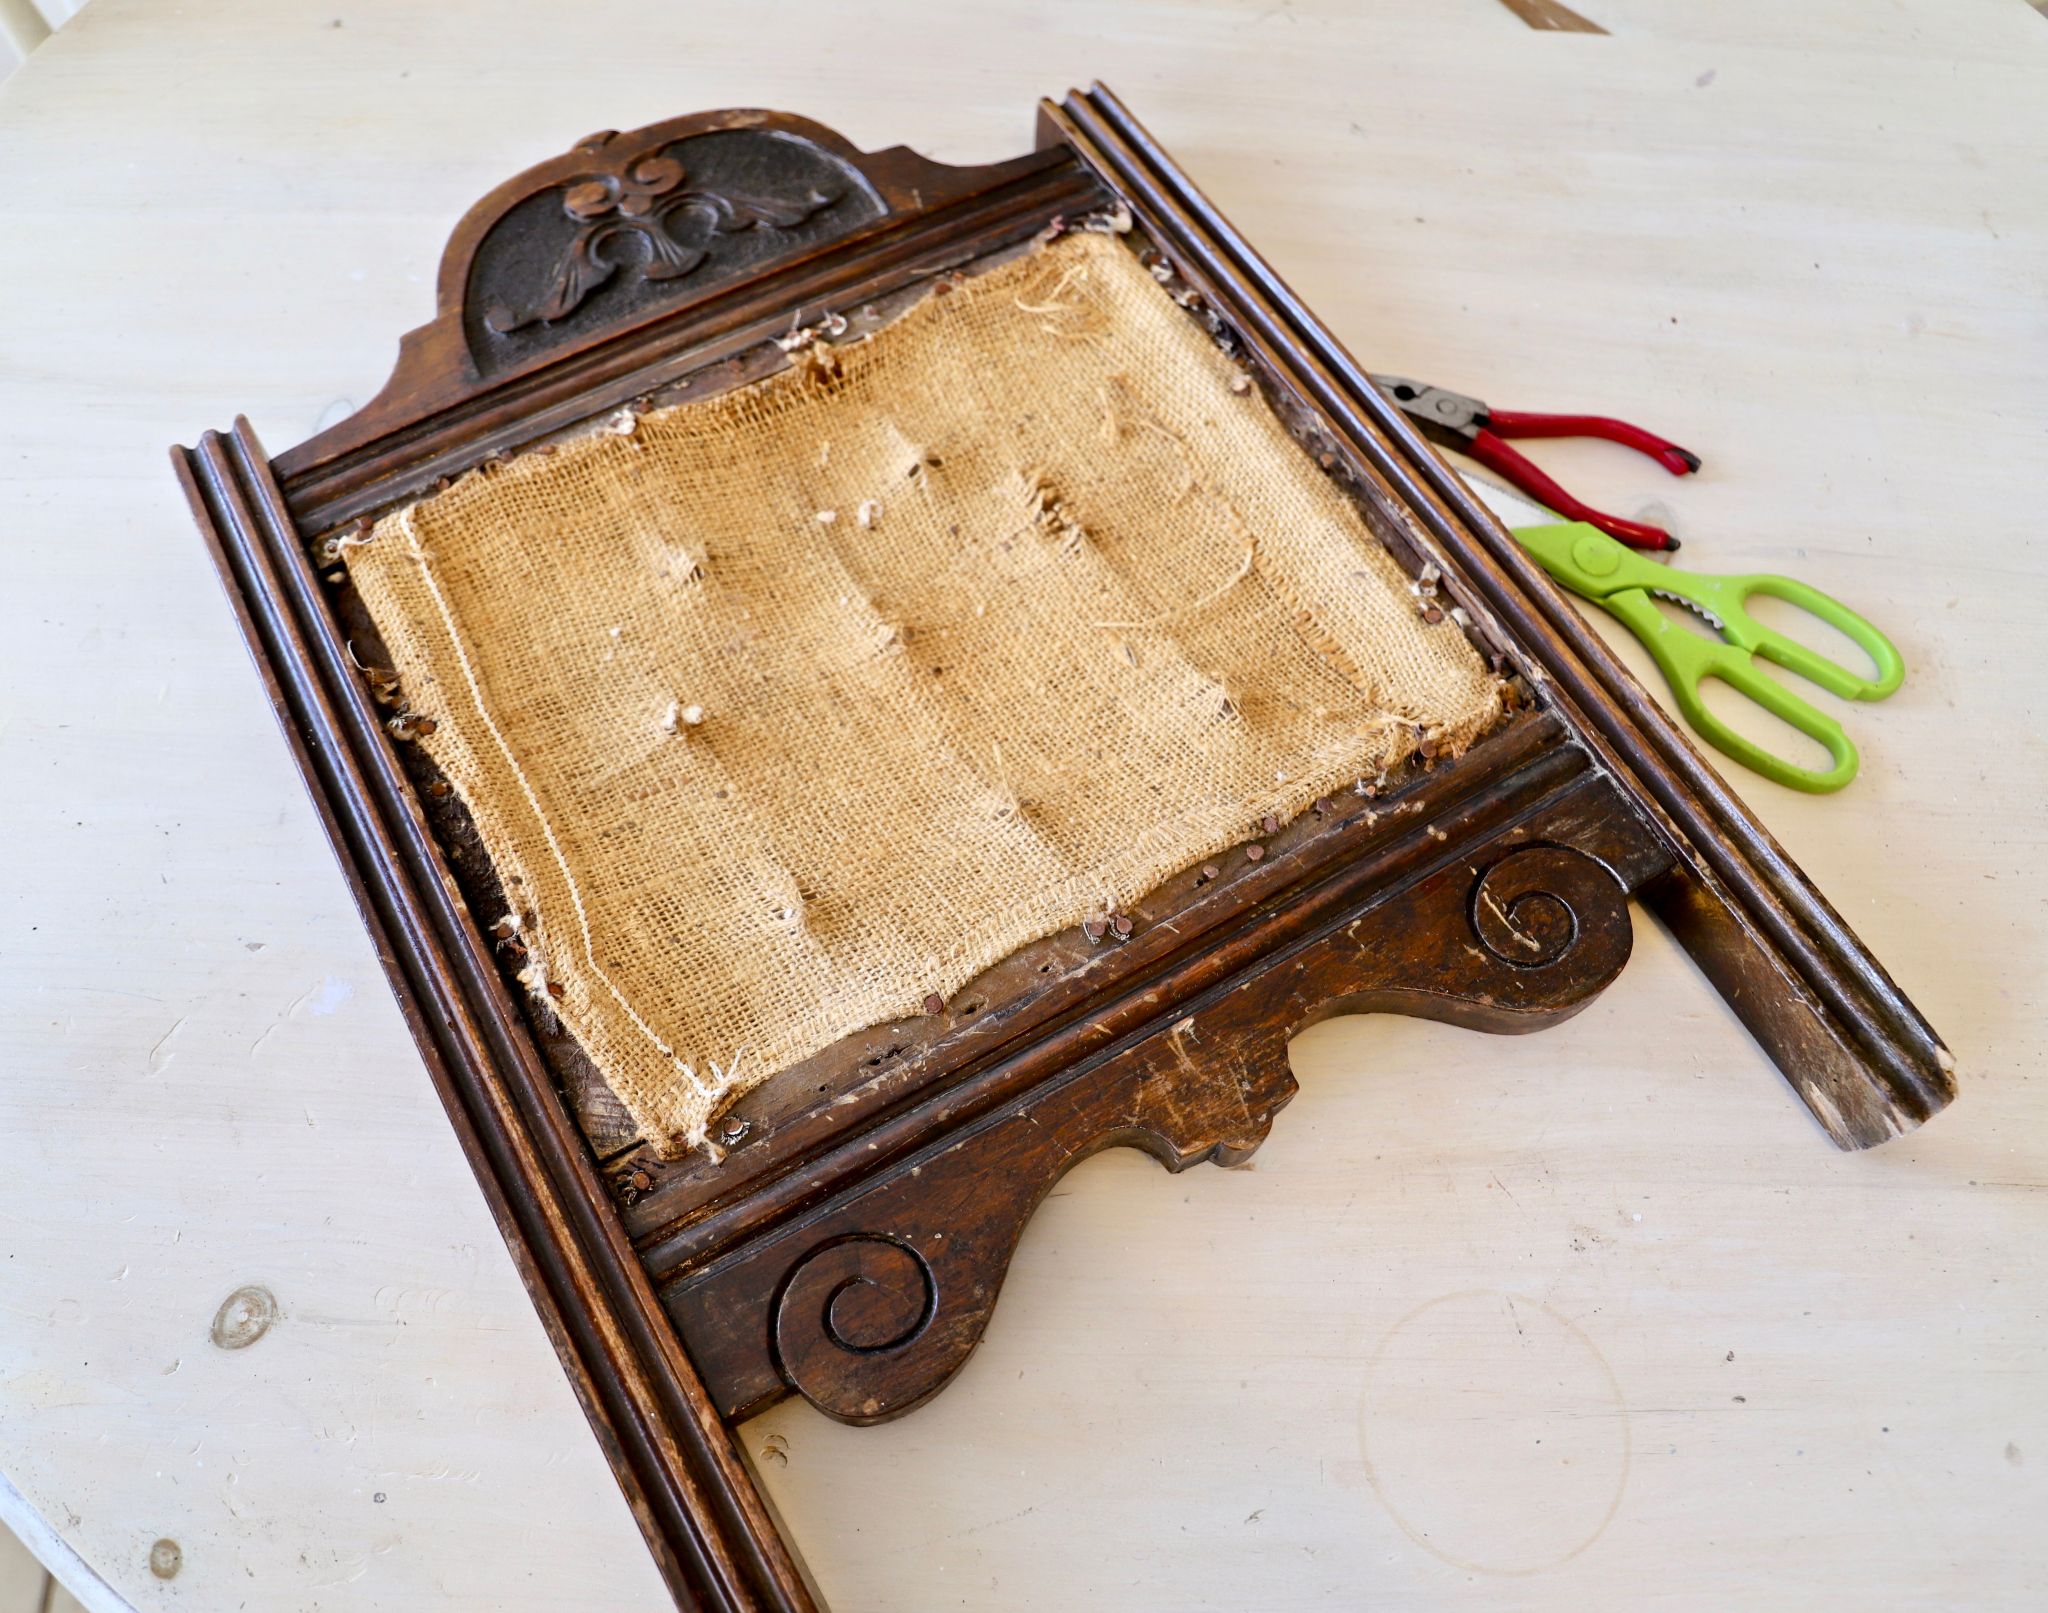
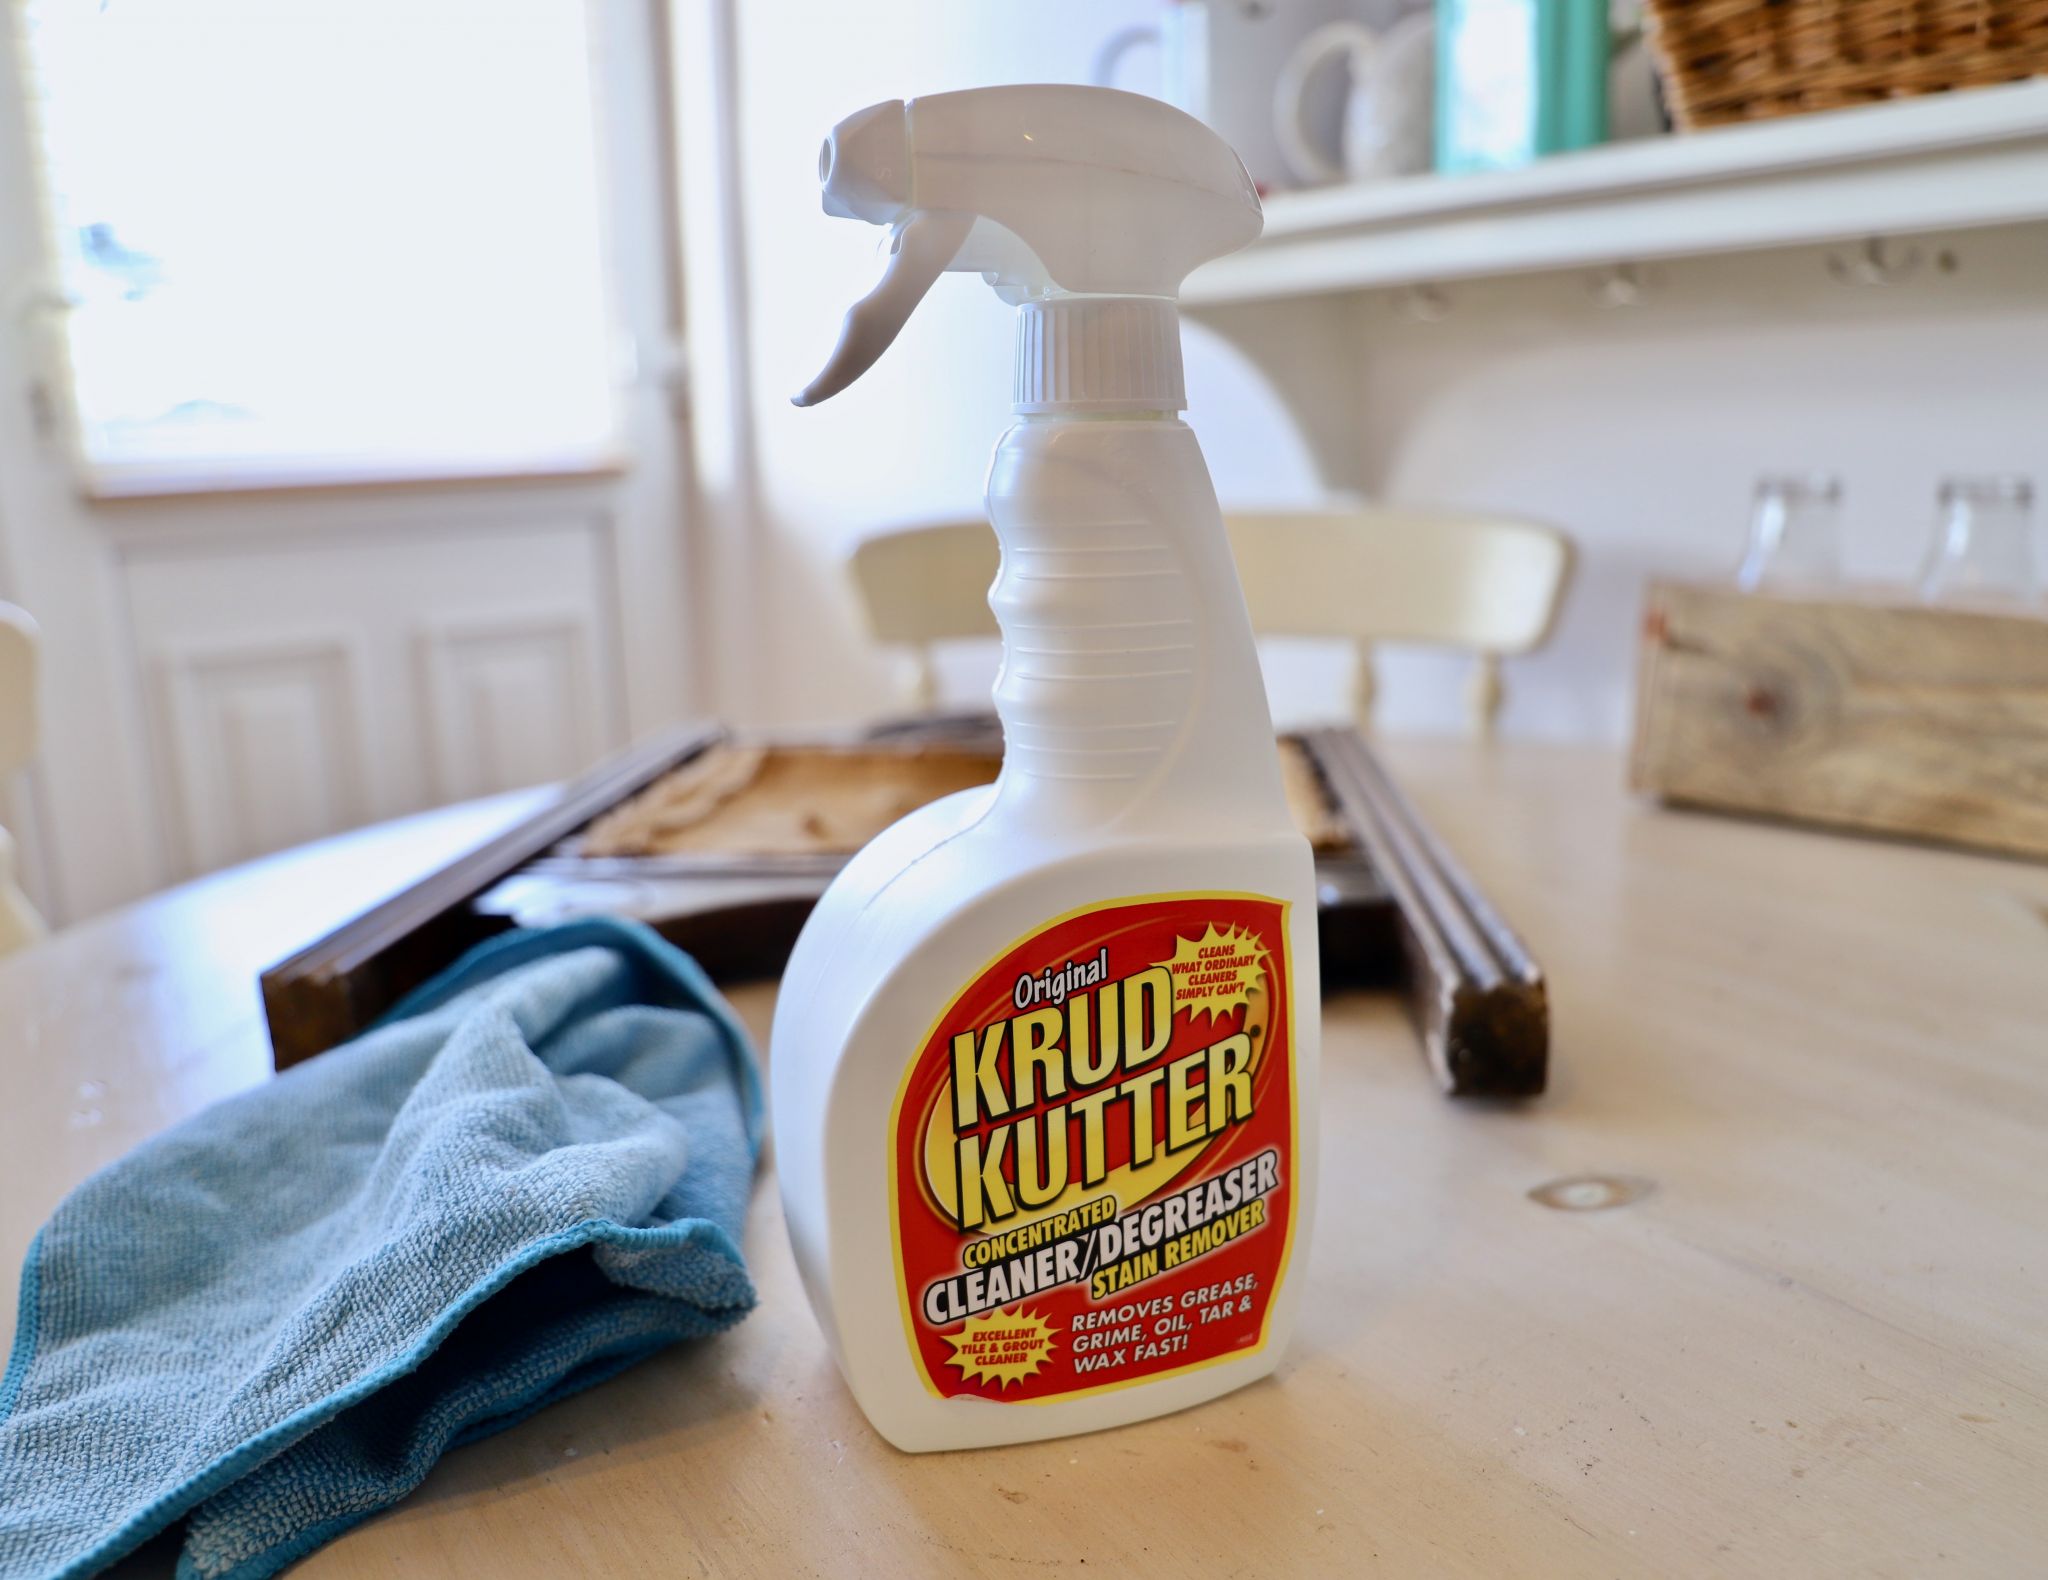
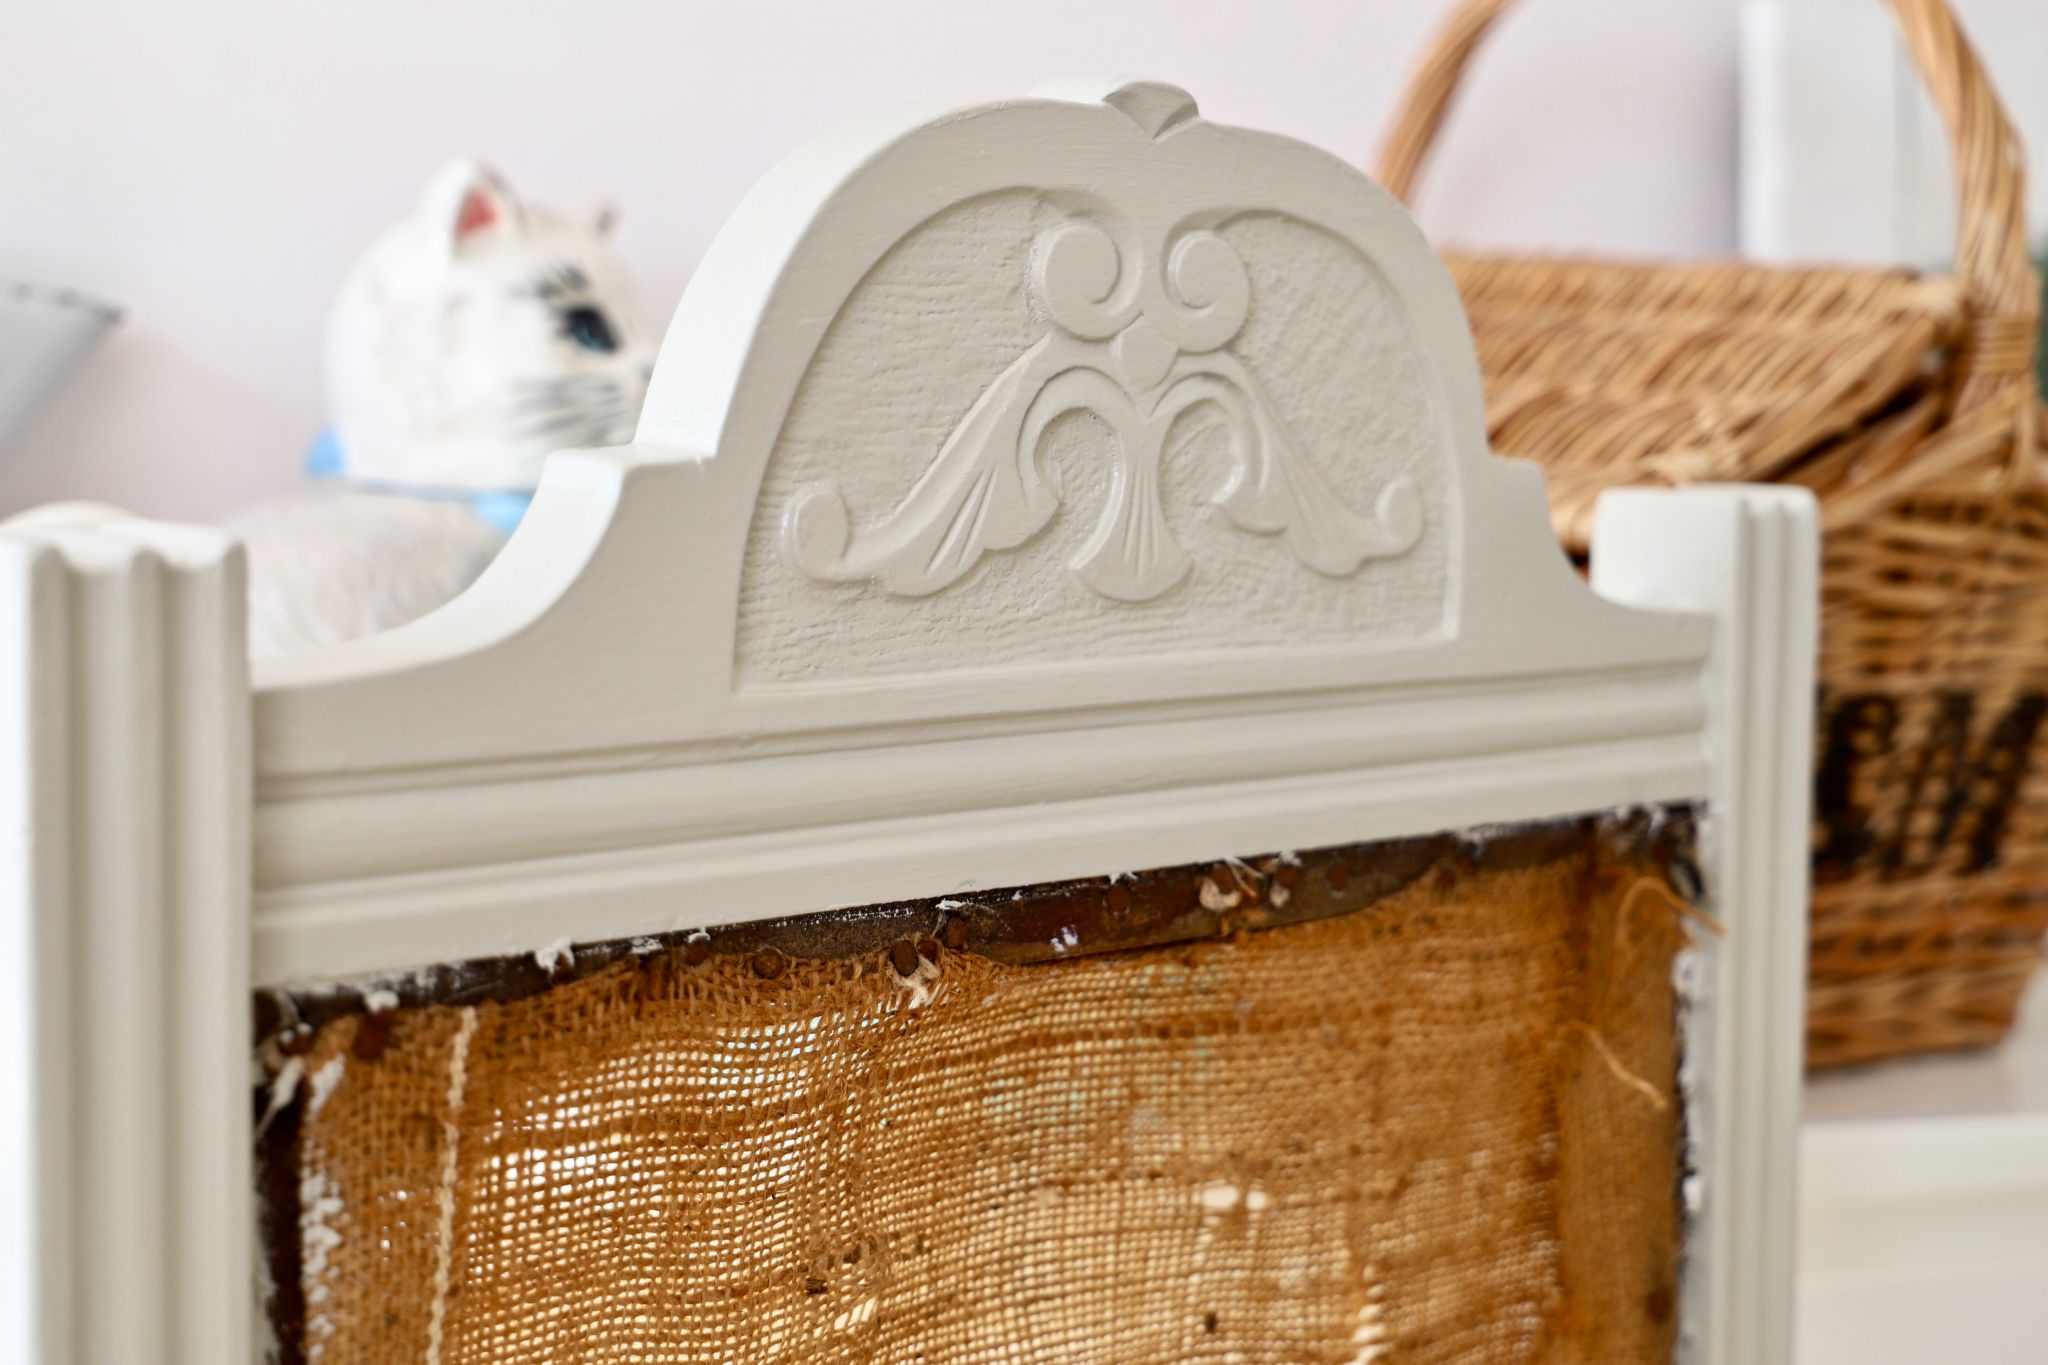
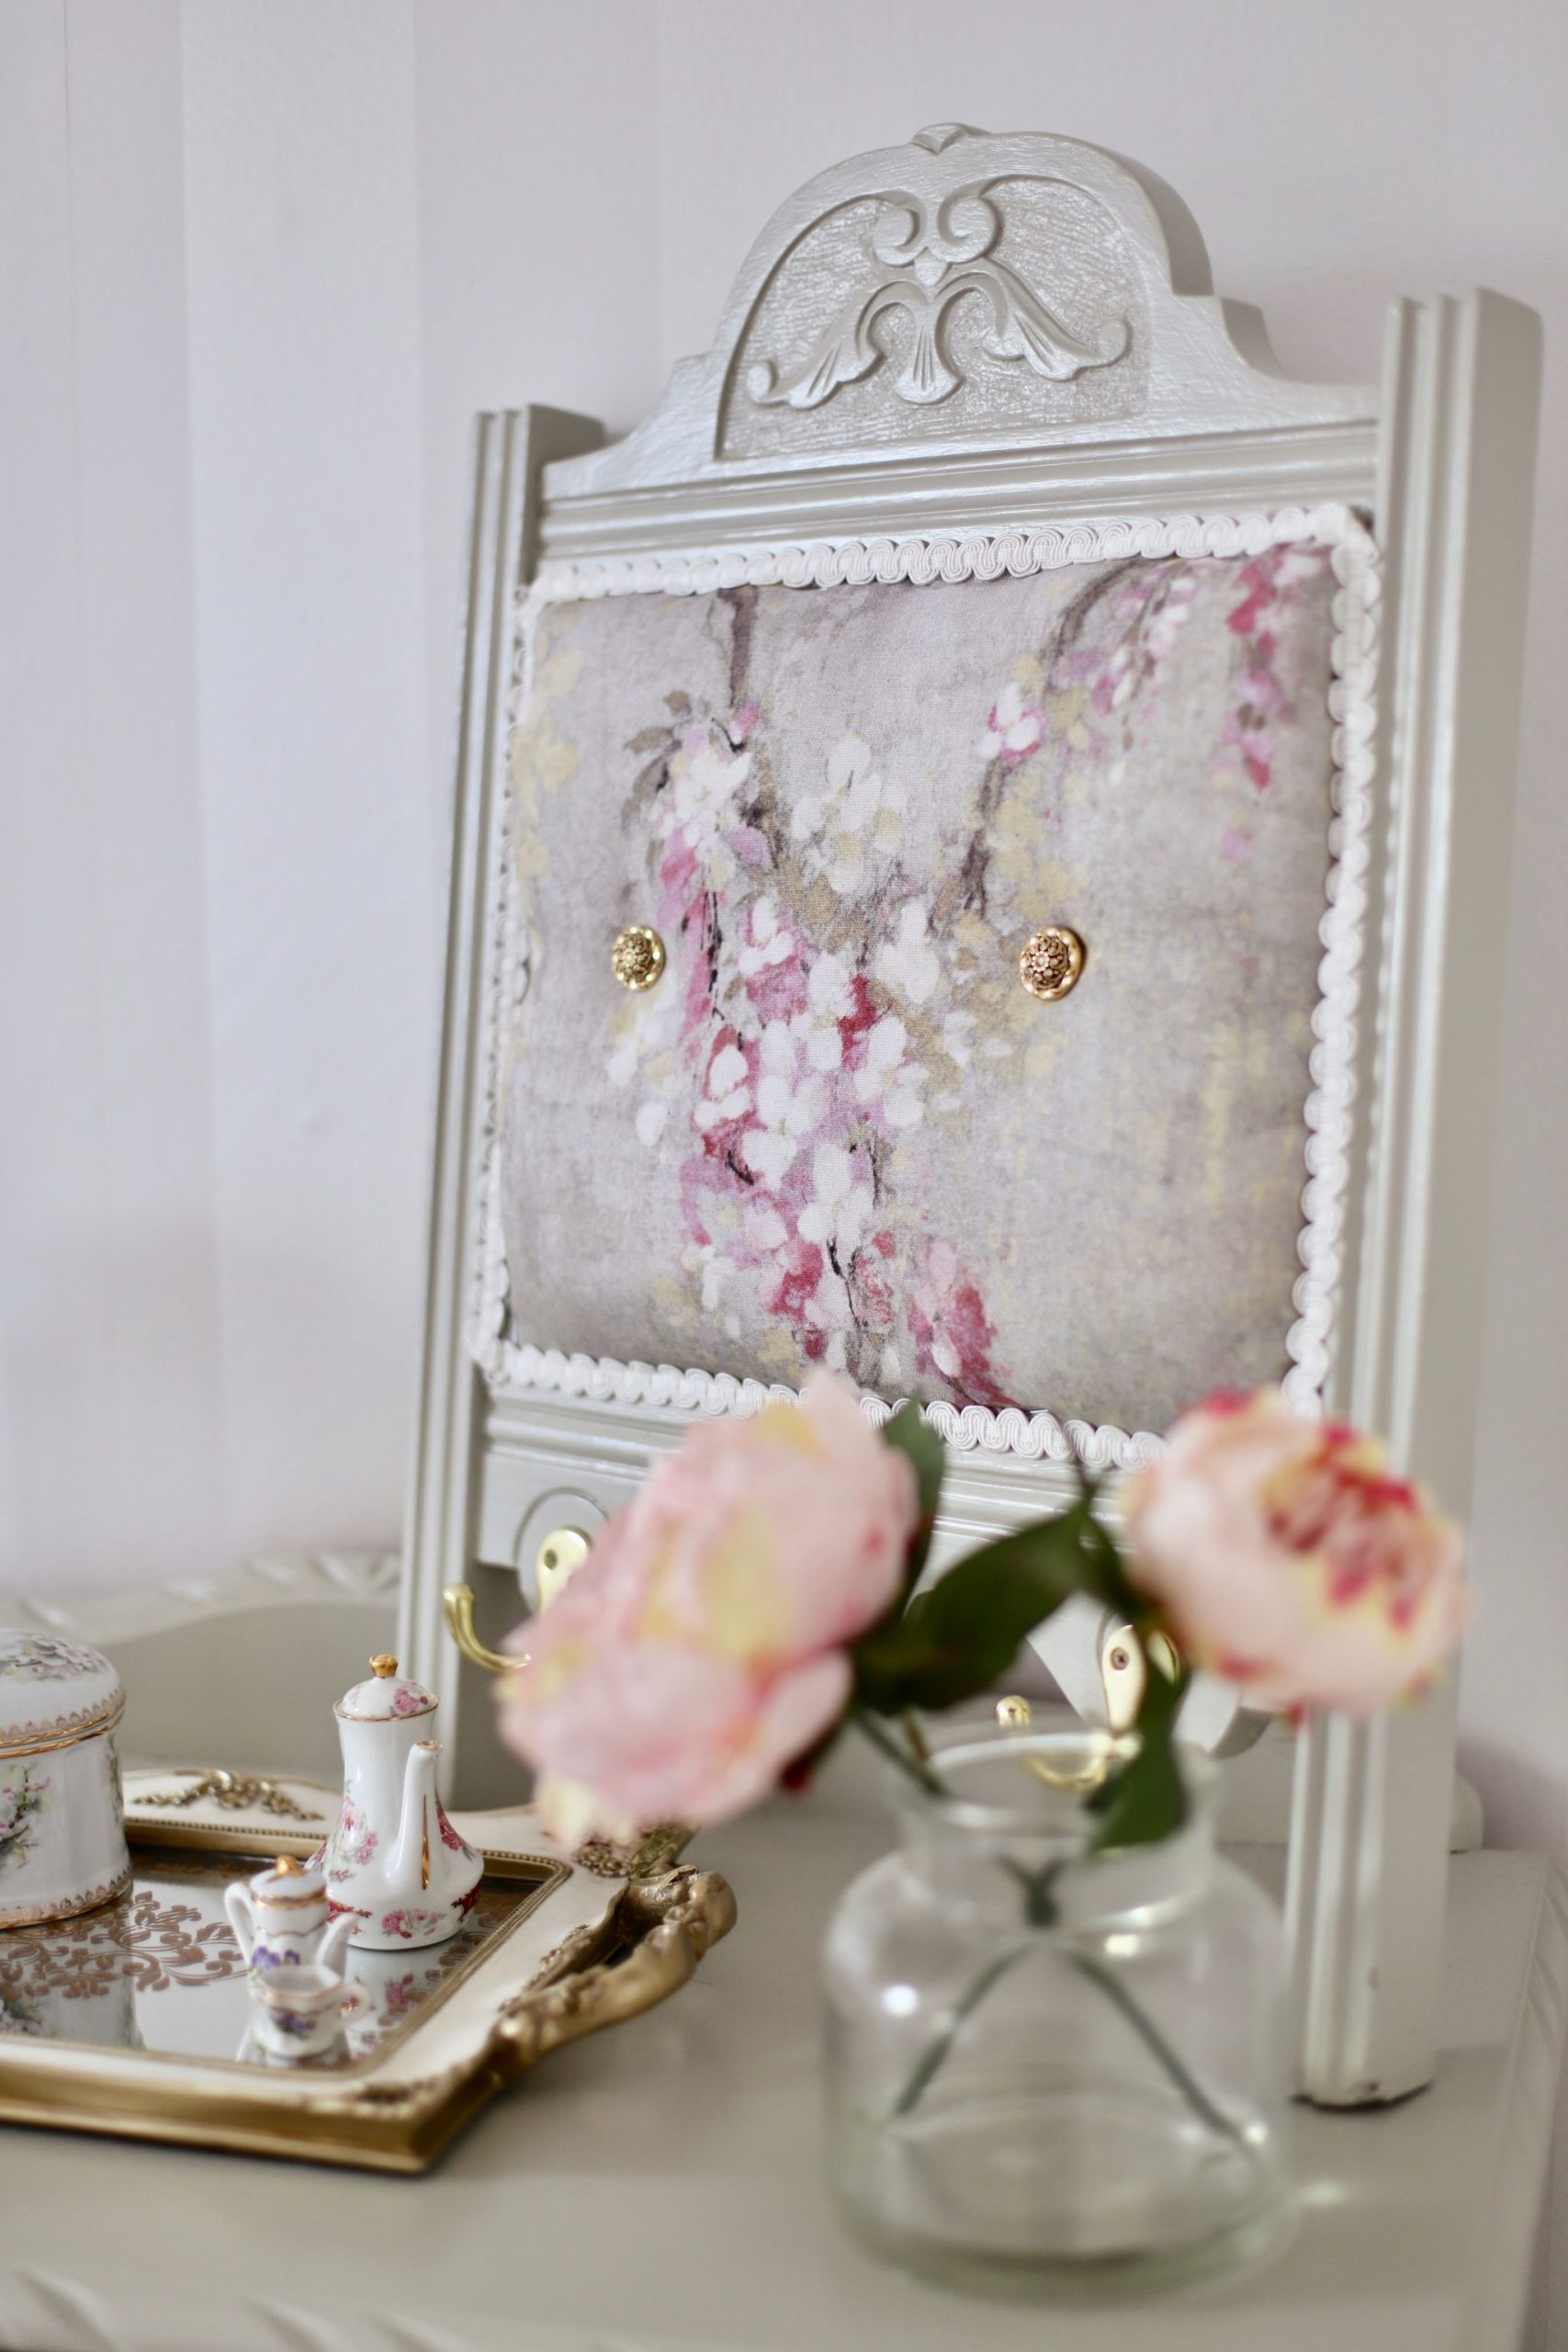
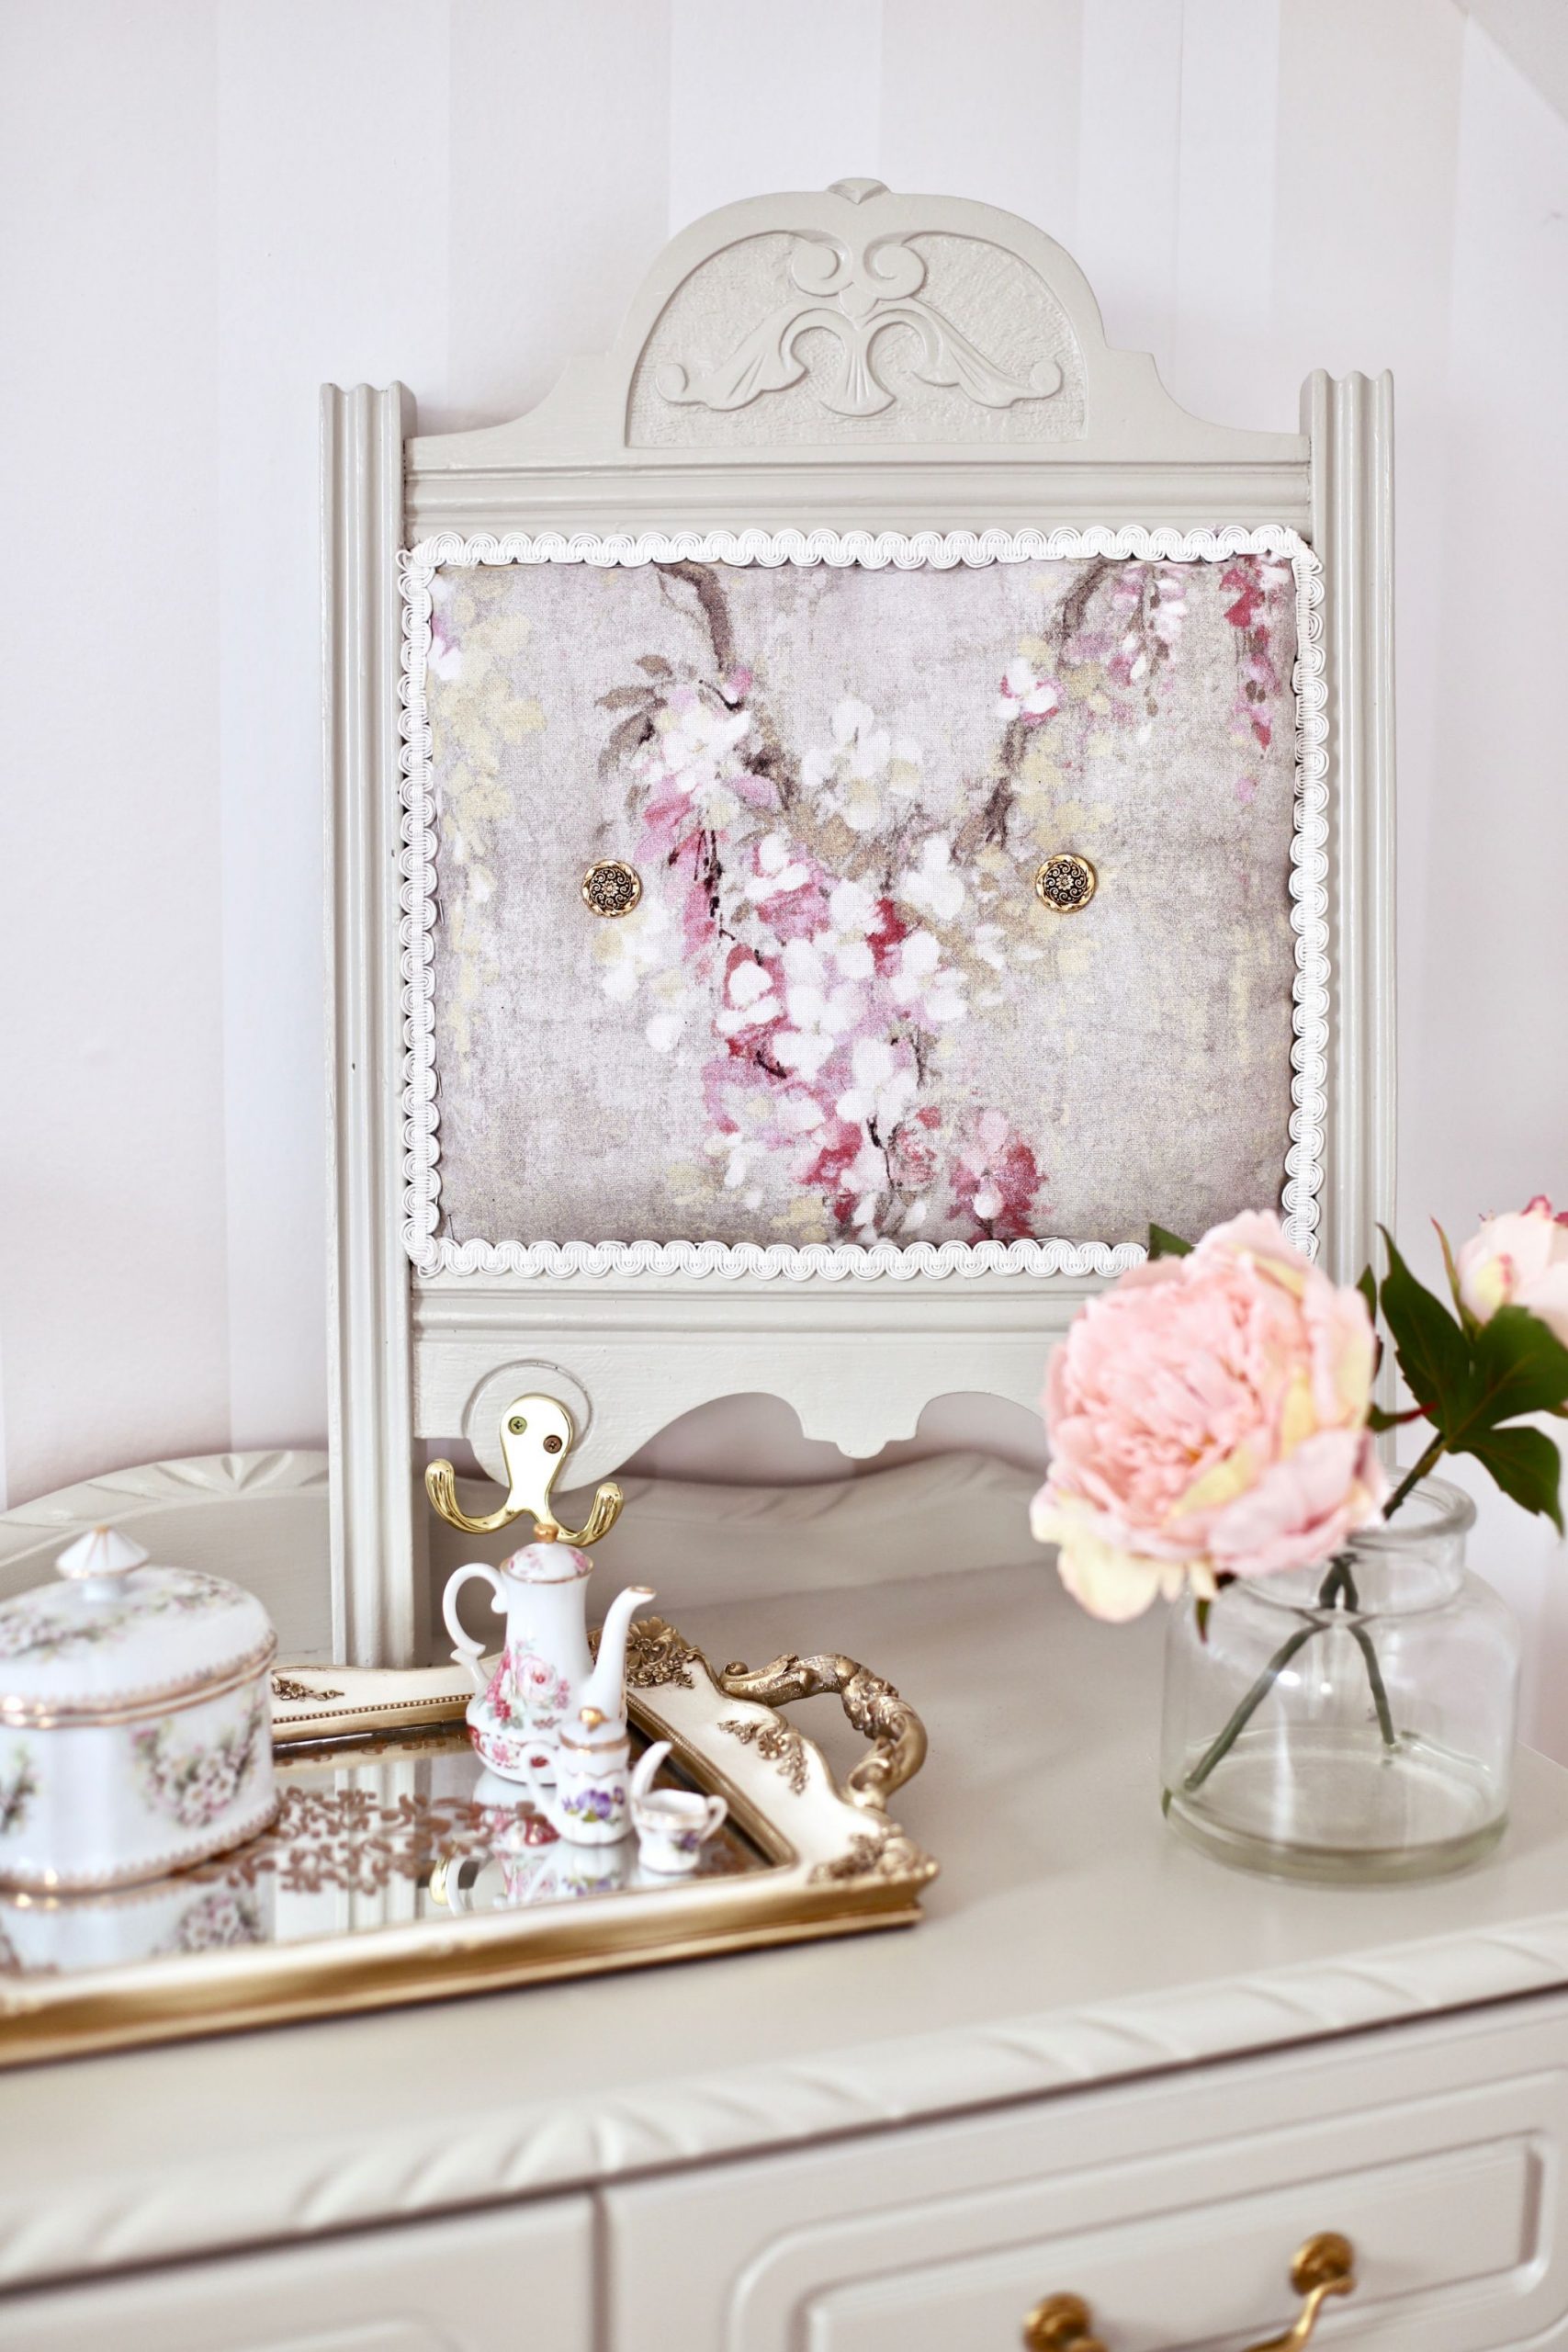
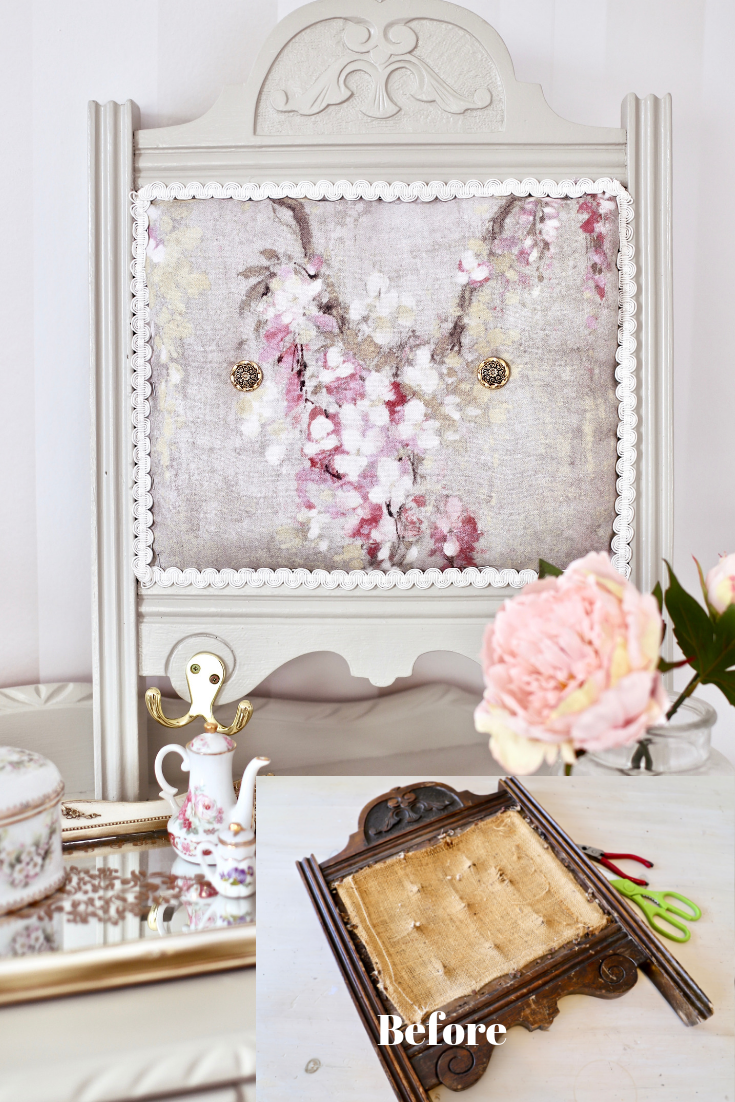
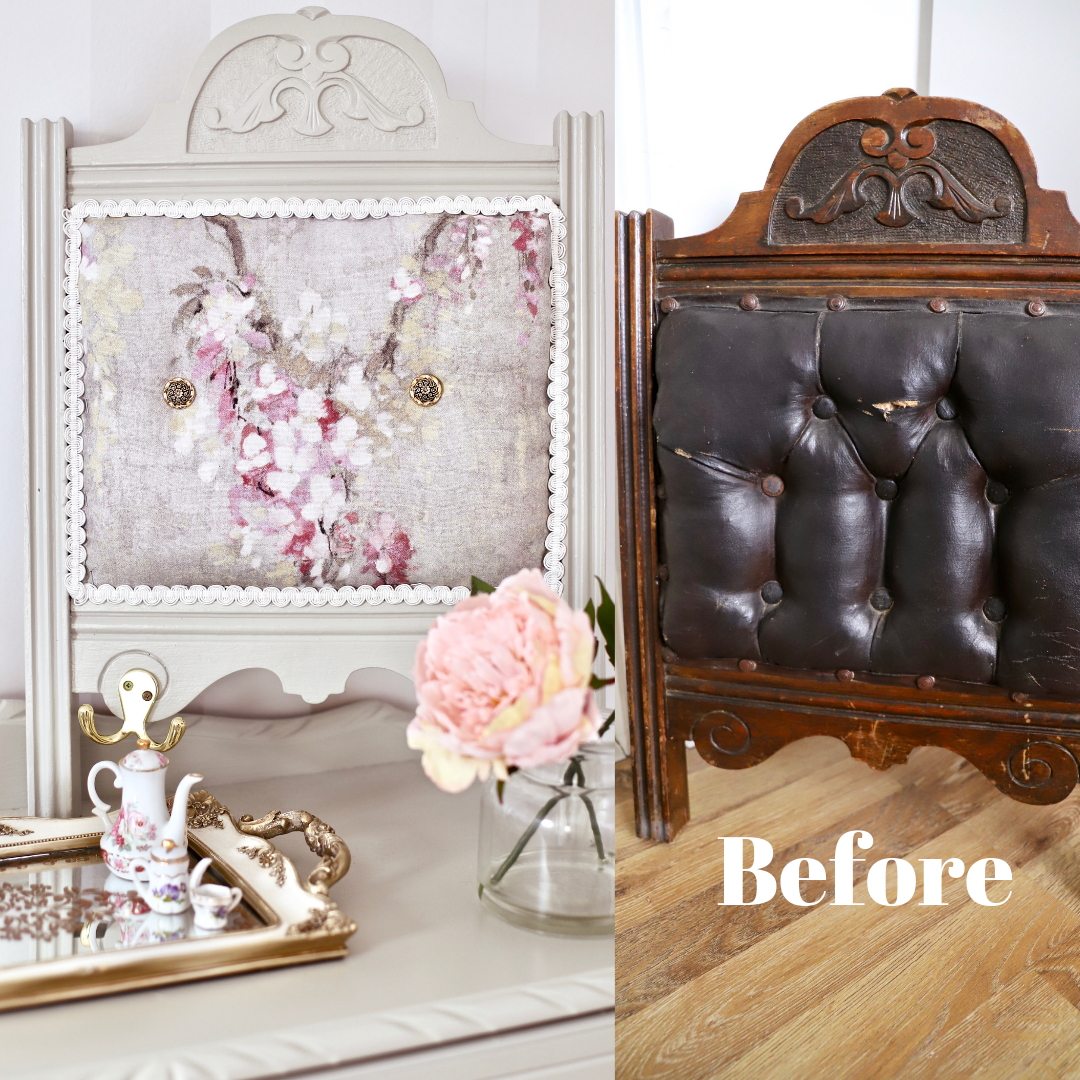
The wood was really good quality on this chair, however, the fabric had seen better days and was starting to lift and tear from old age. I decided that I wanted to recover the fabric so I stripped back the chair and removed all the old fabric and stuffing. I used a pliers and some fabric scissors to remove all of the old material. I then gave it a good prep by lightly sanding the wood and giving it a deep clean with some Krud Kutter. Old wood can be so dirty, you will be so surprised by the amount of grime that comes off your piece.

Prime and Paint
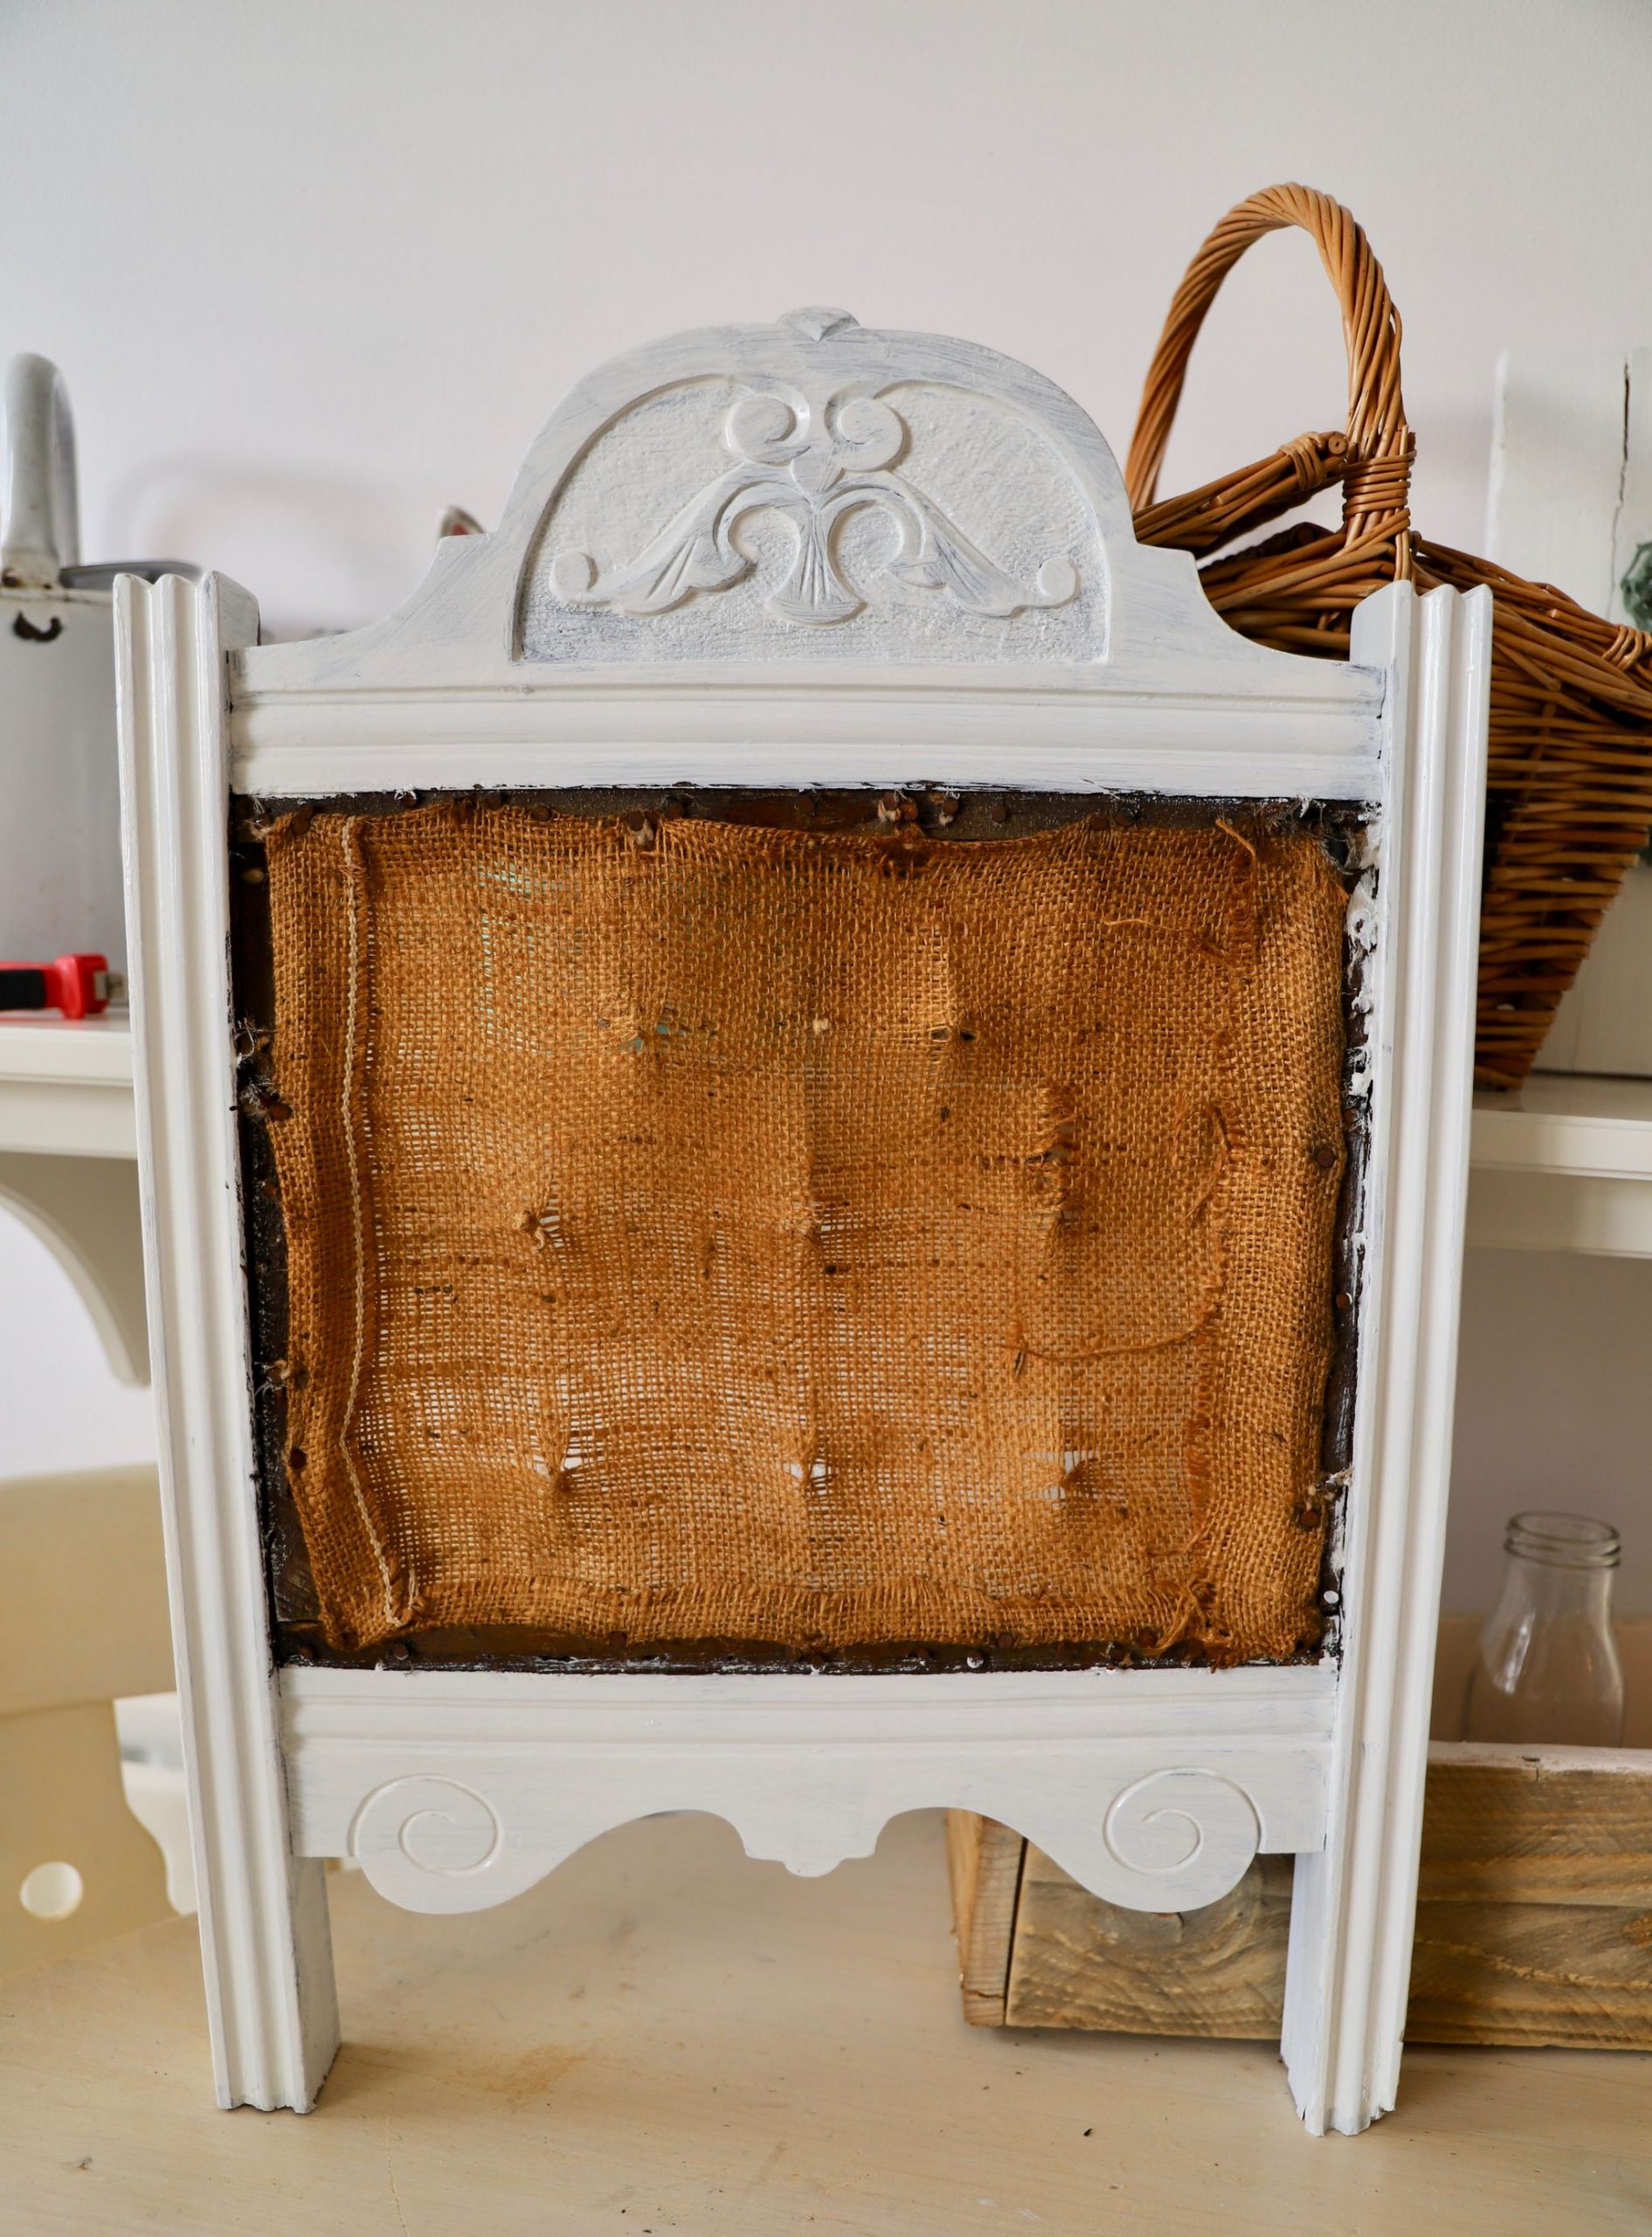
After I cleaned my piece I applied one coat of Zinsser BIN shellac based primer. I allowed this to fully dry before I applied two coats of “Aged Vellum” satin finish paint by Colourtrend. This is the same paint I used on my Blanket box and my recent cabinet makeover. I got loads out of one 750ml pot of paint. You don’t need a lot of paint for a small project like this. I probably would have gotten away with a tester pot of paint for this project.
Recovering the fabric
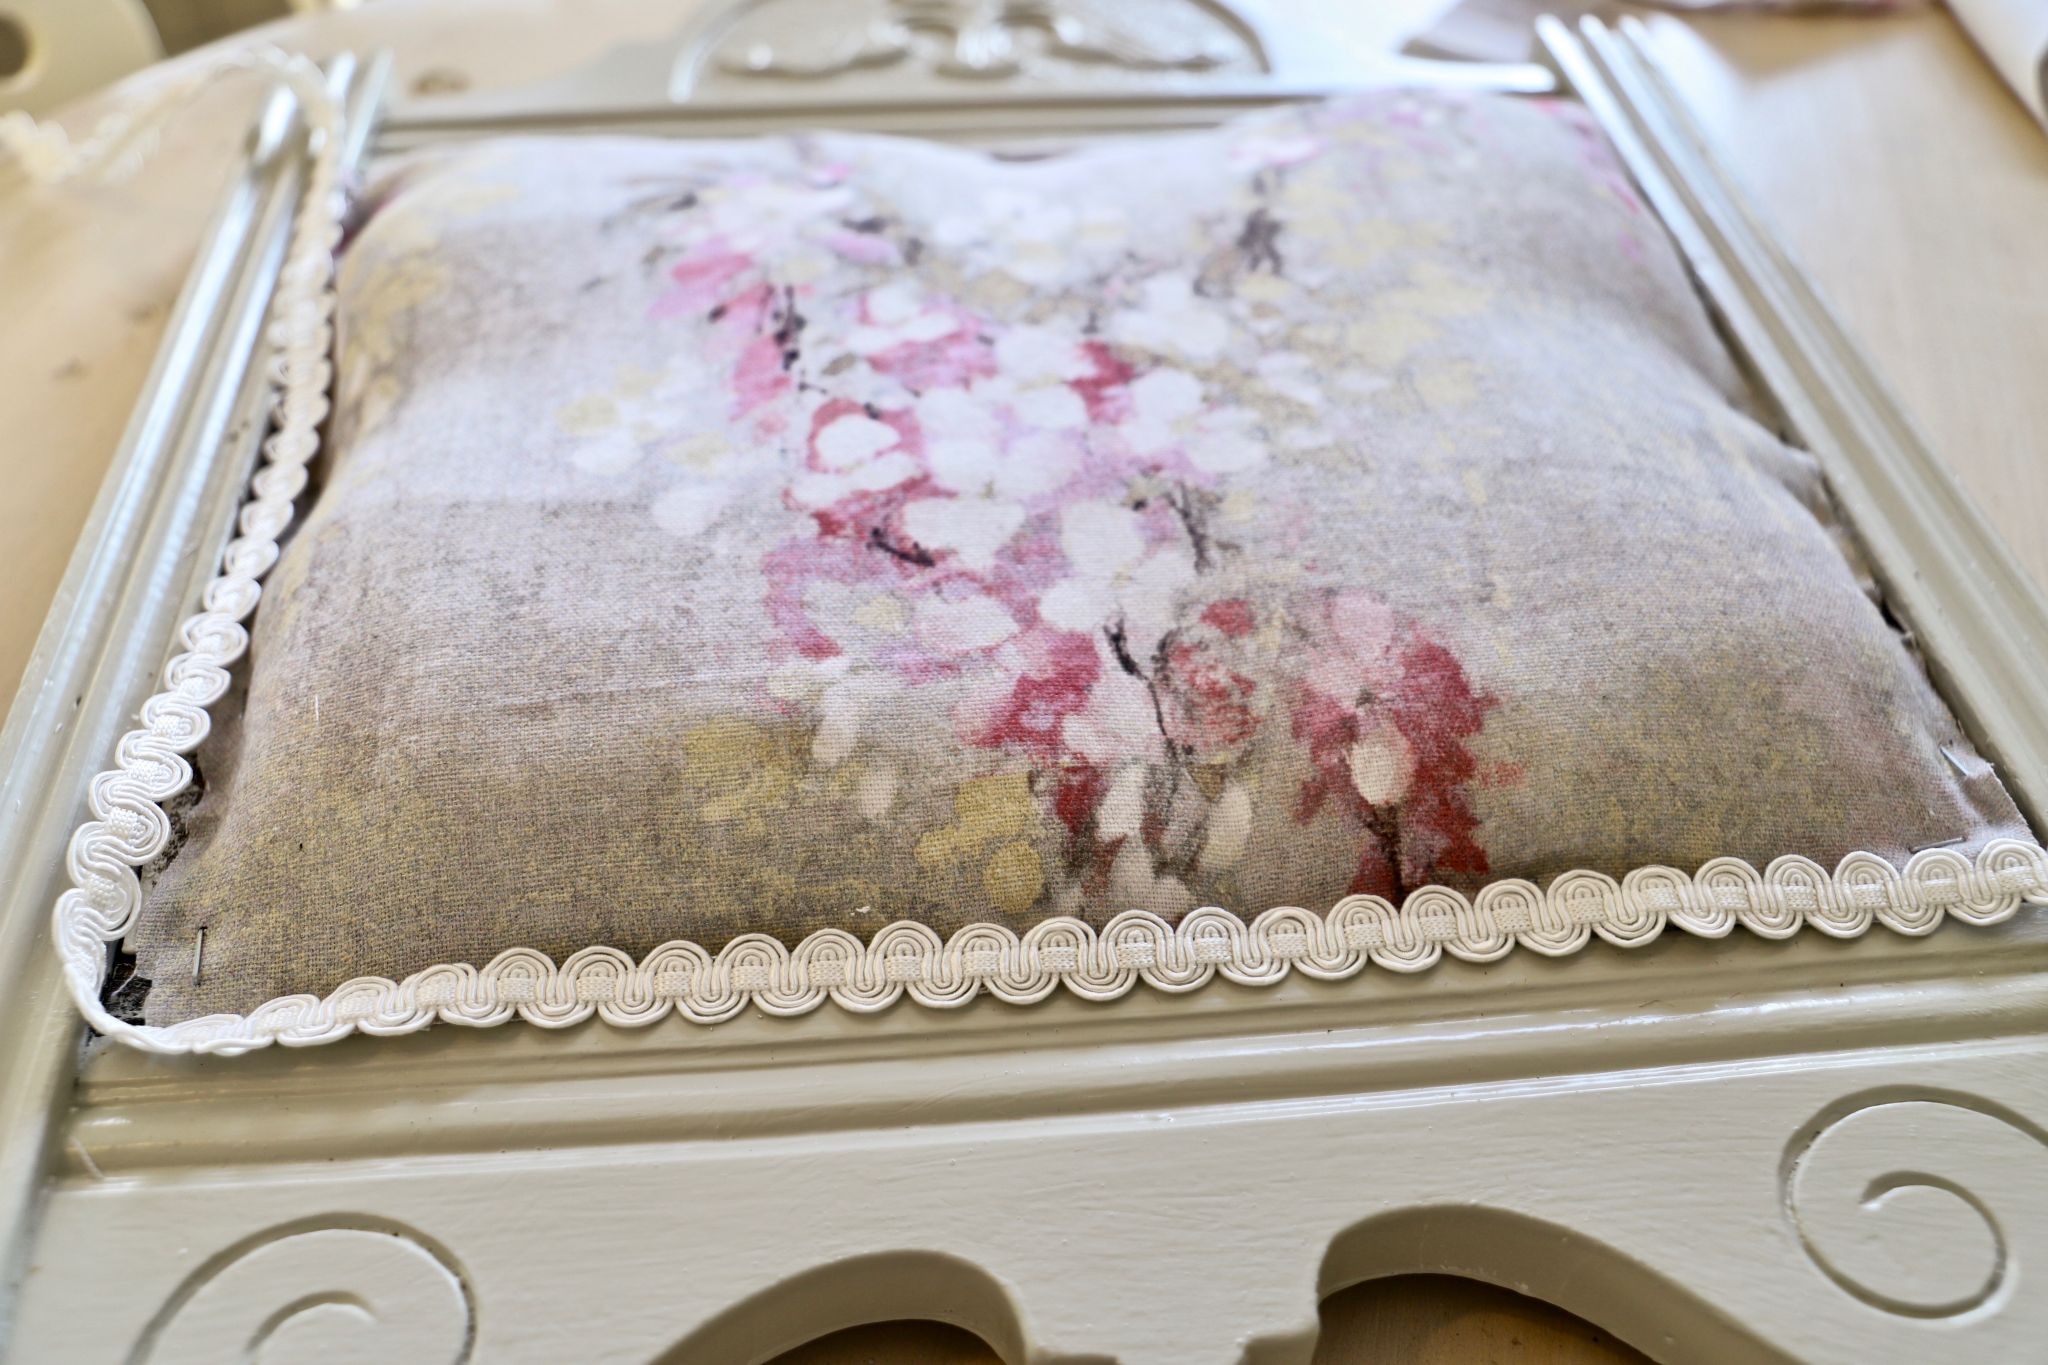
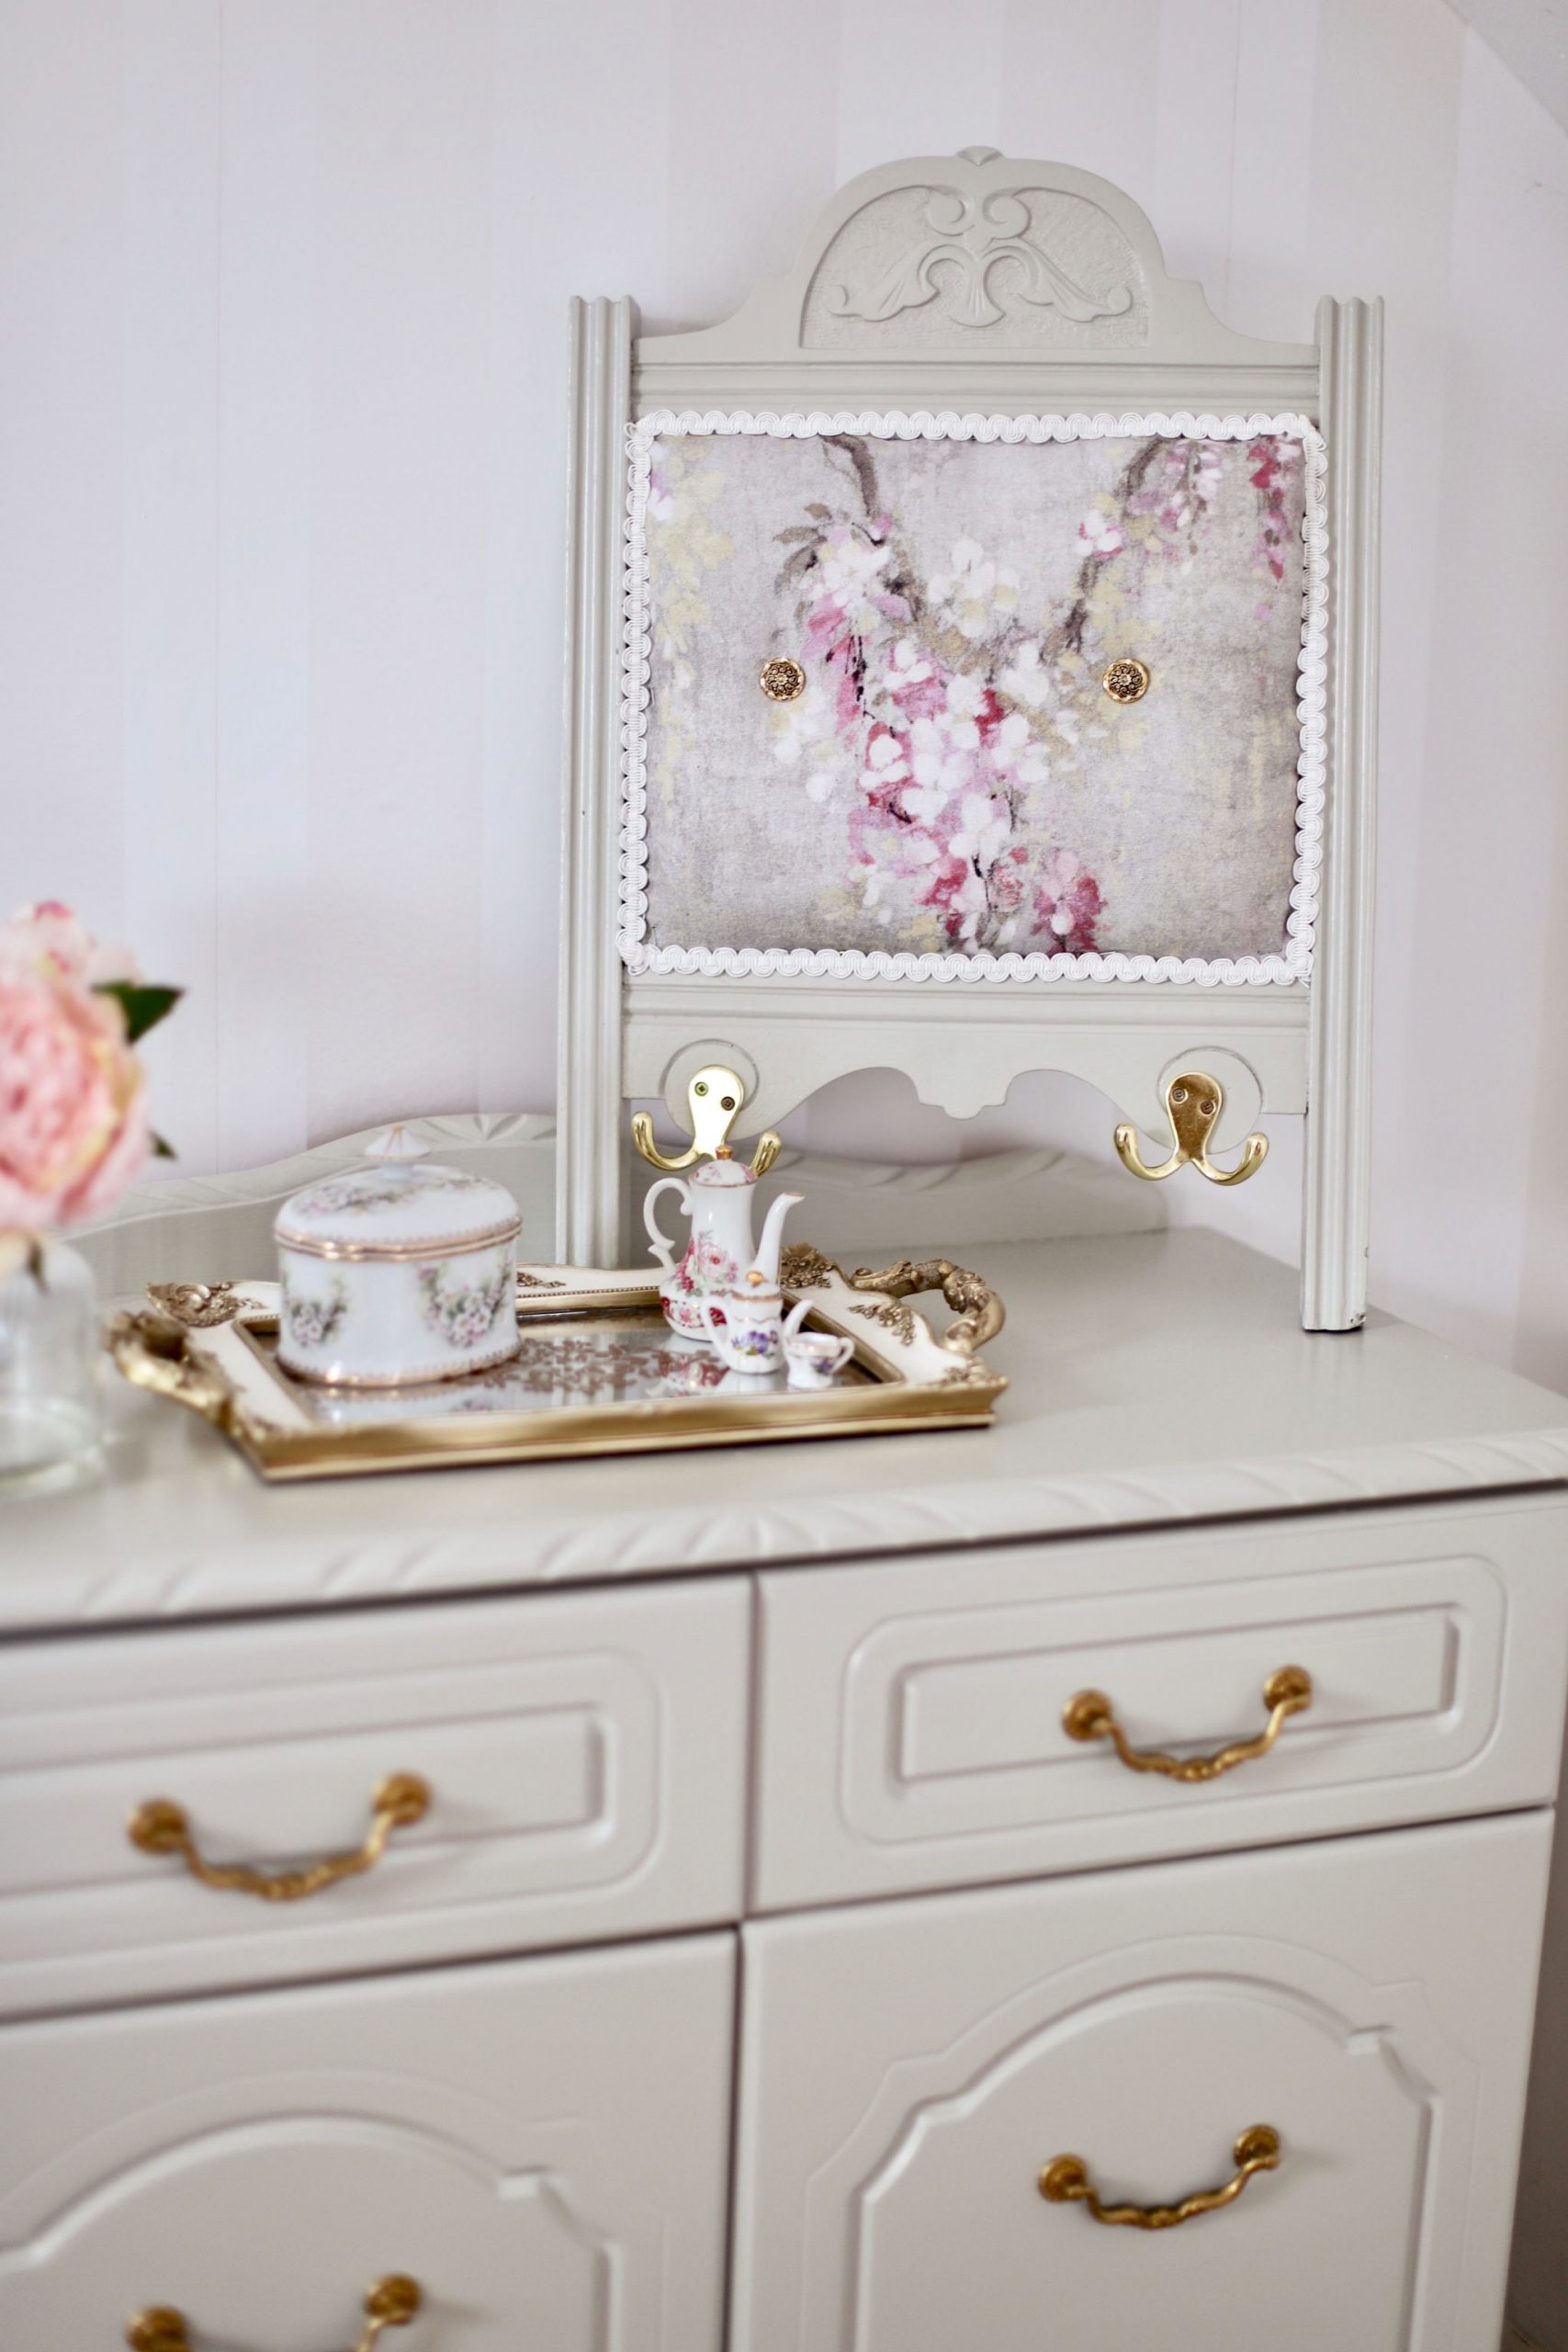
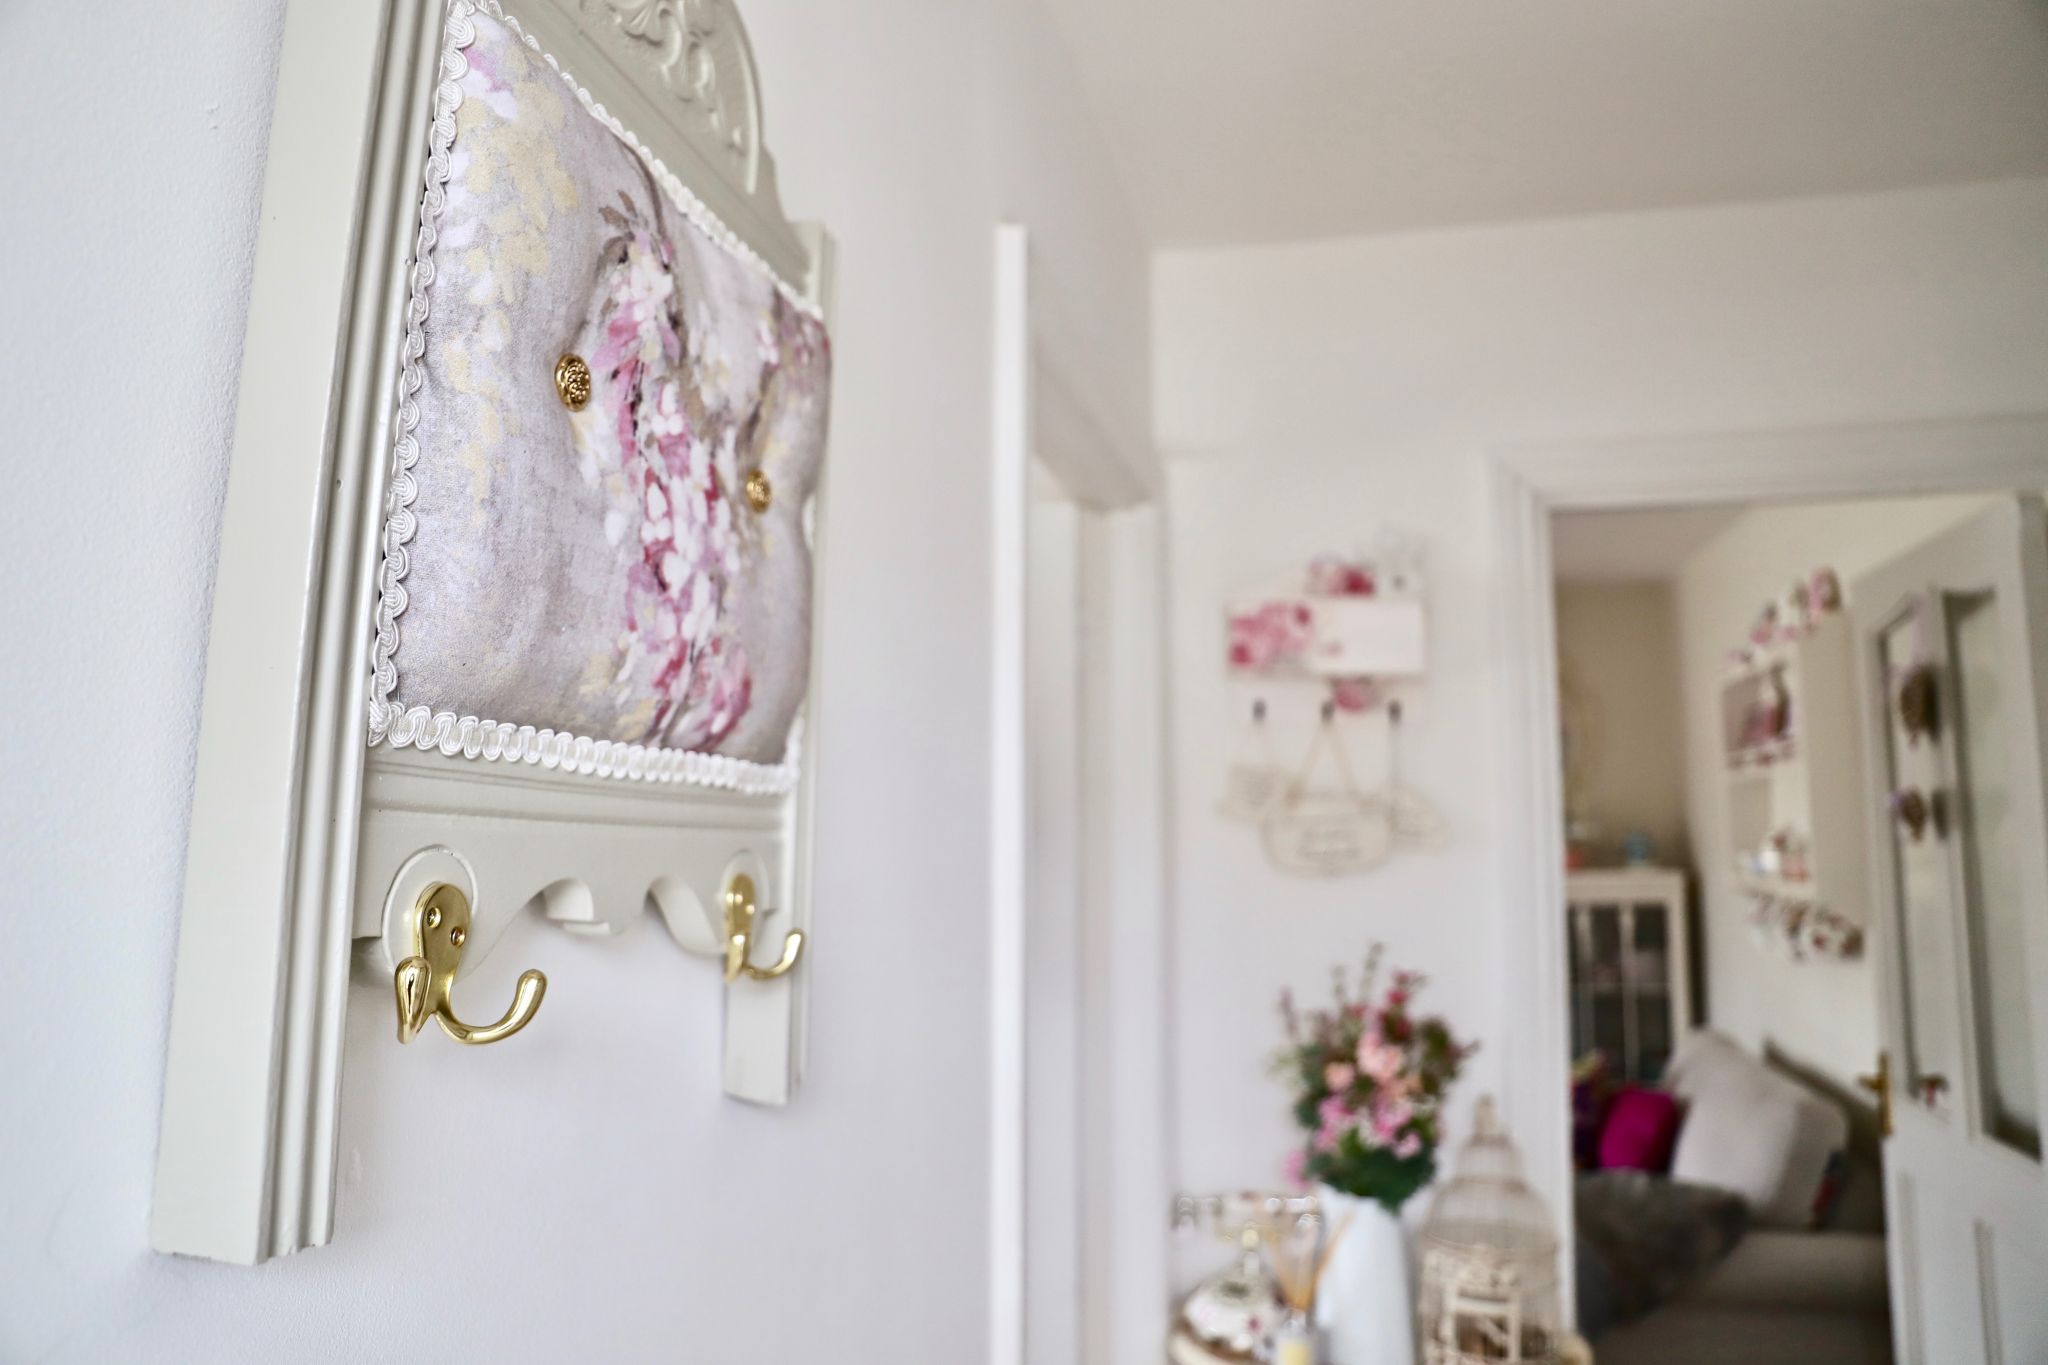
I am no pro when it comes to upholstery but I really wanted to add some pretty fabric to this piece that would compliment the paint. I got this fabric from Hickeys on Mary St. I also got the buttons and trimmings from Hickeys too. I used my staple gun to stick the fabric to the chair. I made sure to pull the fabric nice and tight and started on the top and then the sides to stick the fabric to the chair. I also used some wadding underneath the fabric to give it some thickness. I also hand-stitched some gold buttons into the chair. Check out my video below to see how I did this.
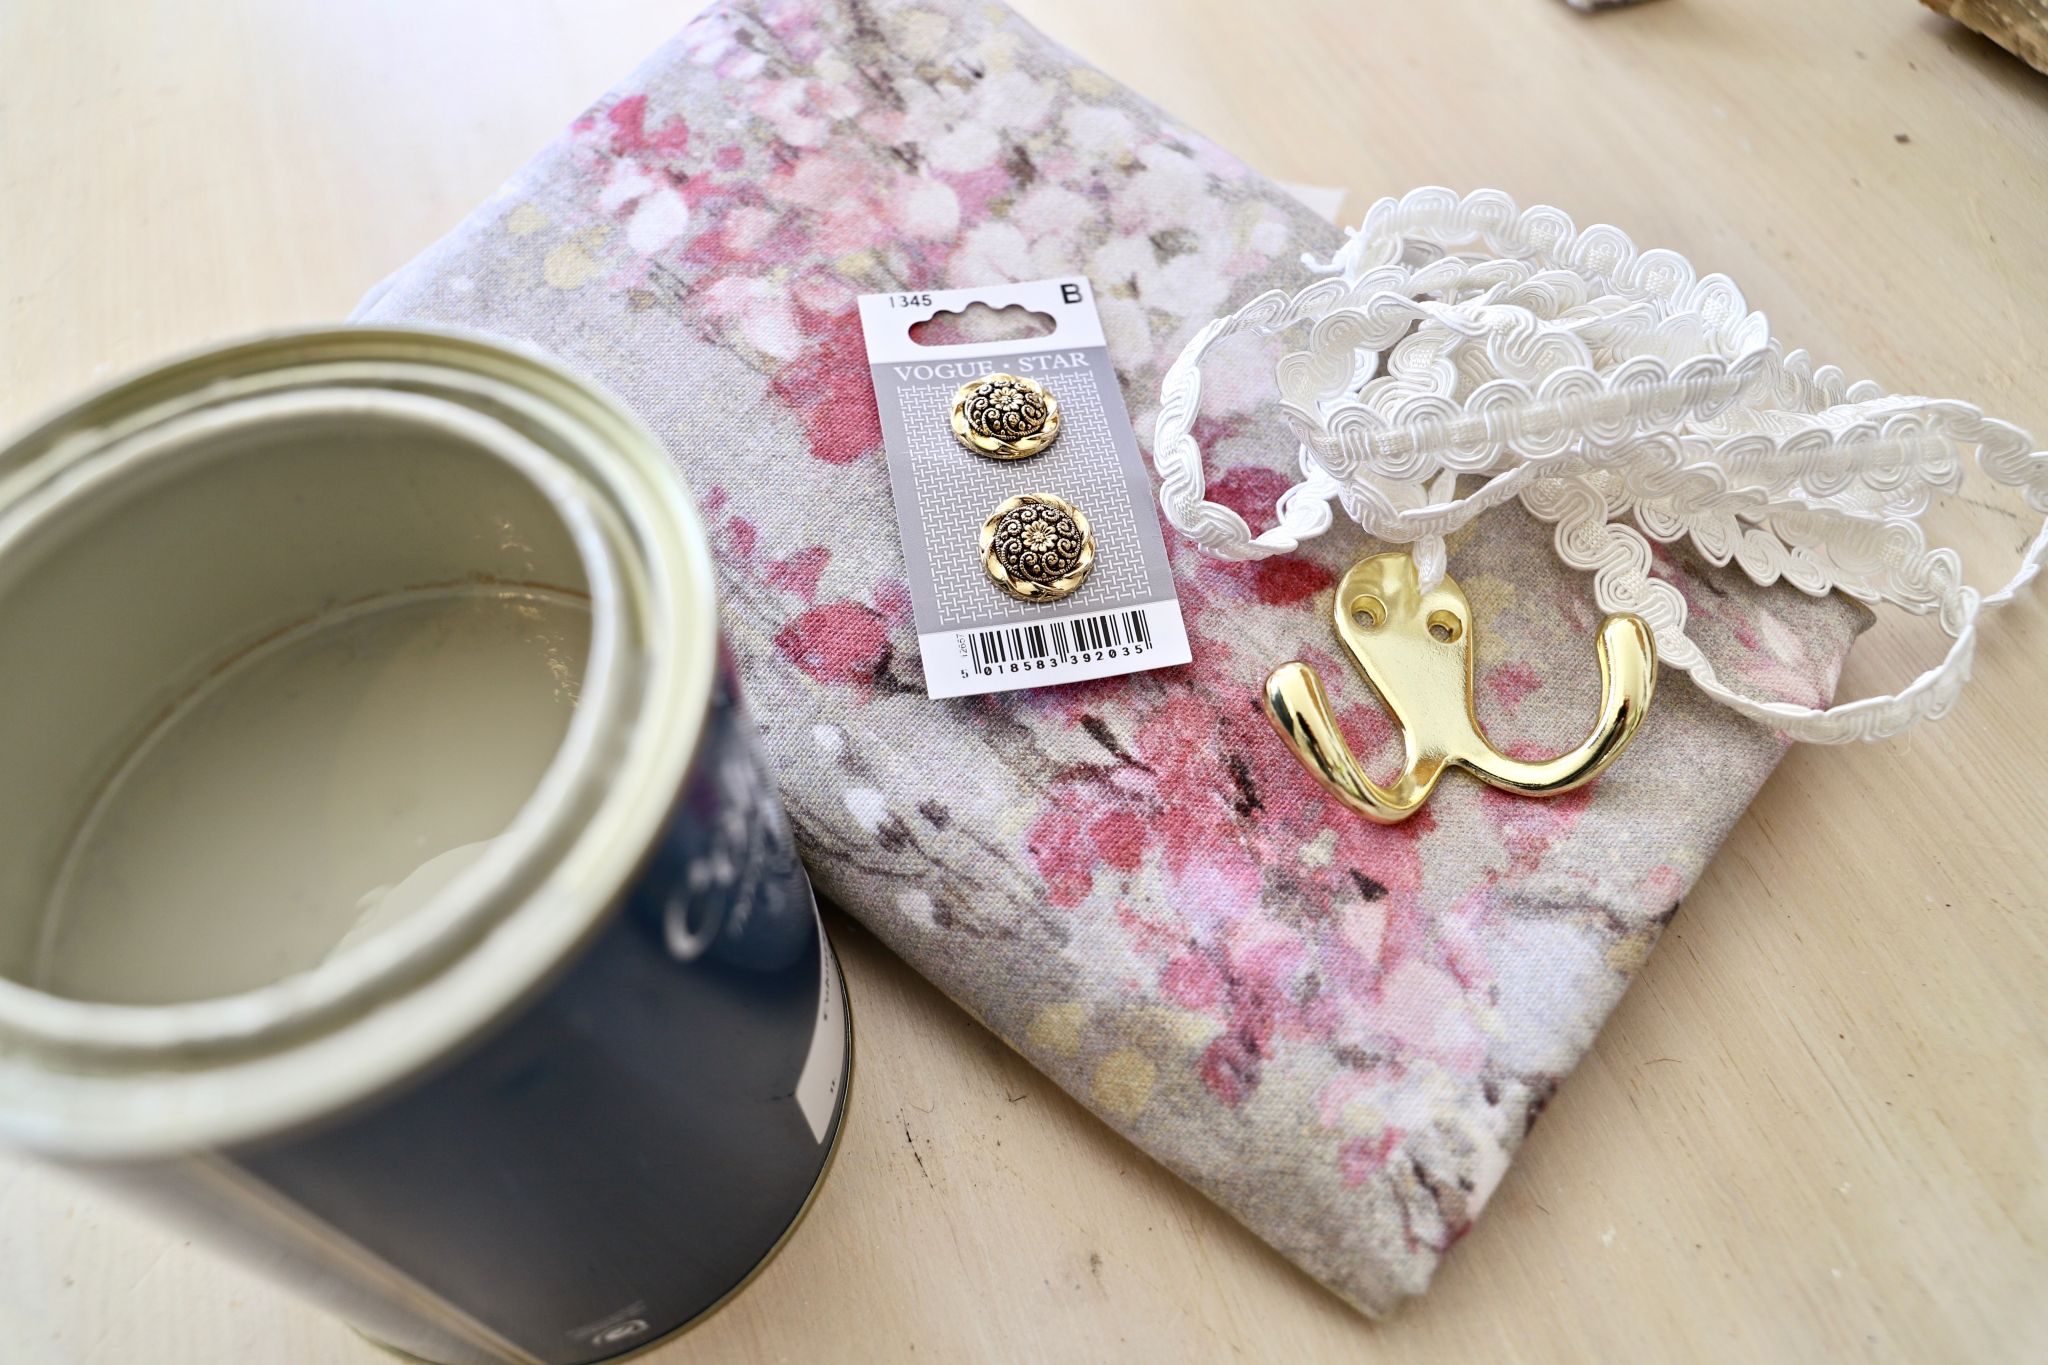
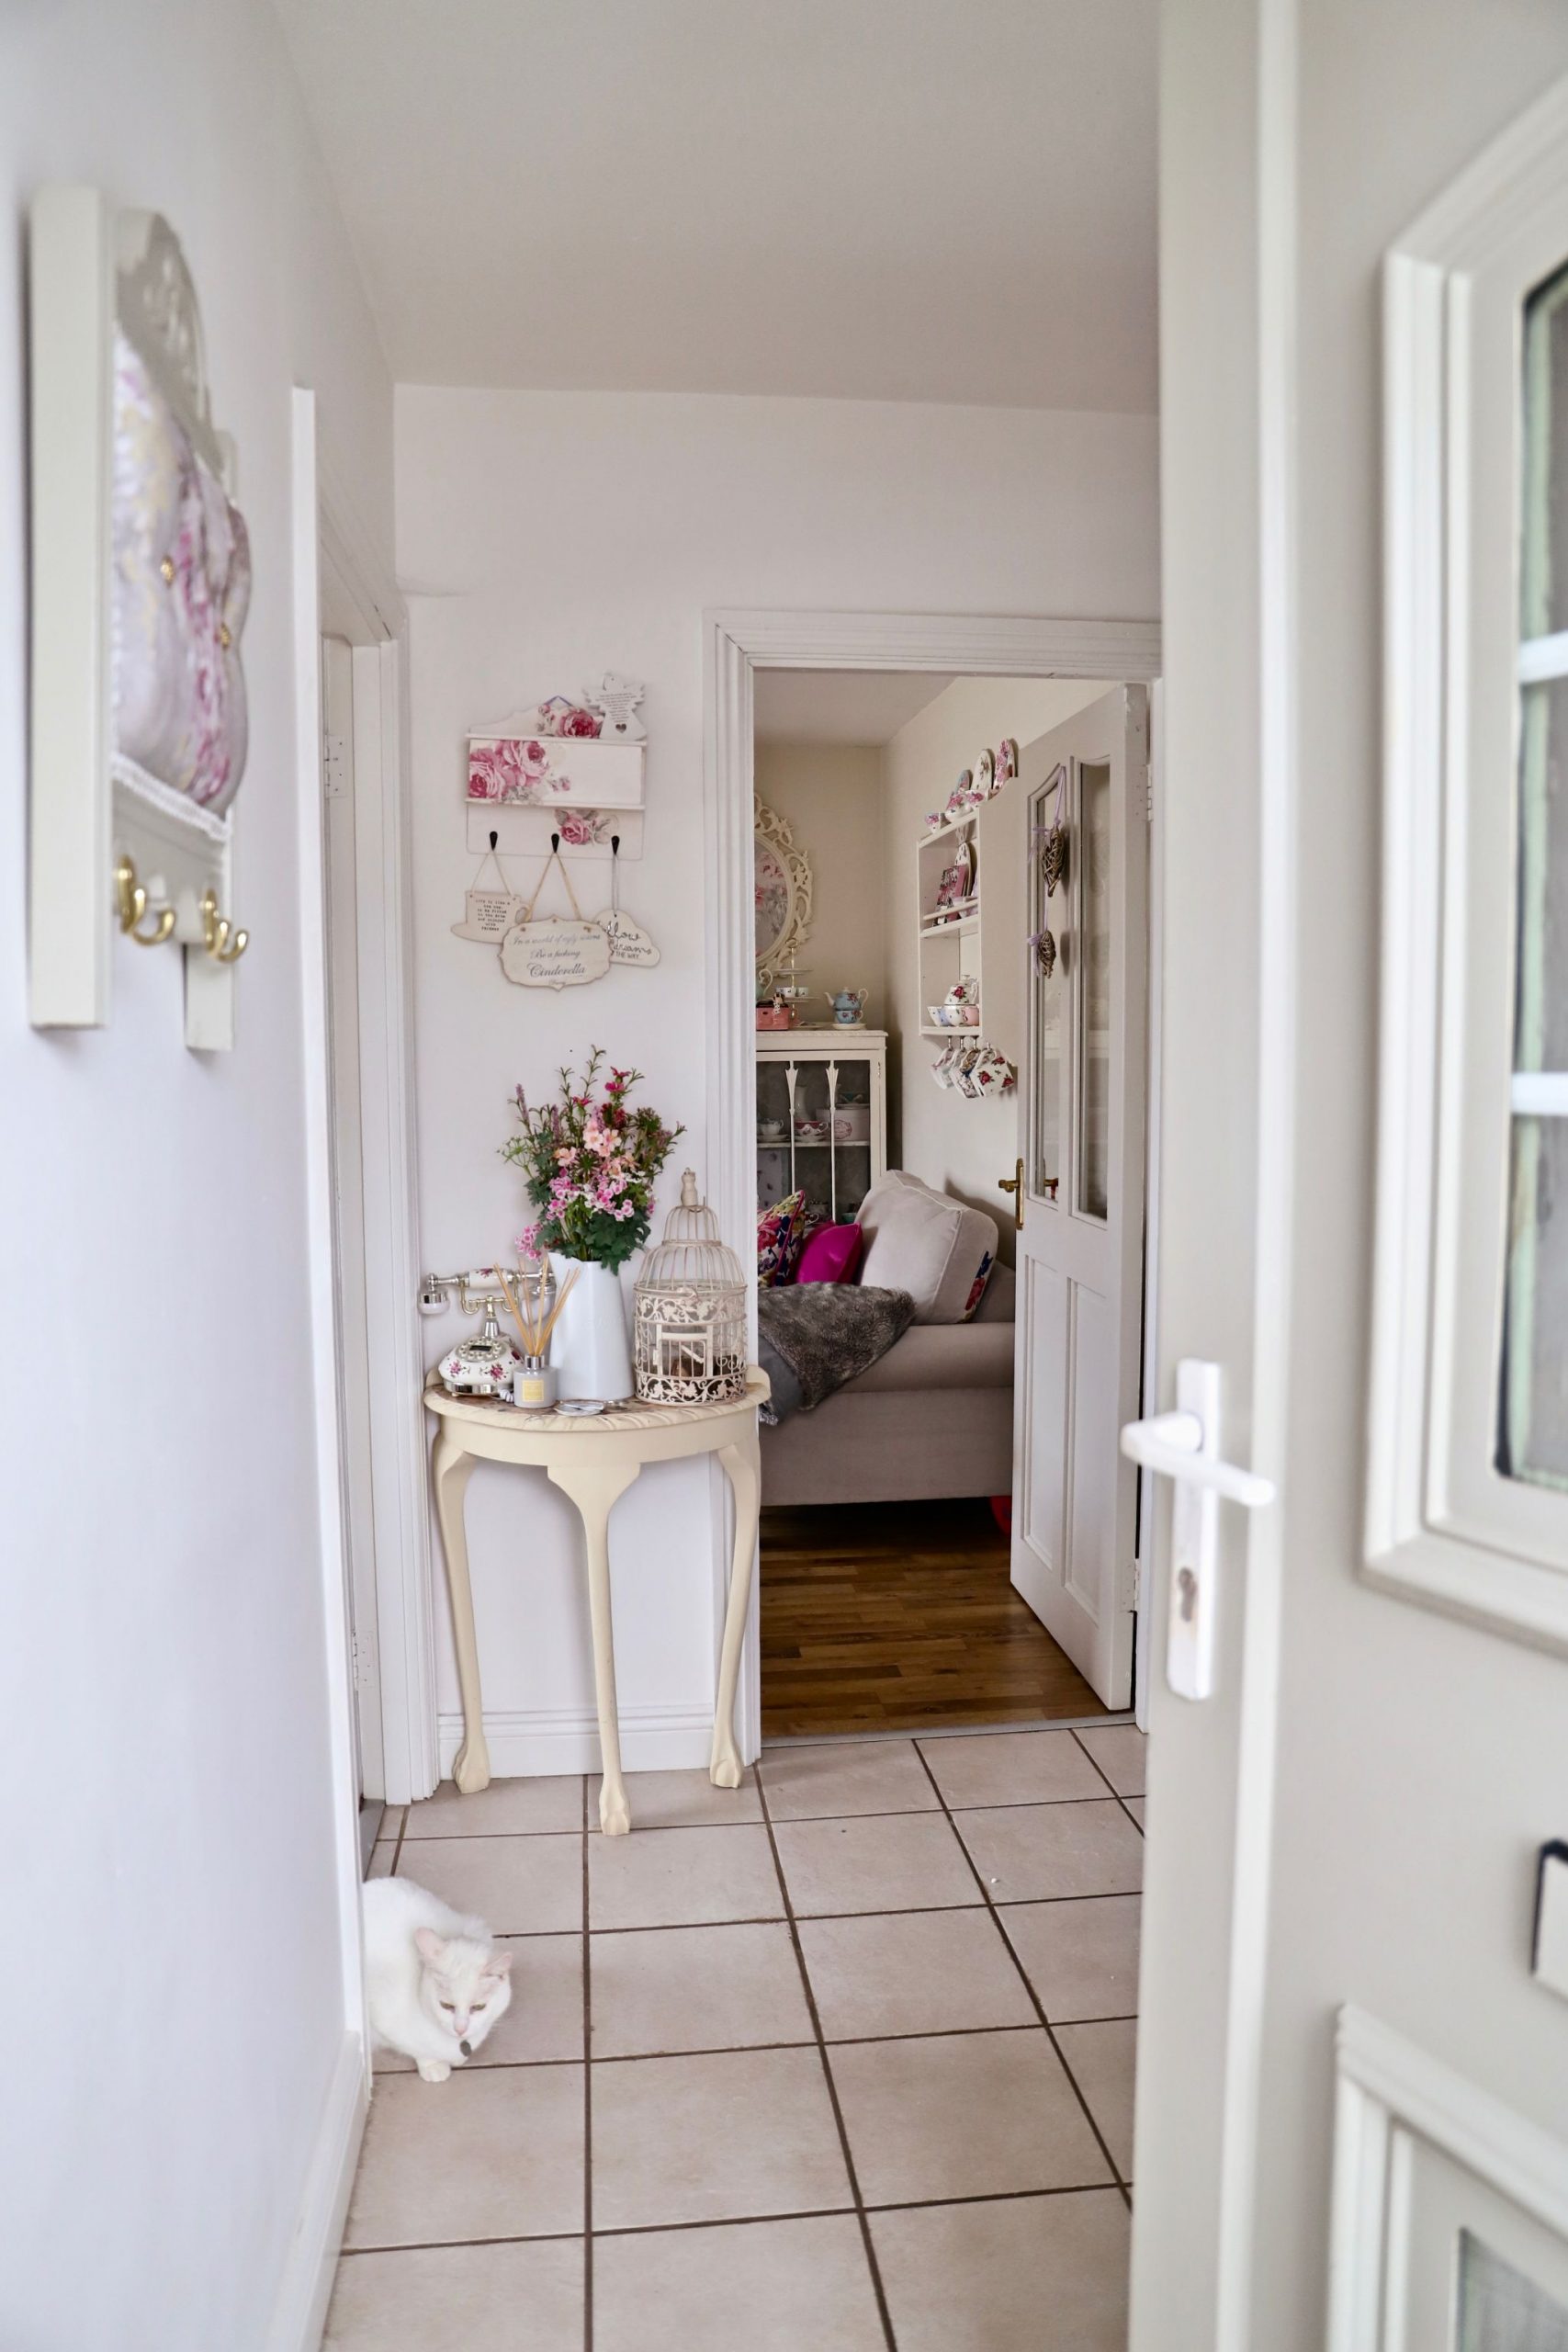
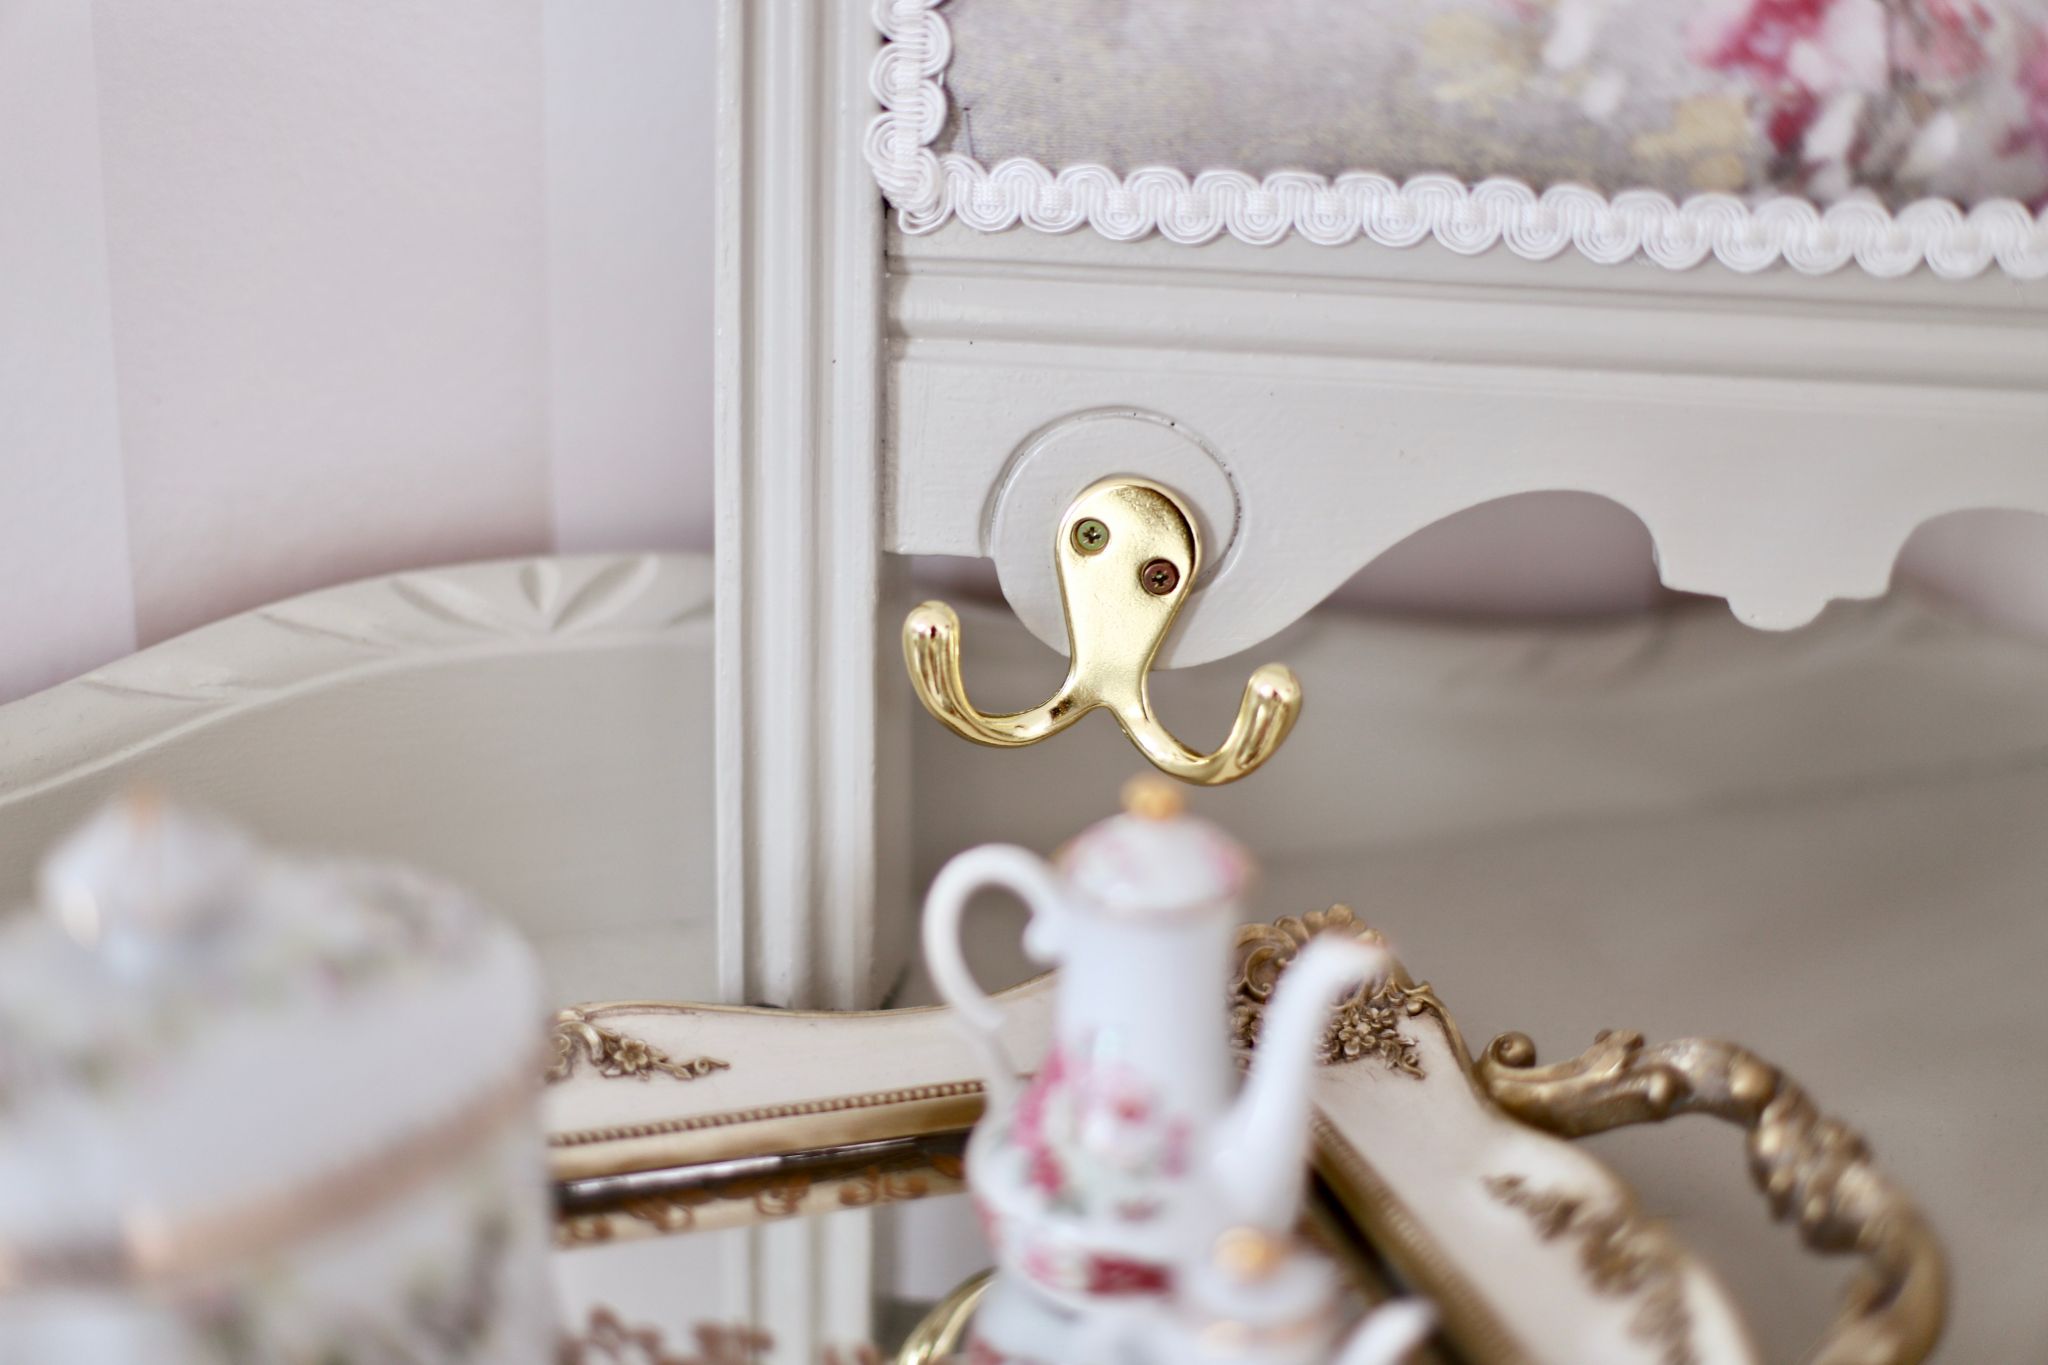
I then added some golden hooks that I picked up in Lenehan’s in Dublin city centre. I was originally going to use this as a towel rack in the bathroom but I decided it was too pretty to keep hidden away in the bathroom so I decided to hang it in my hallway.
Let me know if you have any broken pieces of furniture in your home and if you plan on salvaging them. I love to see your projects so please share them with me over on Instagram or comment below. I will also link my video below and do hit that subscribe button so you don’t miss future videos. Please share this post as well with anyone who you think would enjoy it.
Thanks for reading,
Chat soon,
Catherine.
Please Pin this image to your Pinterest boards


Author
Aw, thanks so much Sarah x
Wow, what an incredible makeover! You certainly have a talent!!
Author
Thanks Tracy! Thanks for reading, glad you enjoyed the tutorial x
Such a wonderful tutorial and what a great way to repurpose something old and broken. Thank you Catherine x
Author
Aw thank you so much I really appreciate that! x
This turned out beautifully! All of the small details you added really make this piece stand out. You did such an amazing job. Thanks for sharing!
Author
Thanks Candice! Thanks for reading! x
Author
Aw thanks Mary! Yea it can be hard with a full time job to do extra projects to sell but maybe in the future, I can! x So glad you liekd it x
Oh wow, the end result looks amazing
Candice xx
What a sweet little makeover! The fabric is lovely, I think you have a real sensitivity to seeing the potential beauty in things. Not everyone has that talent. Have you ever considered painting furniture for an extra income? I have been selling some for a few years now, really fun, however my living room can be full of tarps paint and wax!!I enjoy your posts so much, thank you for sharing your wonderful talented projects. Xx