
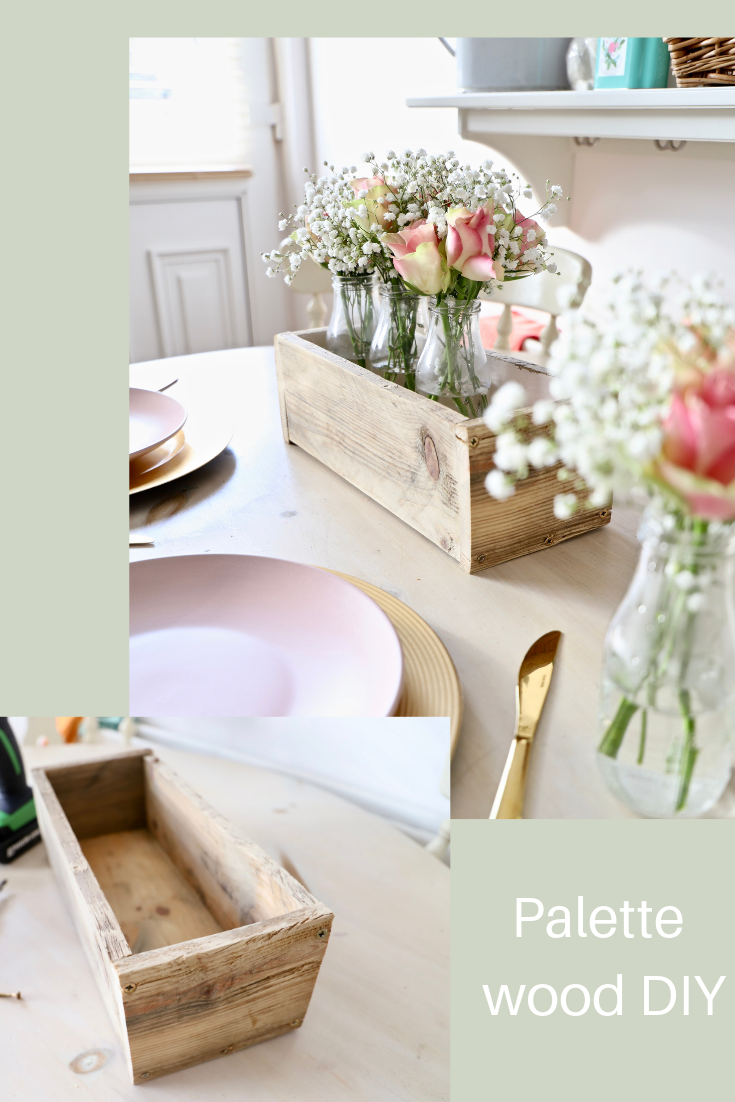
In this week’s Youtube video I have a fun palette wood DIY. I attempted to make a small wooden box to use for a floral display. I reused some old wood to try and create a small box. Now, it was my first attempt and I did learn about the importance of measuring when it comes to woodwork projects. My wooden box isn’t perfect but I think I did an okay job for my first try and I certainly learned from my mistakes.
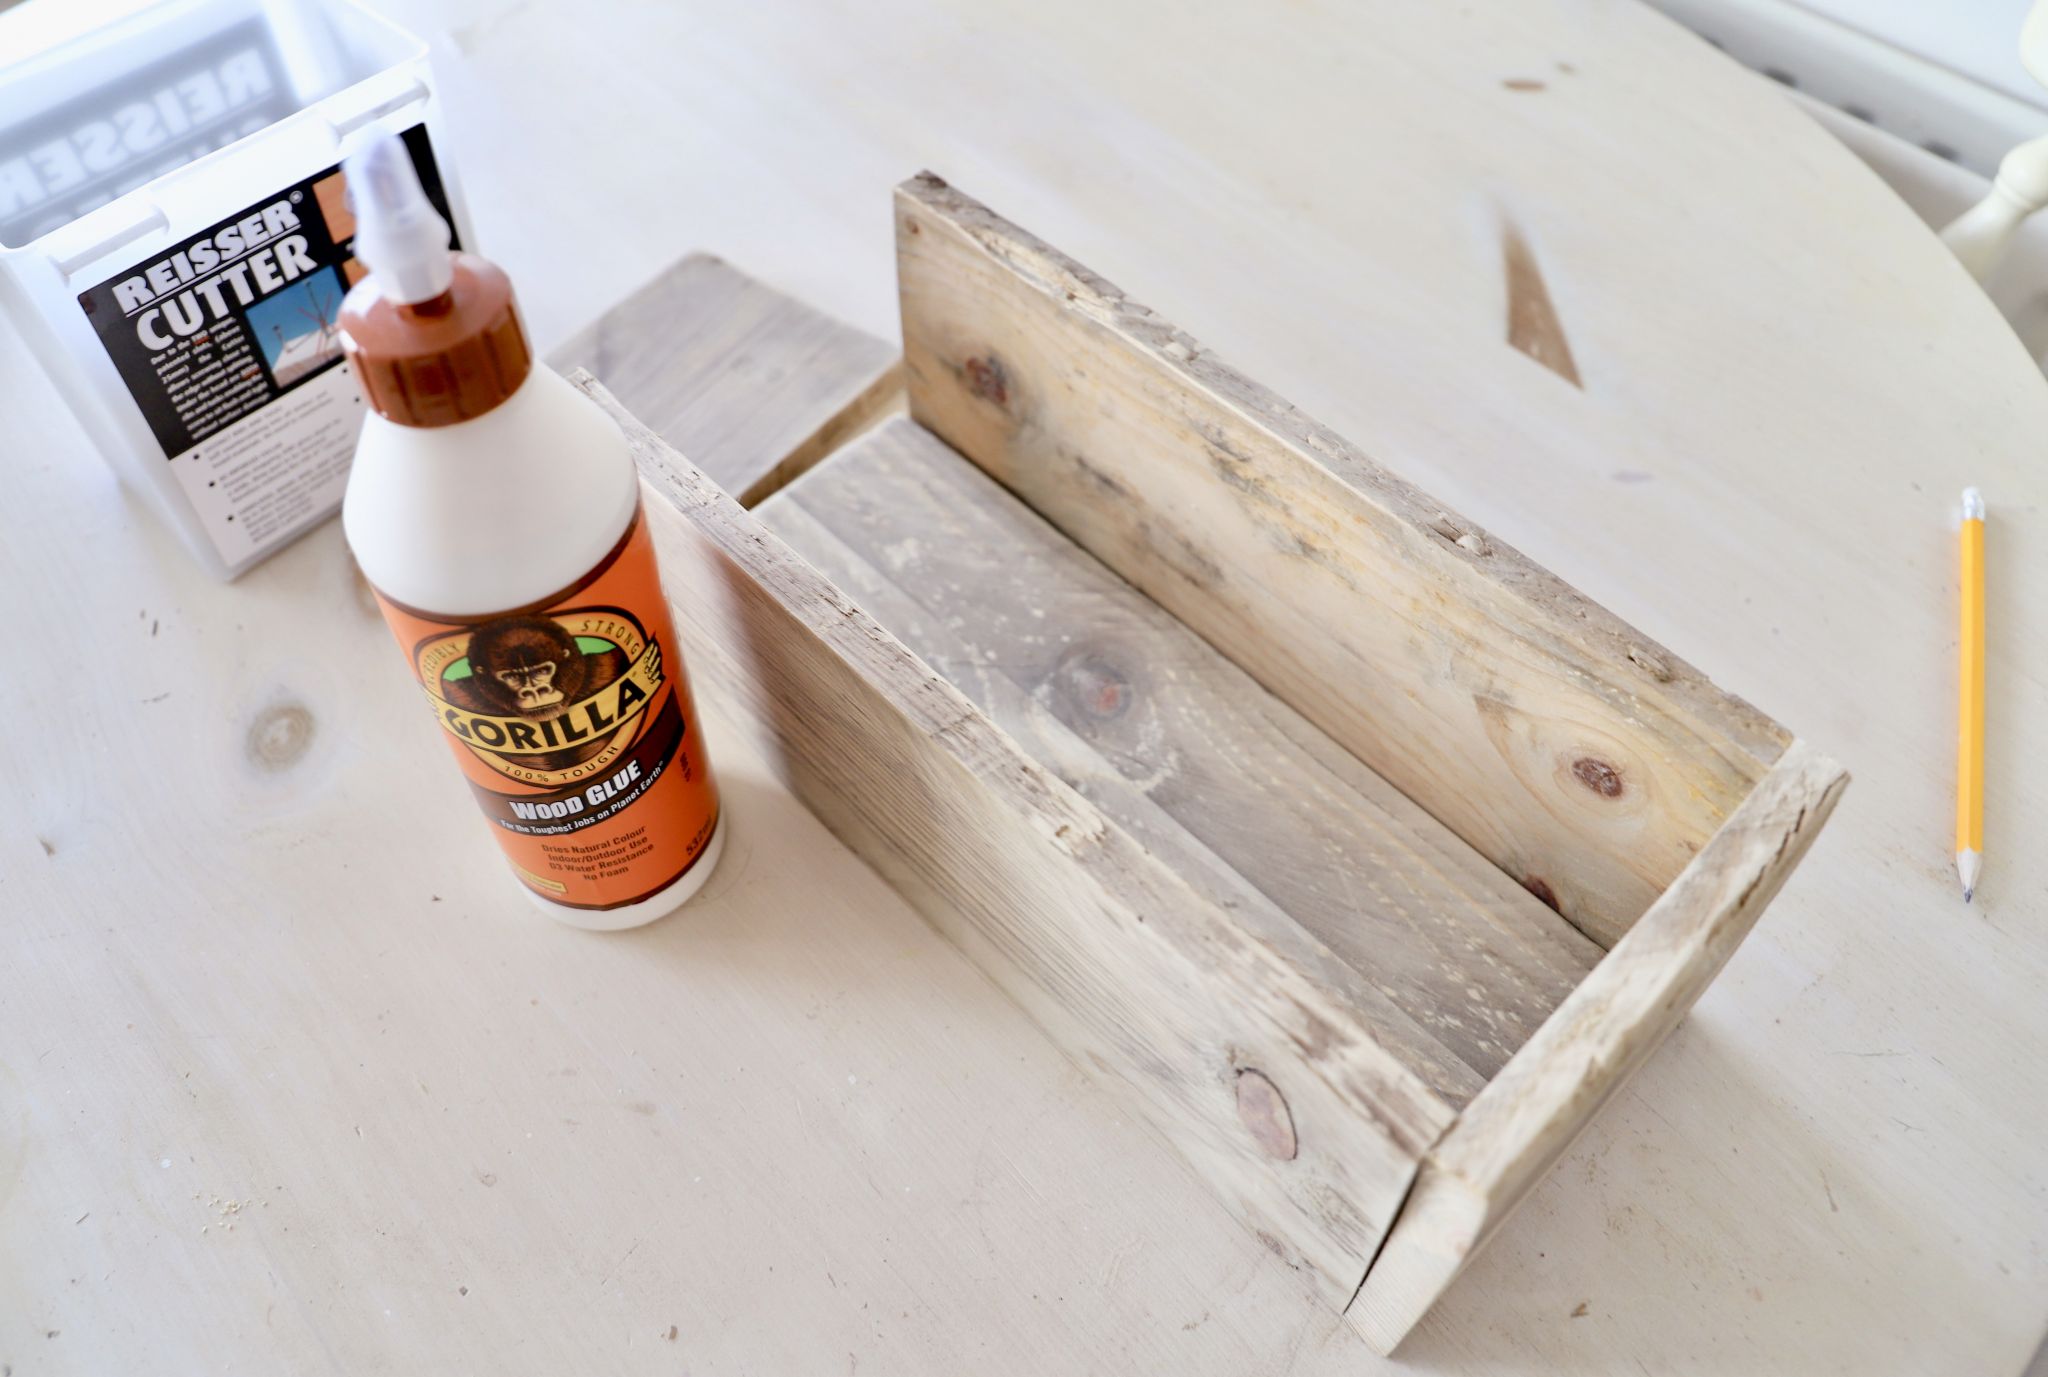
For this DIY I cut up an old wooden palette. I love palette wood because you can pick them up for free, they clean up well and are hardy. I used my jigsaw to cut up the wood into small pieces. Don’t worry if you don’t have a jigsaw as you can use a handsaw instead. I sanded down the wood as it was quite rough. It was full of dirt so I used some Krud Kutter to clean it up. I then assembled the box which you will see in my Youtube video. I used some wood glue and some screws to assemble my box. You don’t have to use both, I didn’t have any clamps or grips to keep my wood together while it dried so I added some screws using my drill. If you do not have a drill then you can use the wood glue. Just make sure to clamp it together while it dries. You will also notice that my wood split in the corner. This is because I didn’t pre-drill a hole before adding the screw. Lesson learnt!
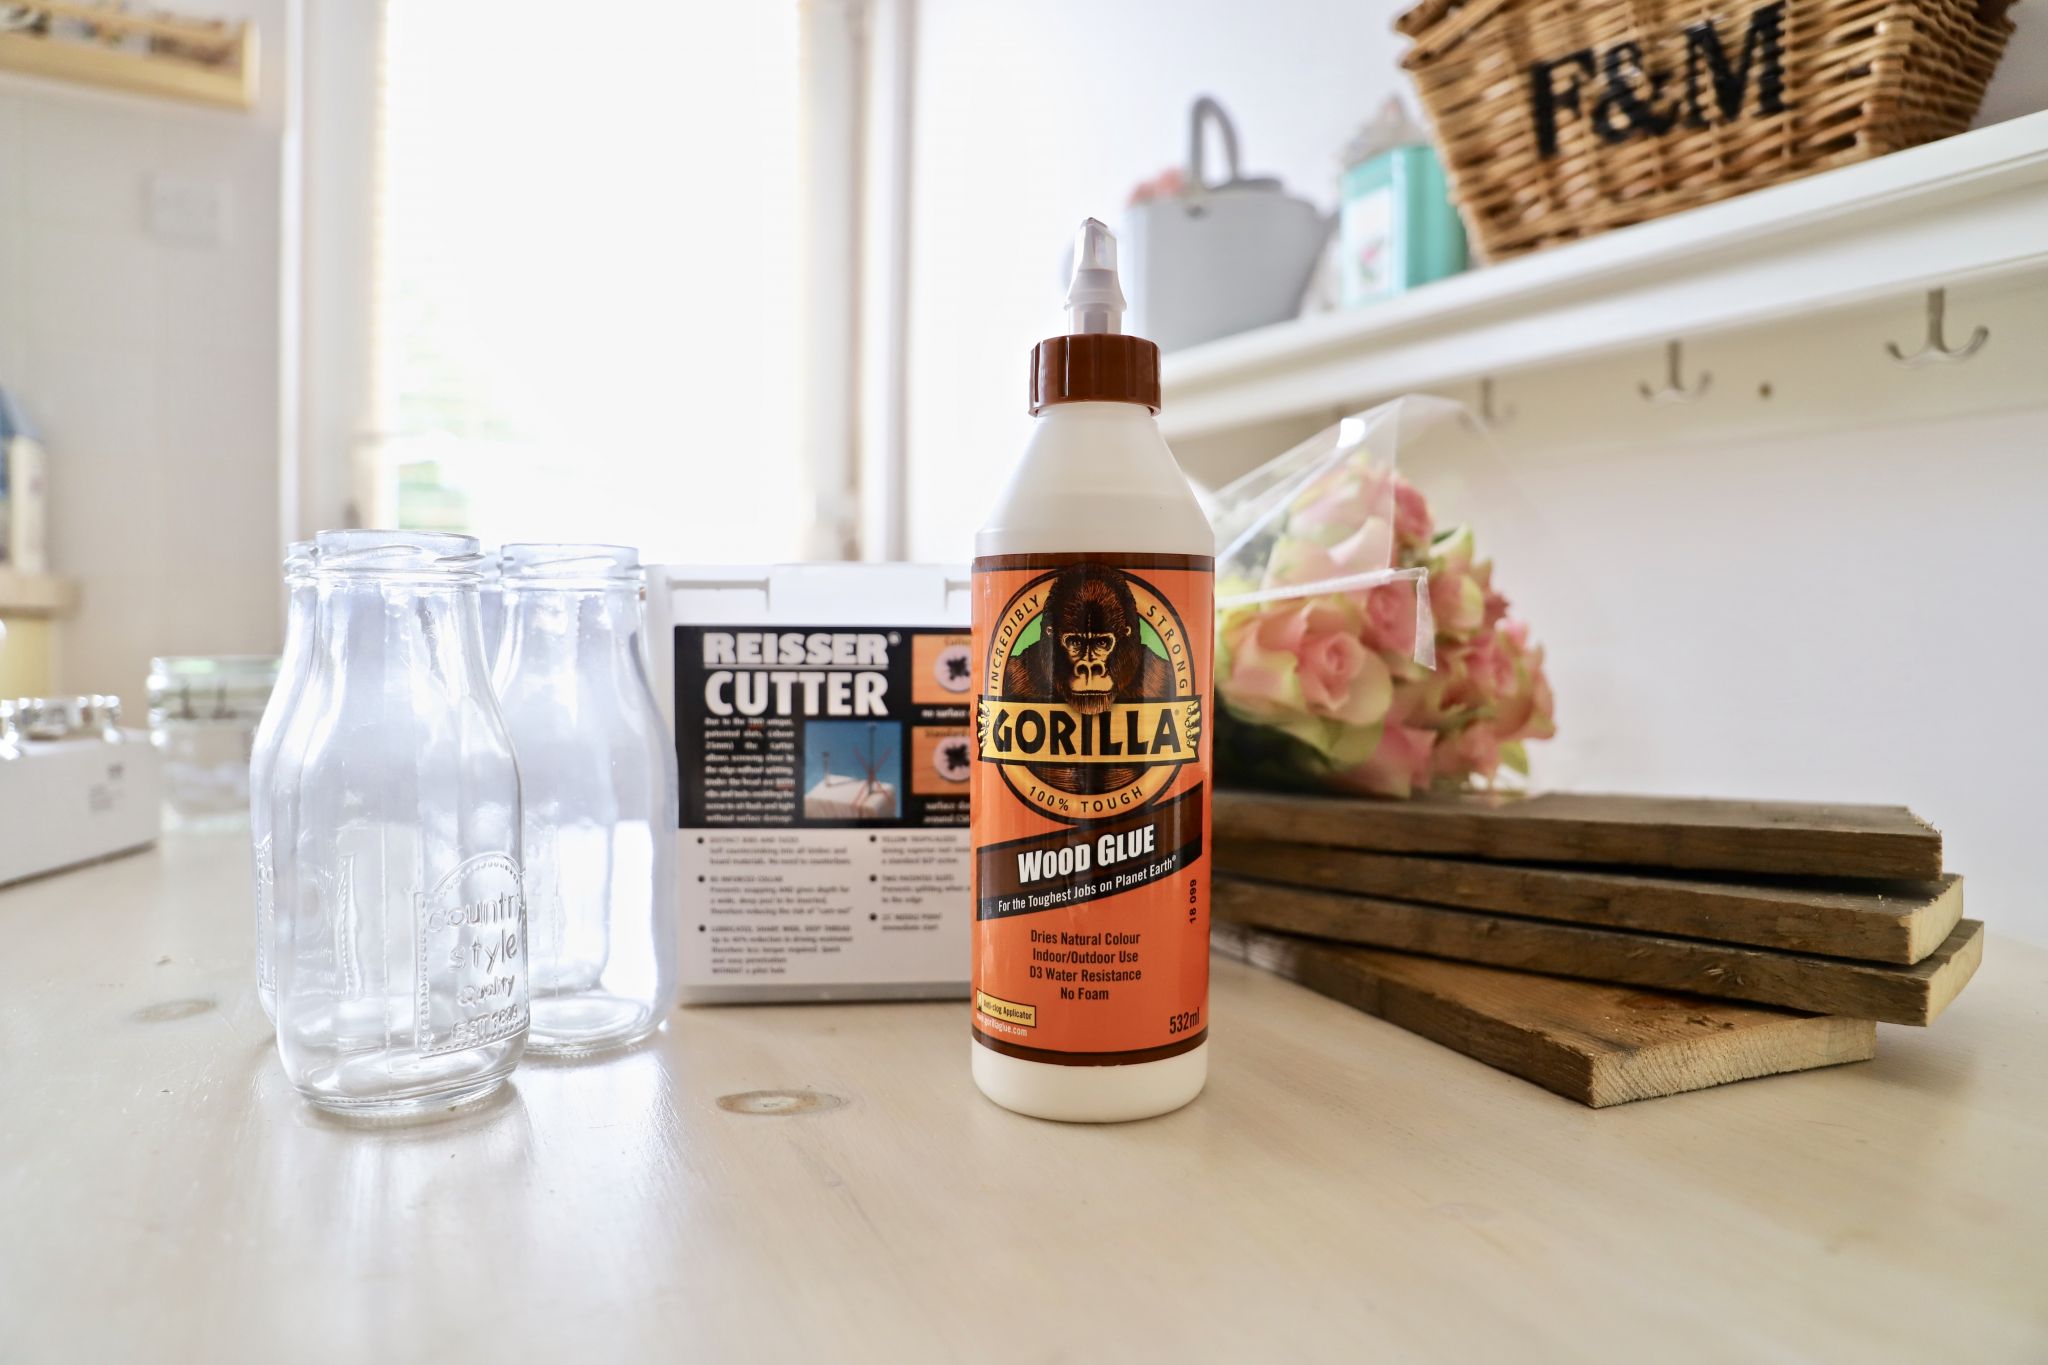

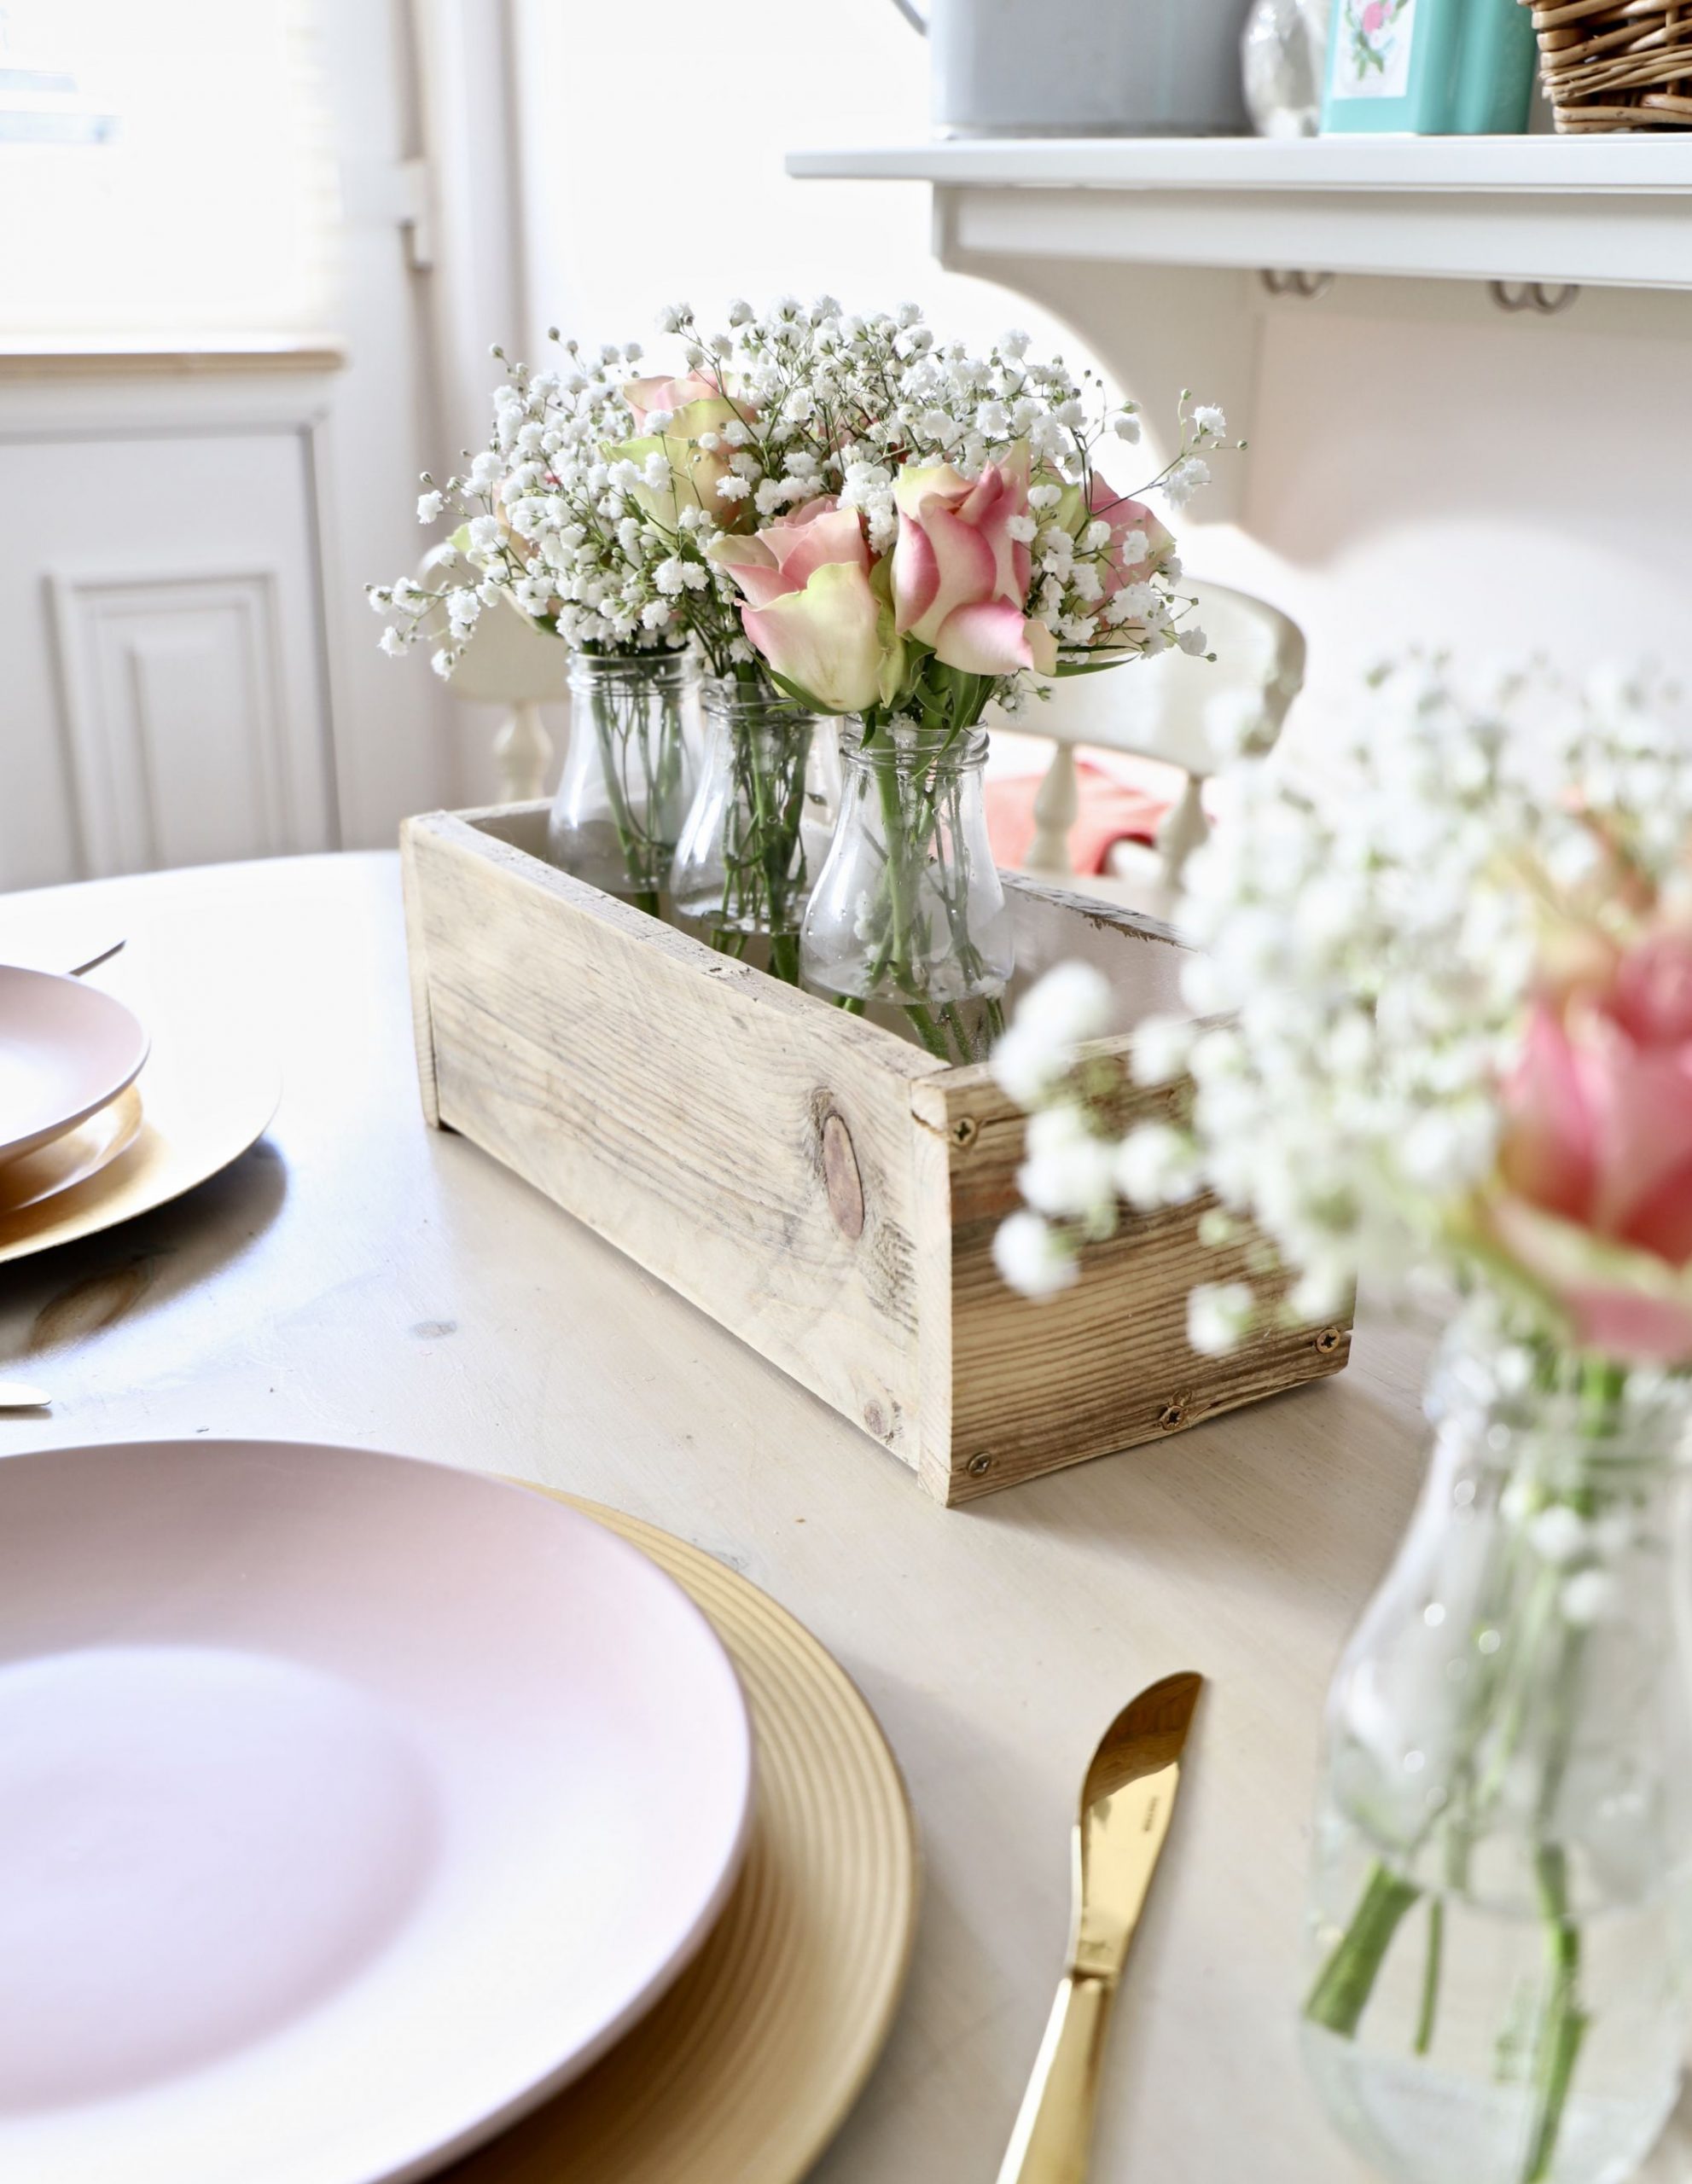
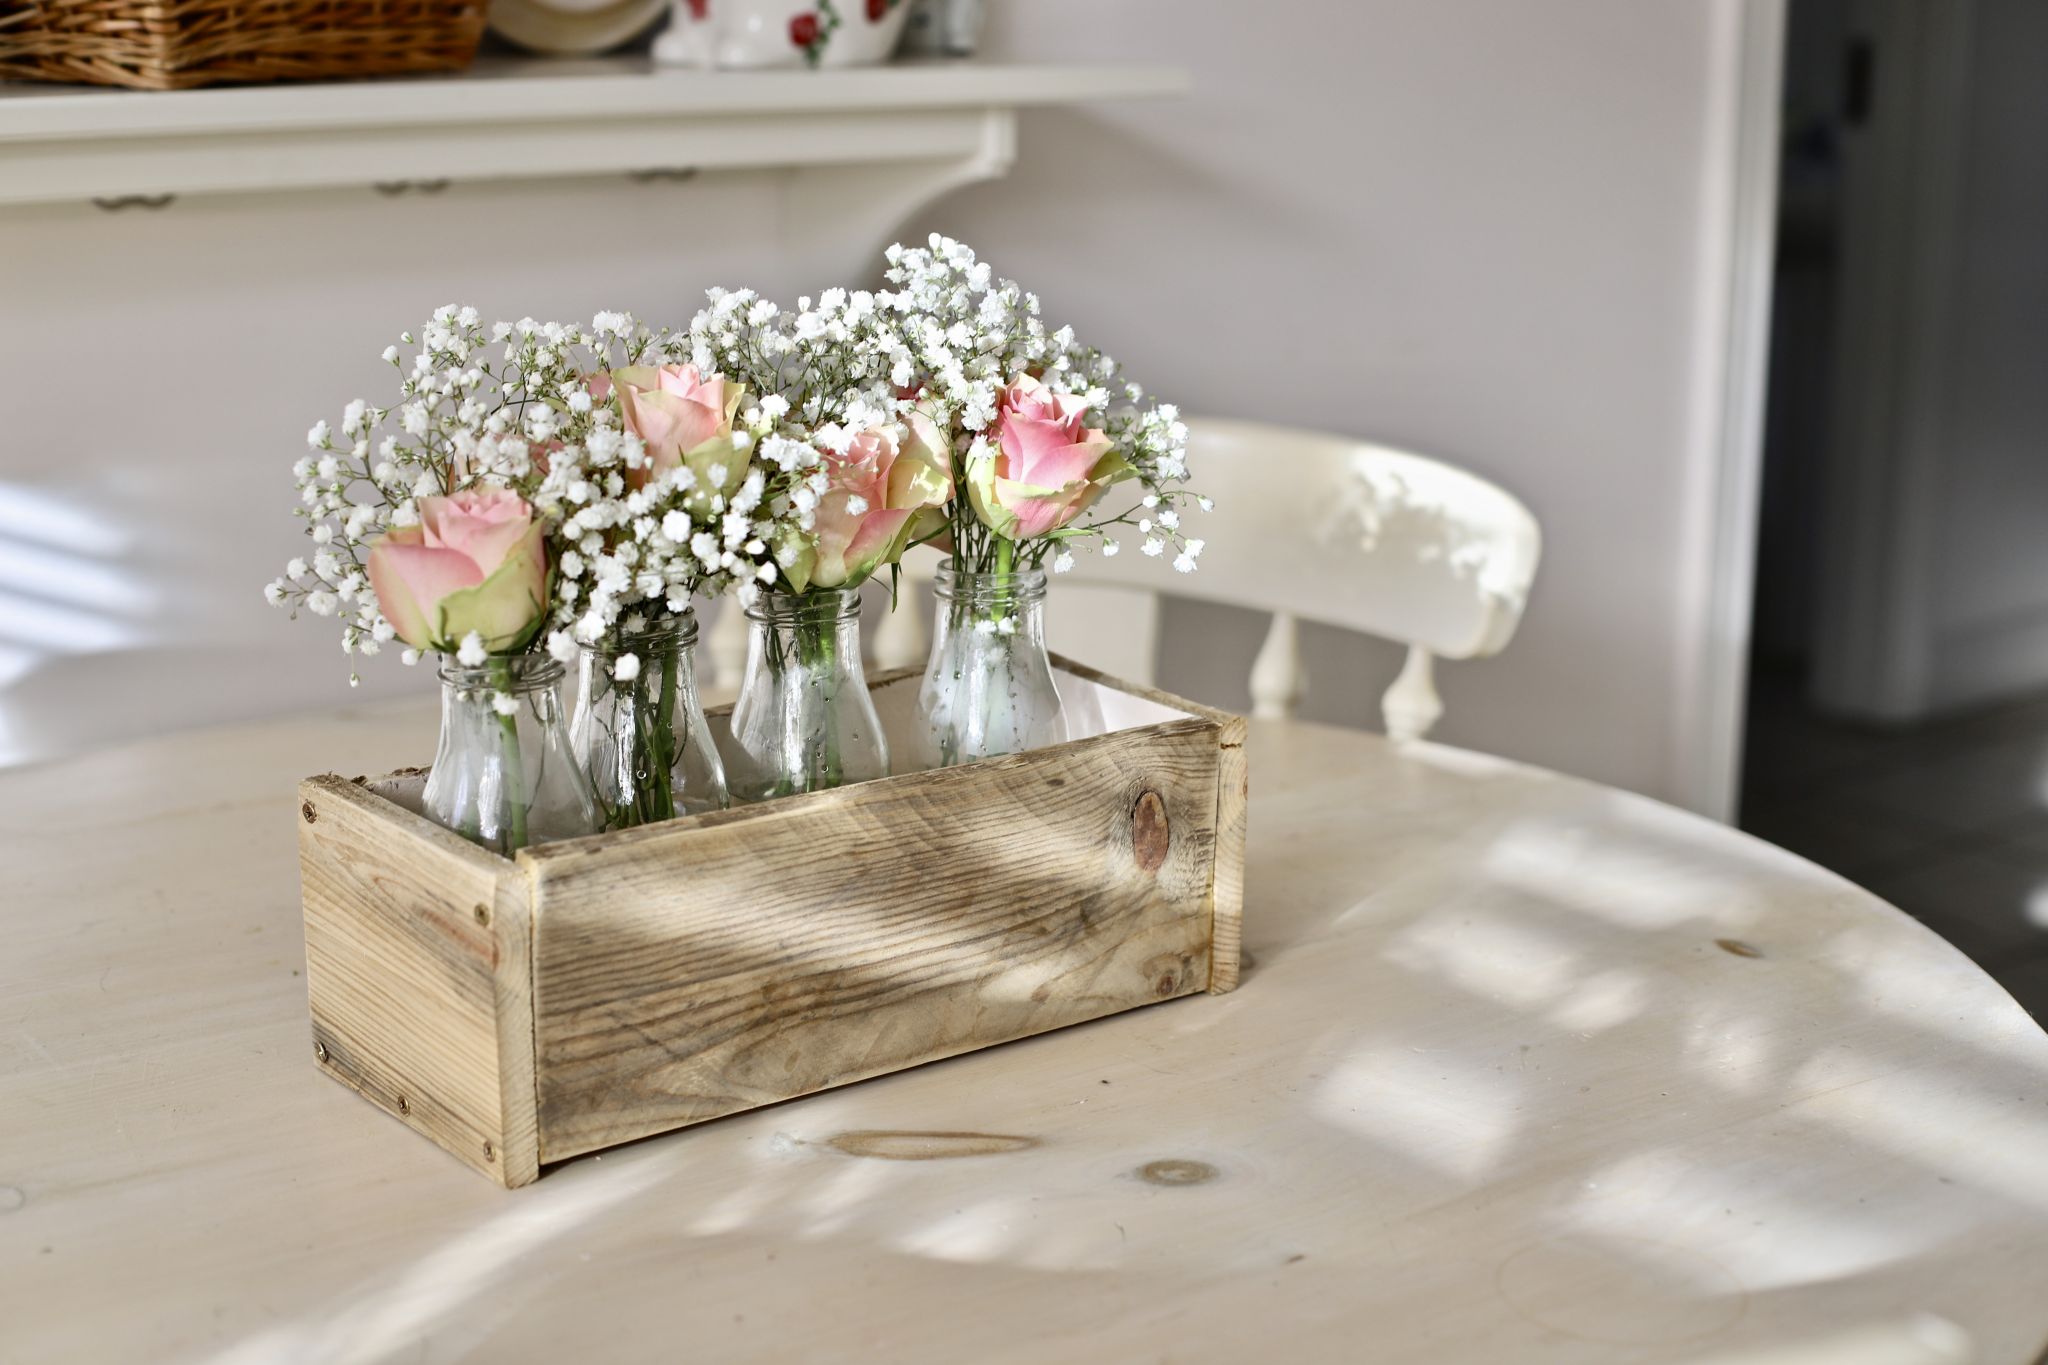
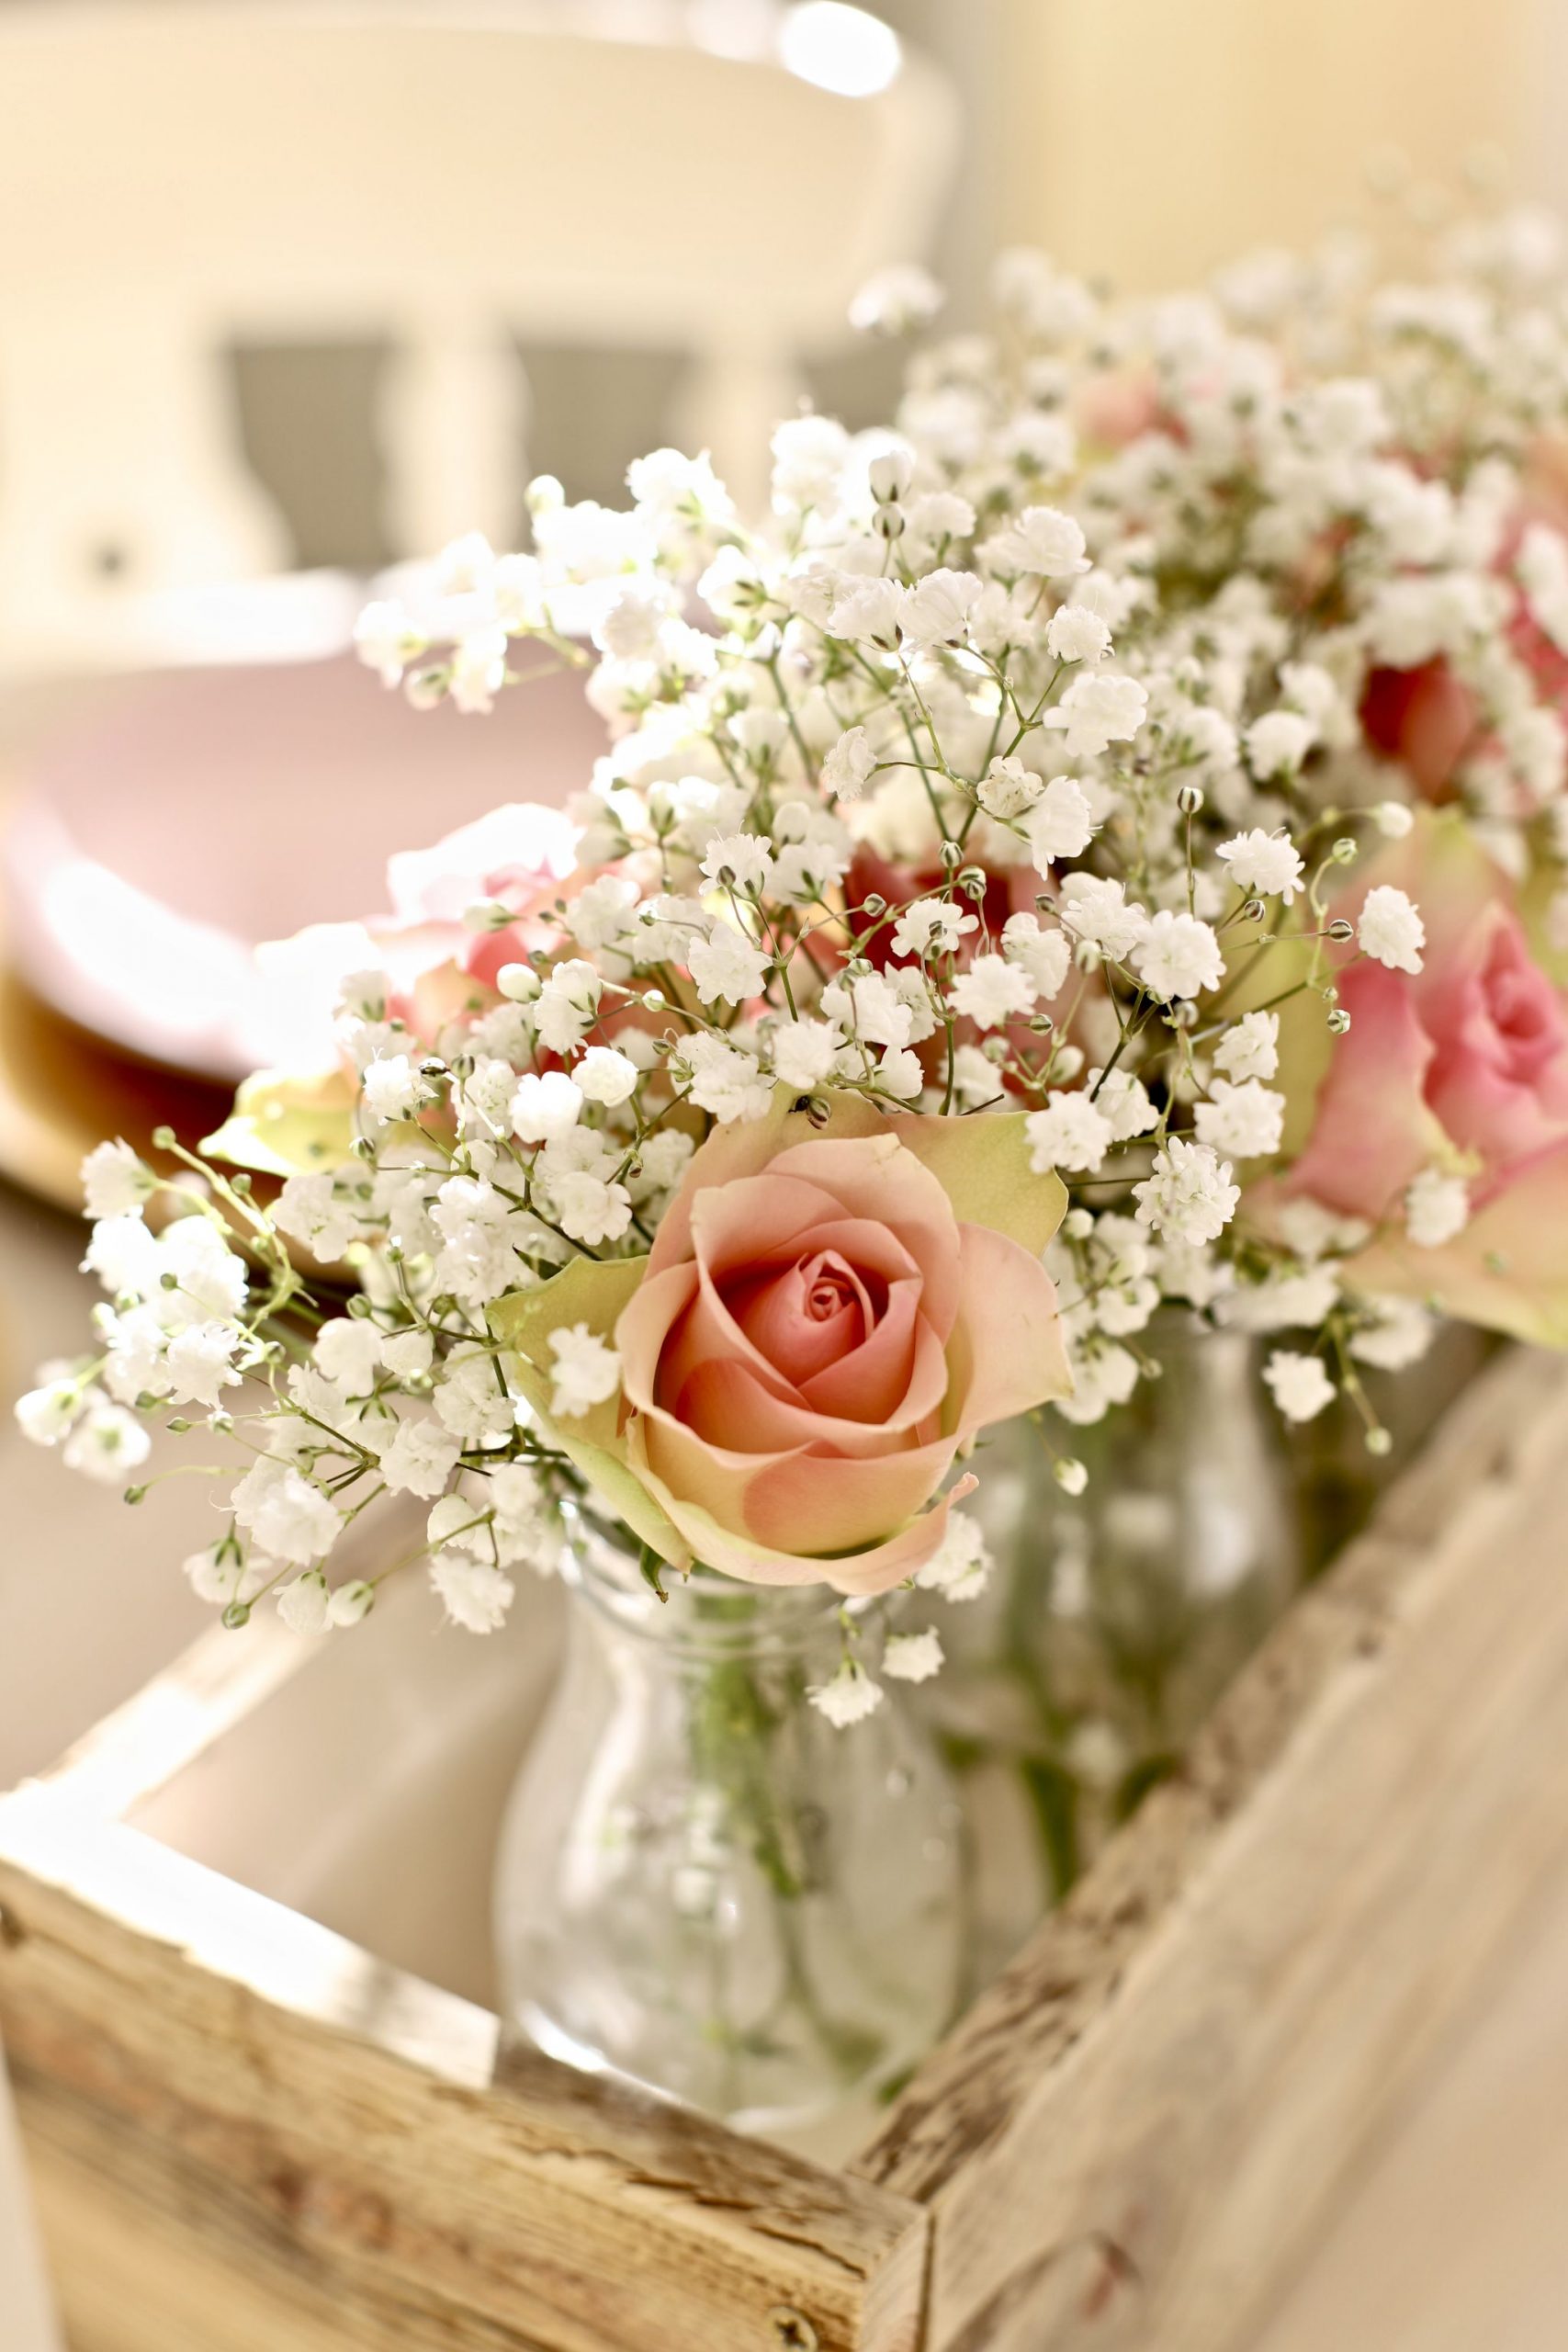
I decided to keep the outside looking rustic but I wanted to add some colour to the inside. I used some paint I had from last weeks cabinet makeover. I added the light pink shade to the inside and allowed it to dry before adding my jars. You can reuse some old cooking jars to add to your wooden box. I had some old milk bottle jars that I got ages ago. I added some fresh roses and gypsophila to the jars to make a pretty romantic floral arrangement. The perfect centrepiece for Valentine’s day. I went for a really girly and romantic feel to my floral arrangement.
I think I get an A for effort with this project. I learnt that I need to cut straighter, measure better and take my time. I also need to pre-drill holes and get some clamps to hold my wood in place making it easier to make my projects. I hope you got some inspiration from today’s DIY. I will link to the video below for you to check out.
Thanks for reading,
Chat Soon,
Catherine.
Please add the image below to your Pinterest boards

Author
Thanks so much for reading and for the lovely message! X
I have just discovered your blog, and im making my way through every single video! You definitely inspire me to get on with things in the house and do them in a more creative way then just going to the shop and spending a fortune on what i need. Thank you & keep going!
Lovely so cute but if you really to give it a level finish just sand the whole outside or corners gorg
Author
Thanks Sarah! Thanks for popping by, hope you’re having a lovely weekend!
That box is so cute! I love it.