
Today I have teamed up with the guys over at Hickeys to show you how to make an easy envelope cushion. Making an envelope cushion was my very first project when I was learning to sew. I did some evening sewing classes at my local school and I remember the excitement when my teacher Mary showed us how to make a cushion!
I was a complete beginner and could barely thread my machine at the time so it really motivated me and inspired me to sew more when I completed my first project. Hands up who has a sewing machine collecting dust?
From chatting to some of you ladies on Instagram I know you guys have sewing machines collecting dust, why not take them out of storage, dust them off, thread them up and have a go at making today’s project.
*This post is sponsored by Hickeys Homefocus

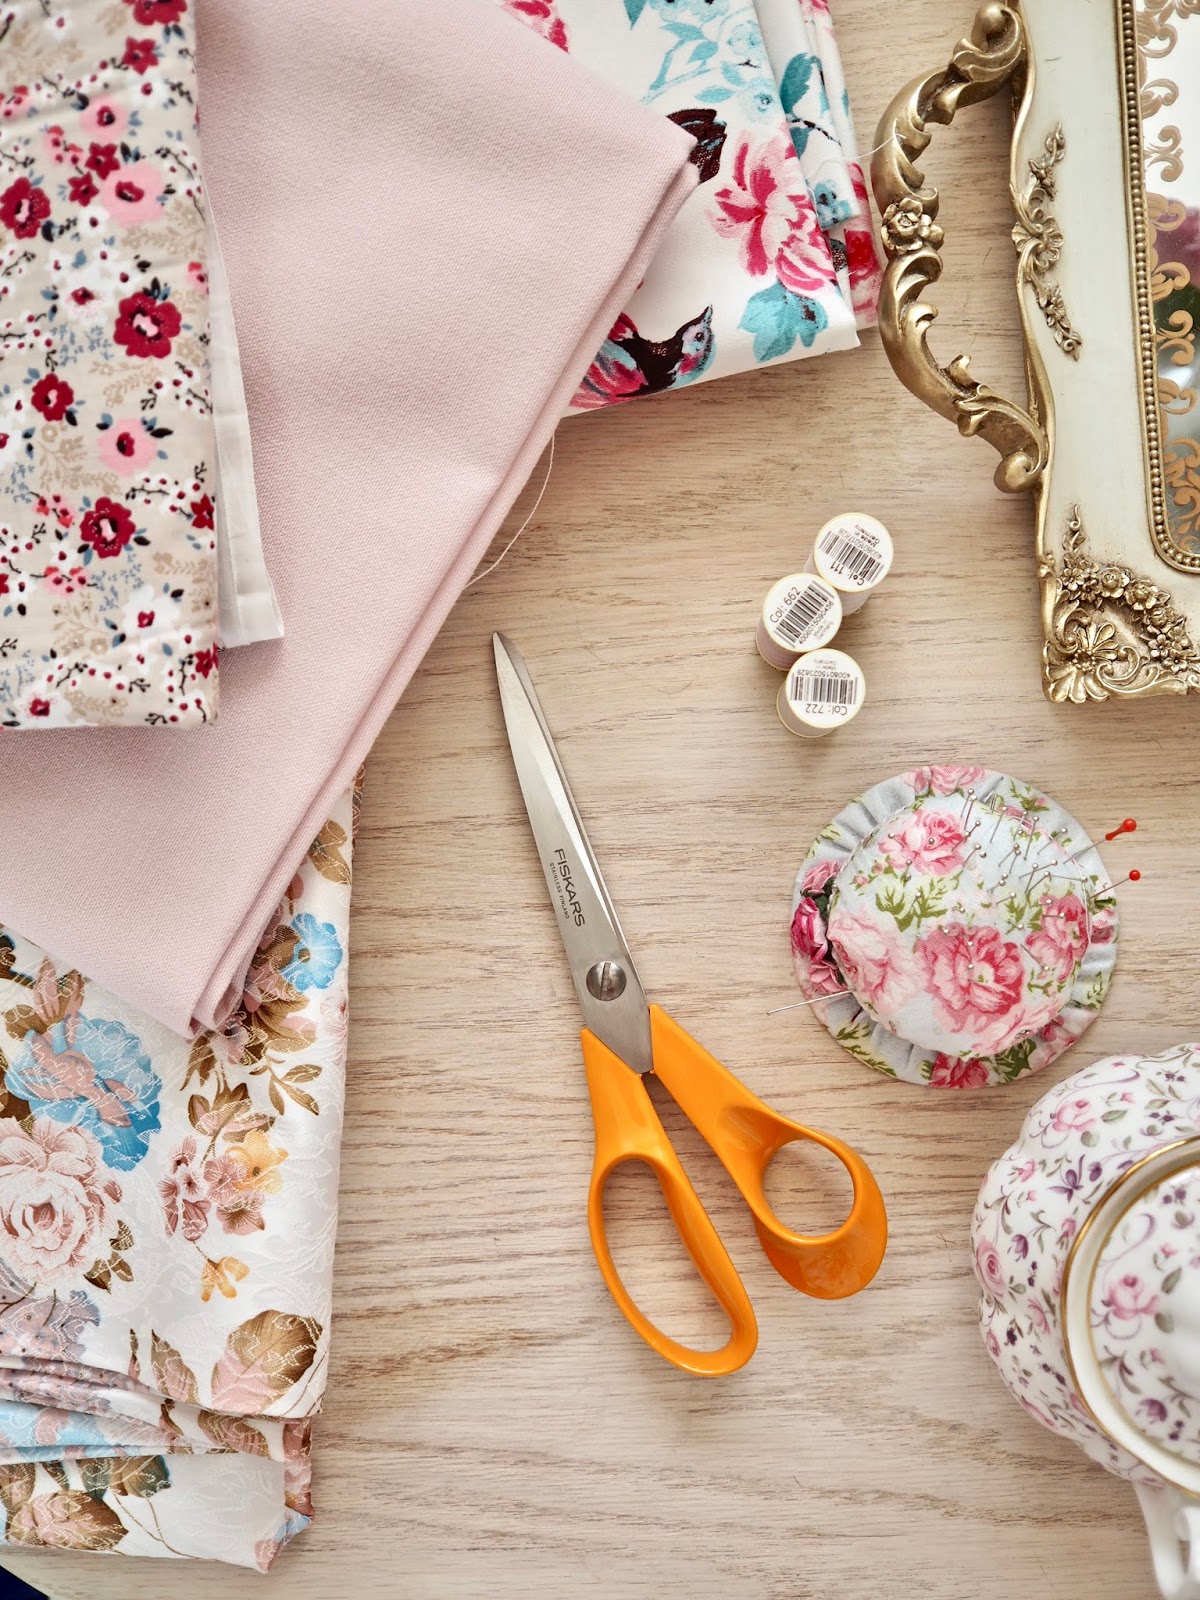
What you will need to make your cushion
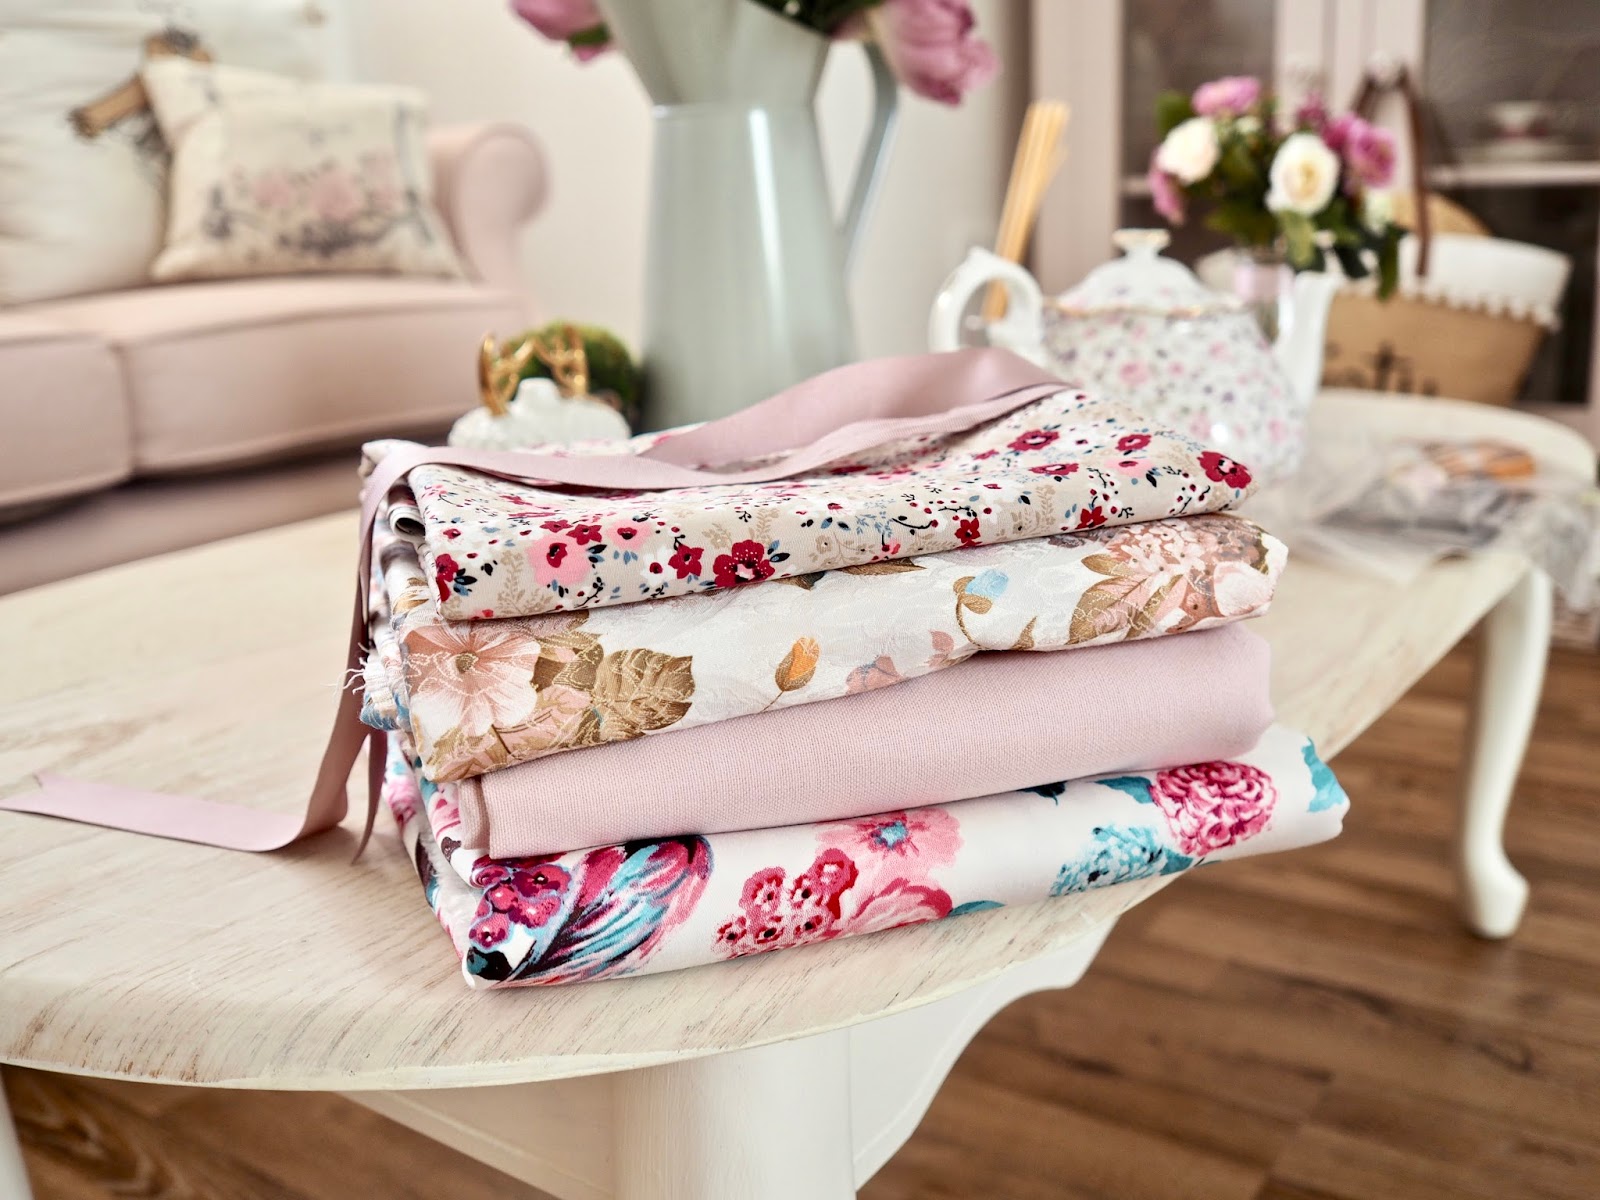
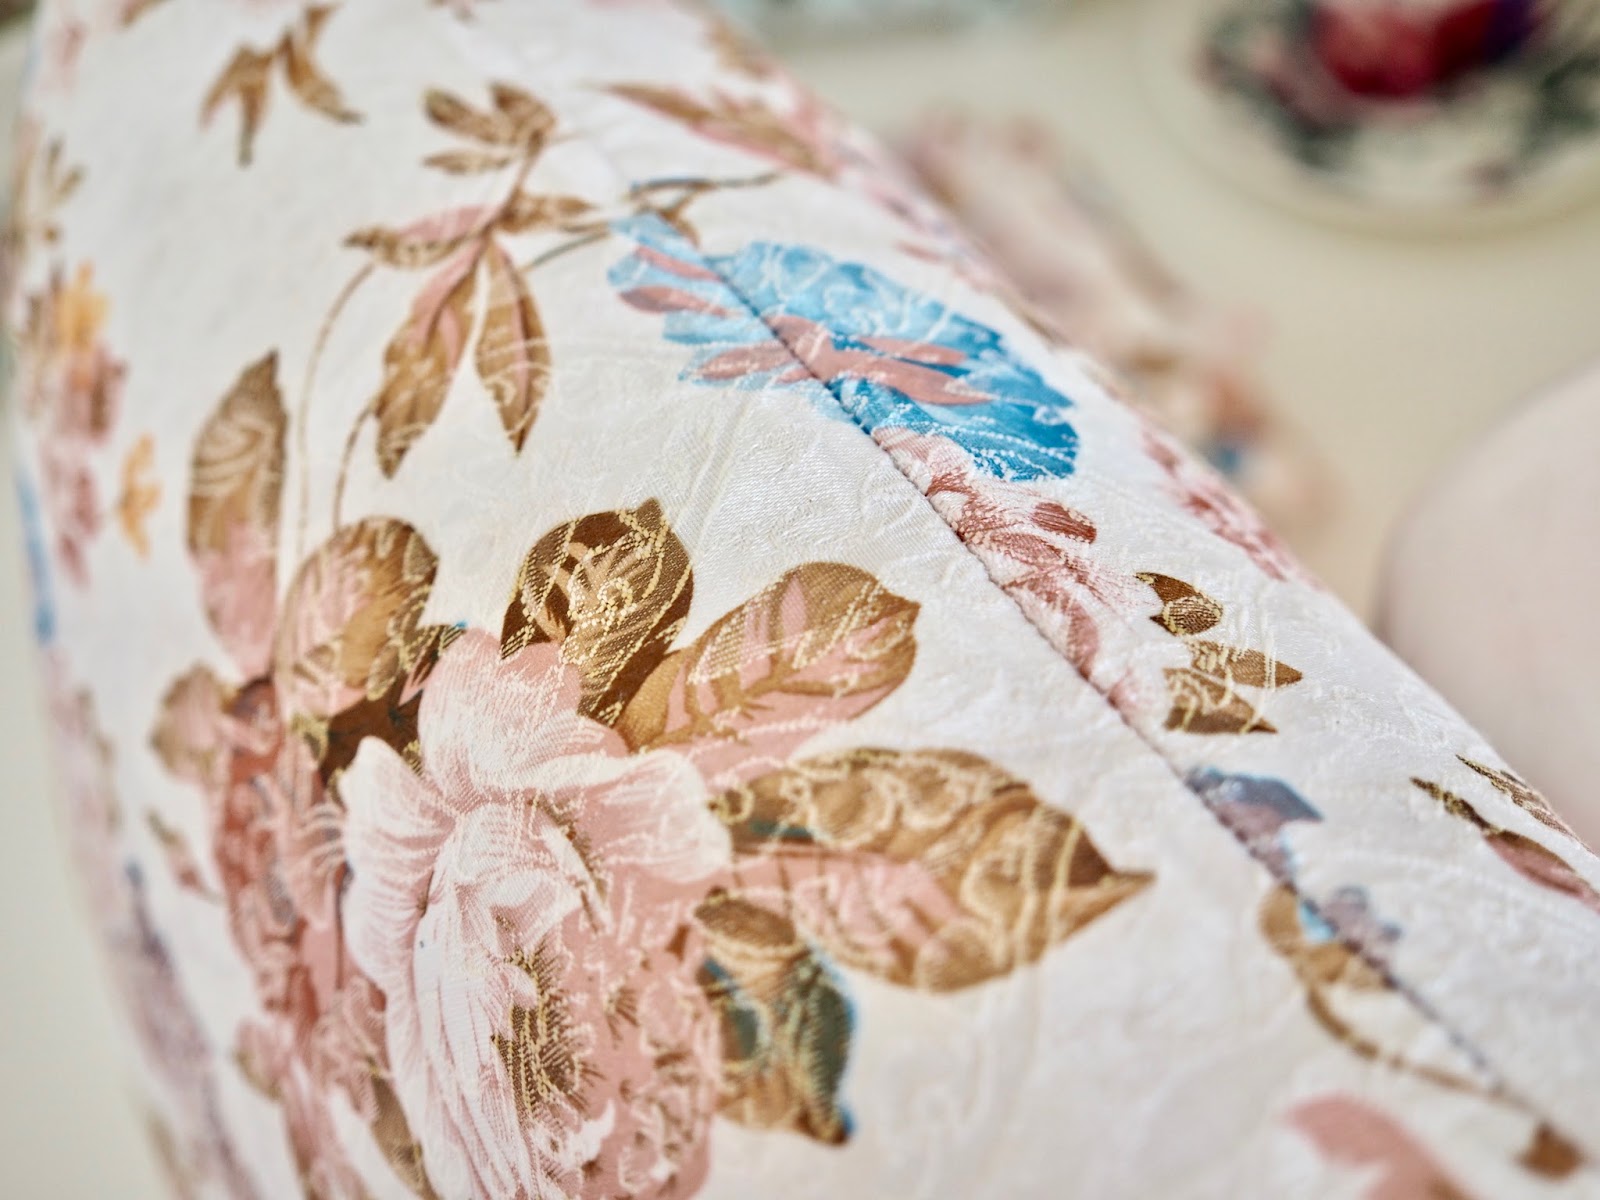
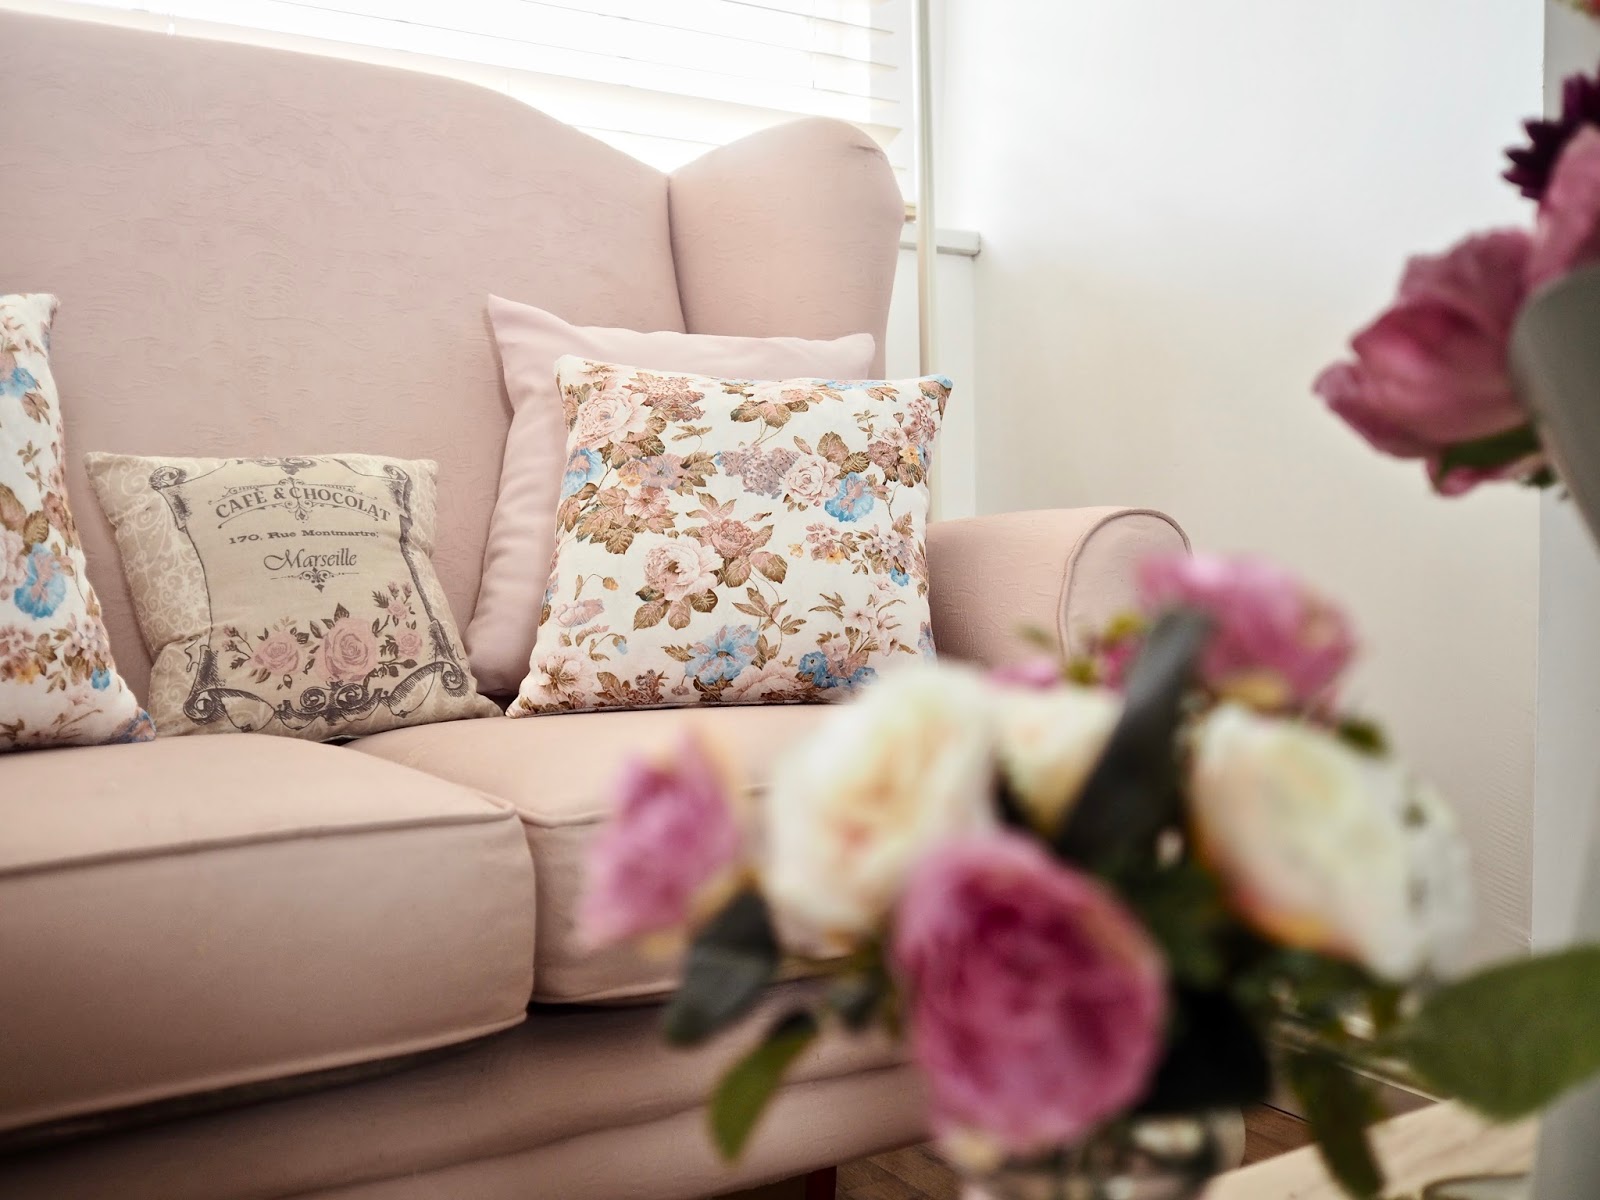
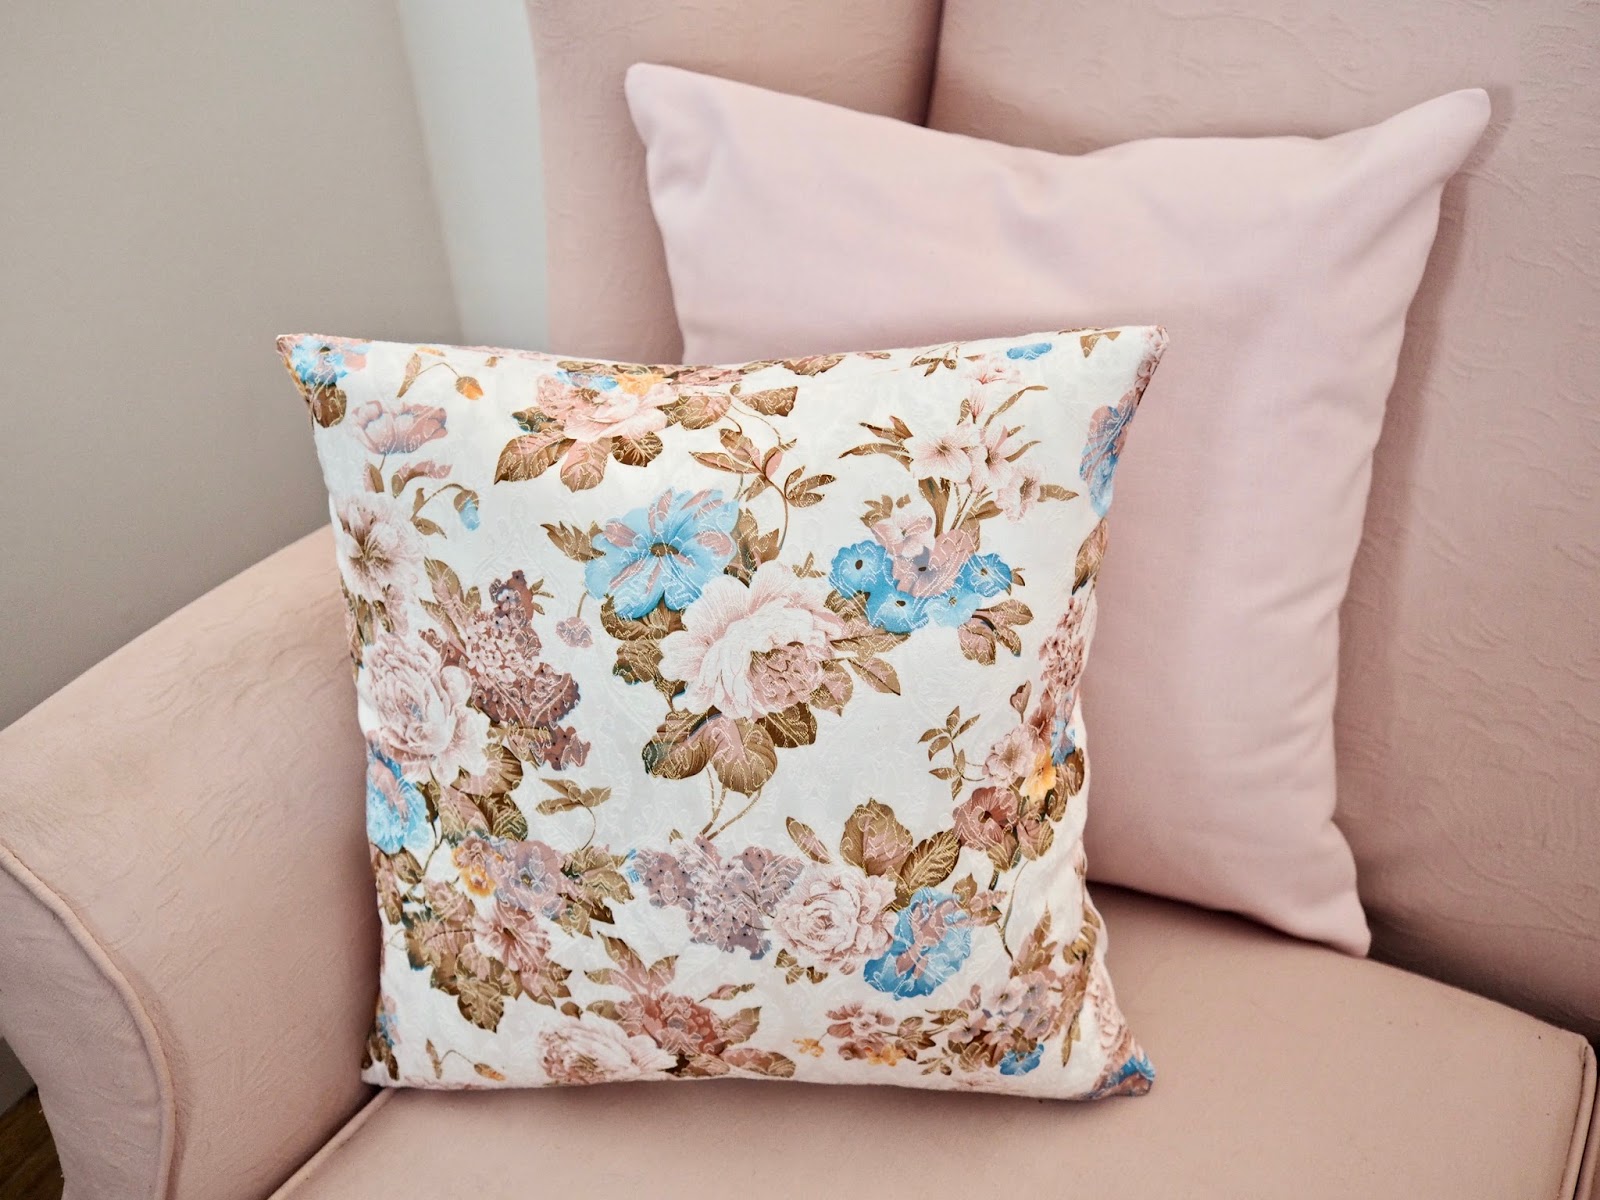
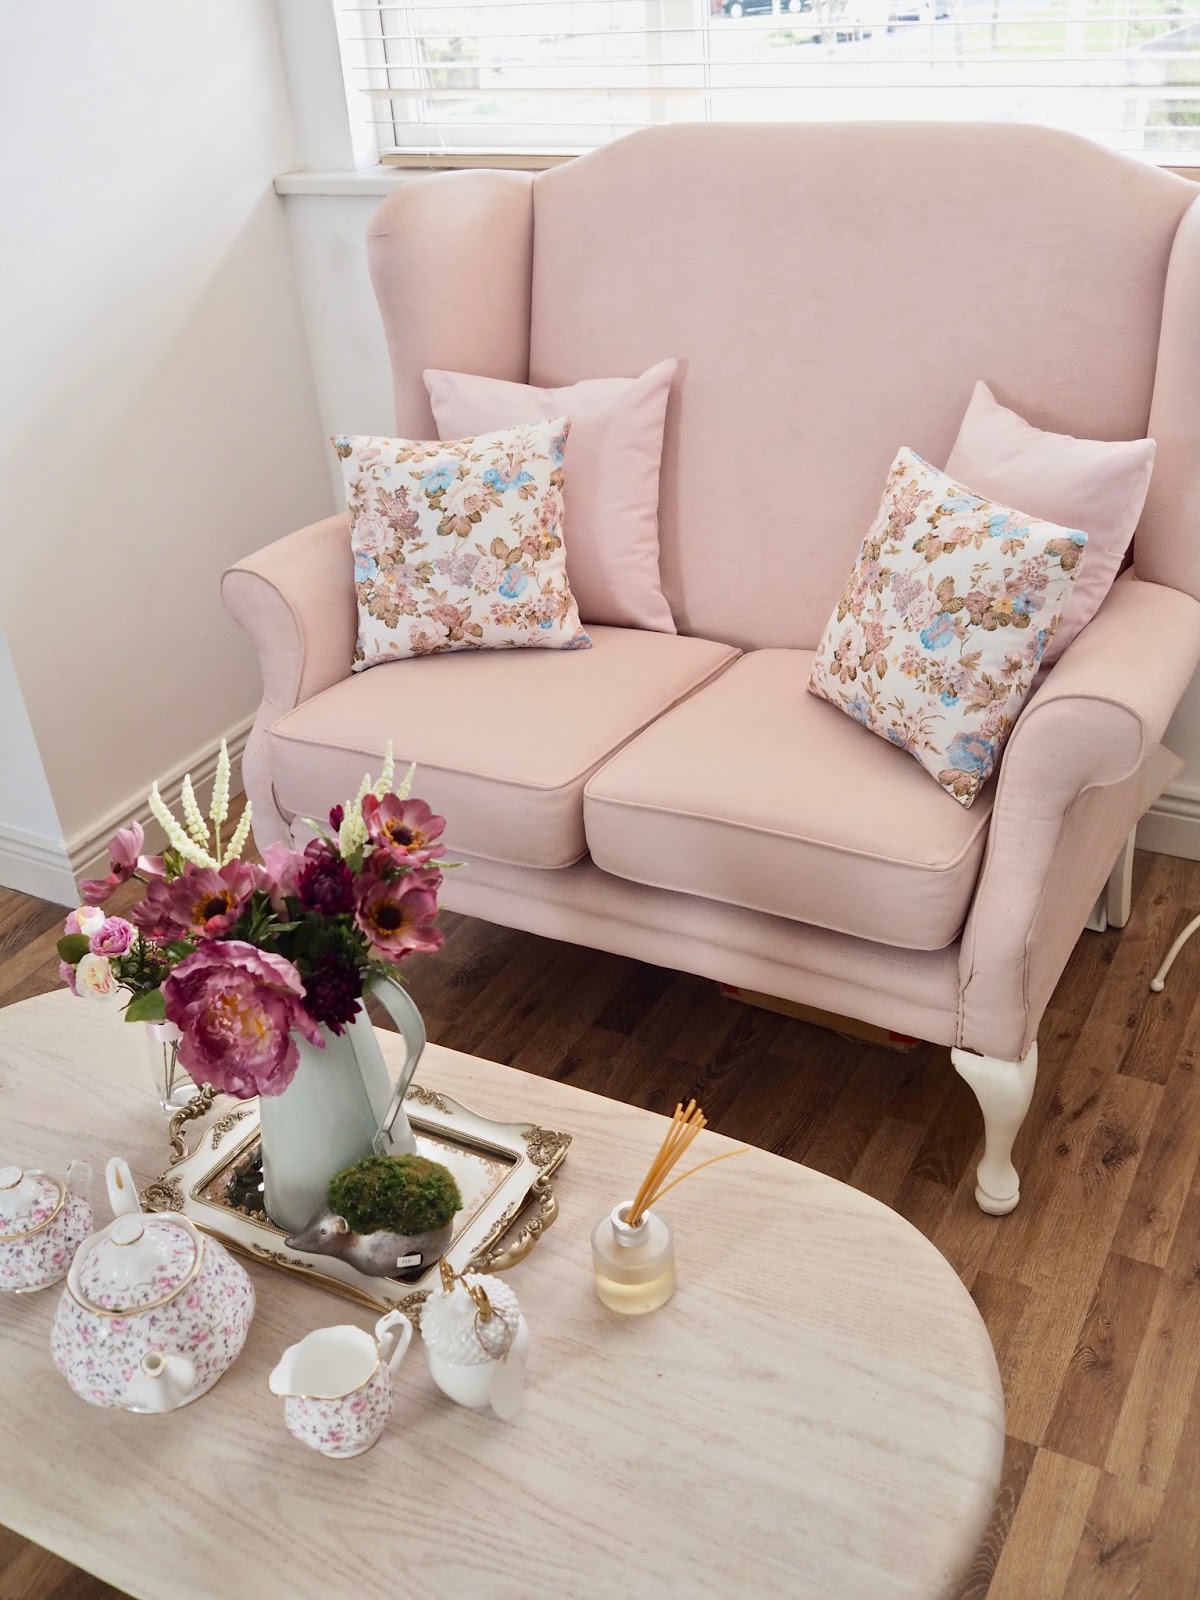
The first thing you will need to get is some nice fabric. I love picking fabrics and I have a soft spot for florals. I used fabric today that would match my pink chair in my bedroom.
I want to change up the cushions on this chair to give it a freshen up. That is the fun thing about sewing, if you want to change up your decor then get a metre or two of fabric and get crafty, you can save yourself money and you get to have pieces in your home that others don’t have.
I am using fabric from Hickeys, I normally head to my local Hickeys in Blanchardstown for fabric but you can also shop online if you are not near a store. If you are a beginner then I recommend starting off with the cotton or poly-cotton craft fabrics. These have very little stretch and are easy to work with when starting off.
There is a wide range of fabrics available in-store and online. When I was first learning to sew my favourite thing was heading into Hickeys to pick fabric for my next project.
If you are like me and love your florals then you will be pleased to know that they have loads of stunning printed fabrics in stock at the moment.
– 1 metre of fabric ( depending on how many cushions you want to make )
– Fabric scissors
– Pins
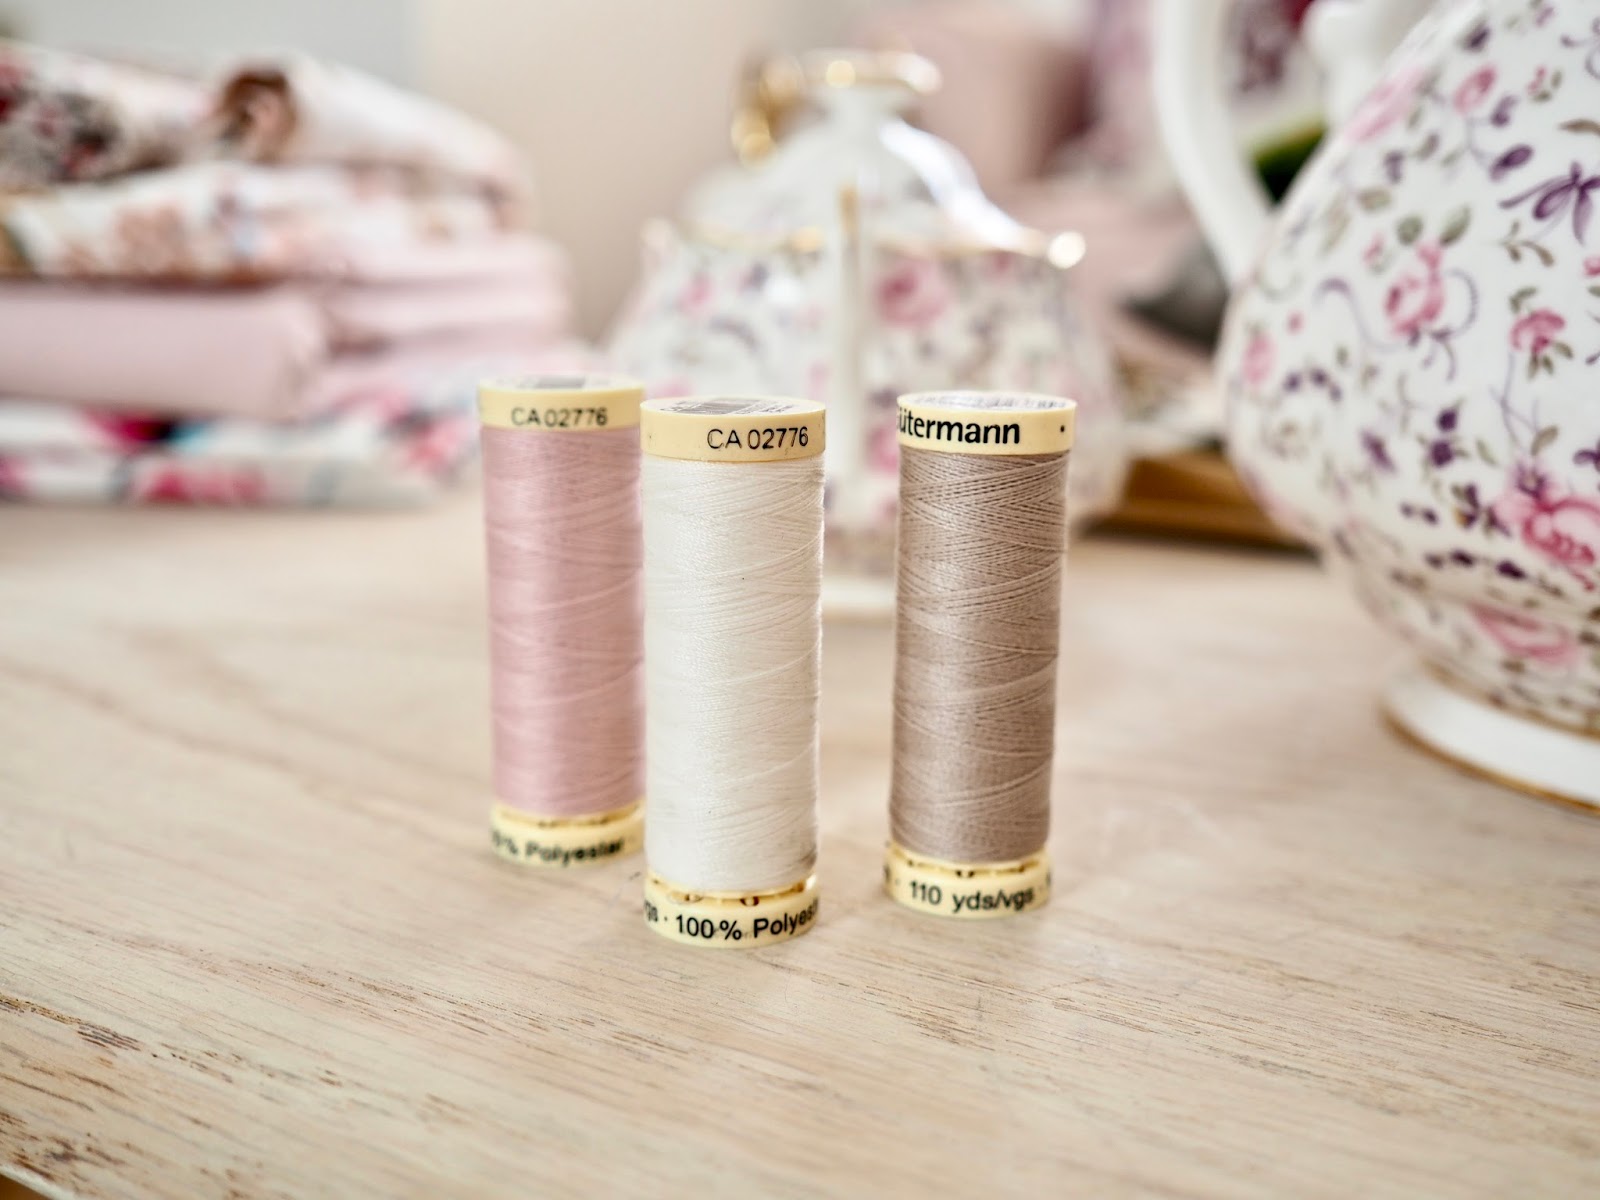
– Thread in a matching colour to your fabric
– Paper to make a template/pattern
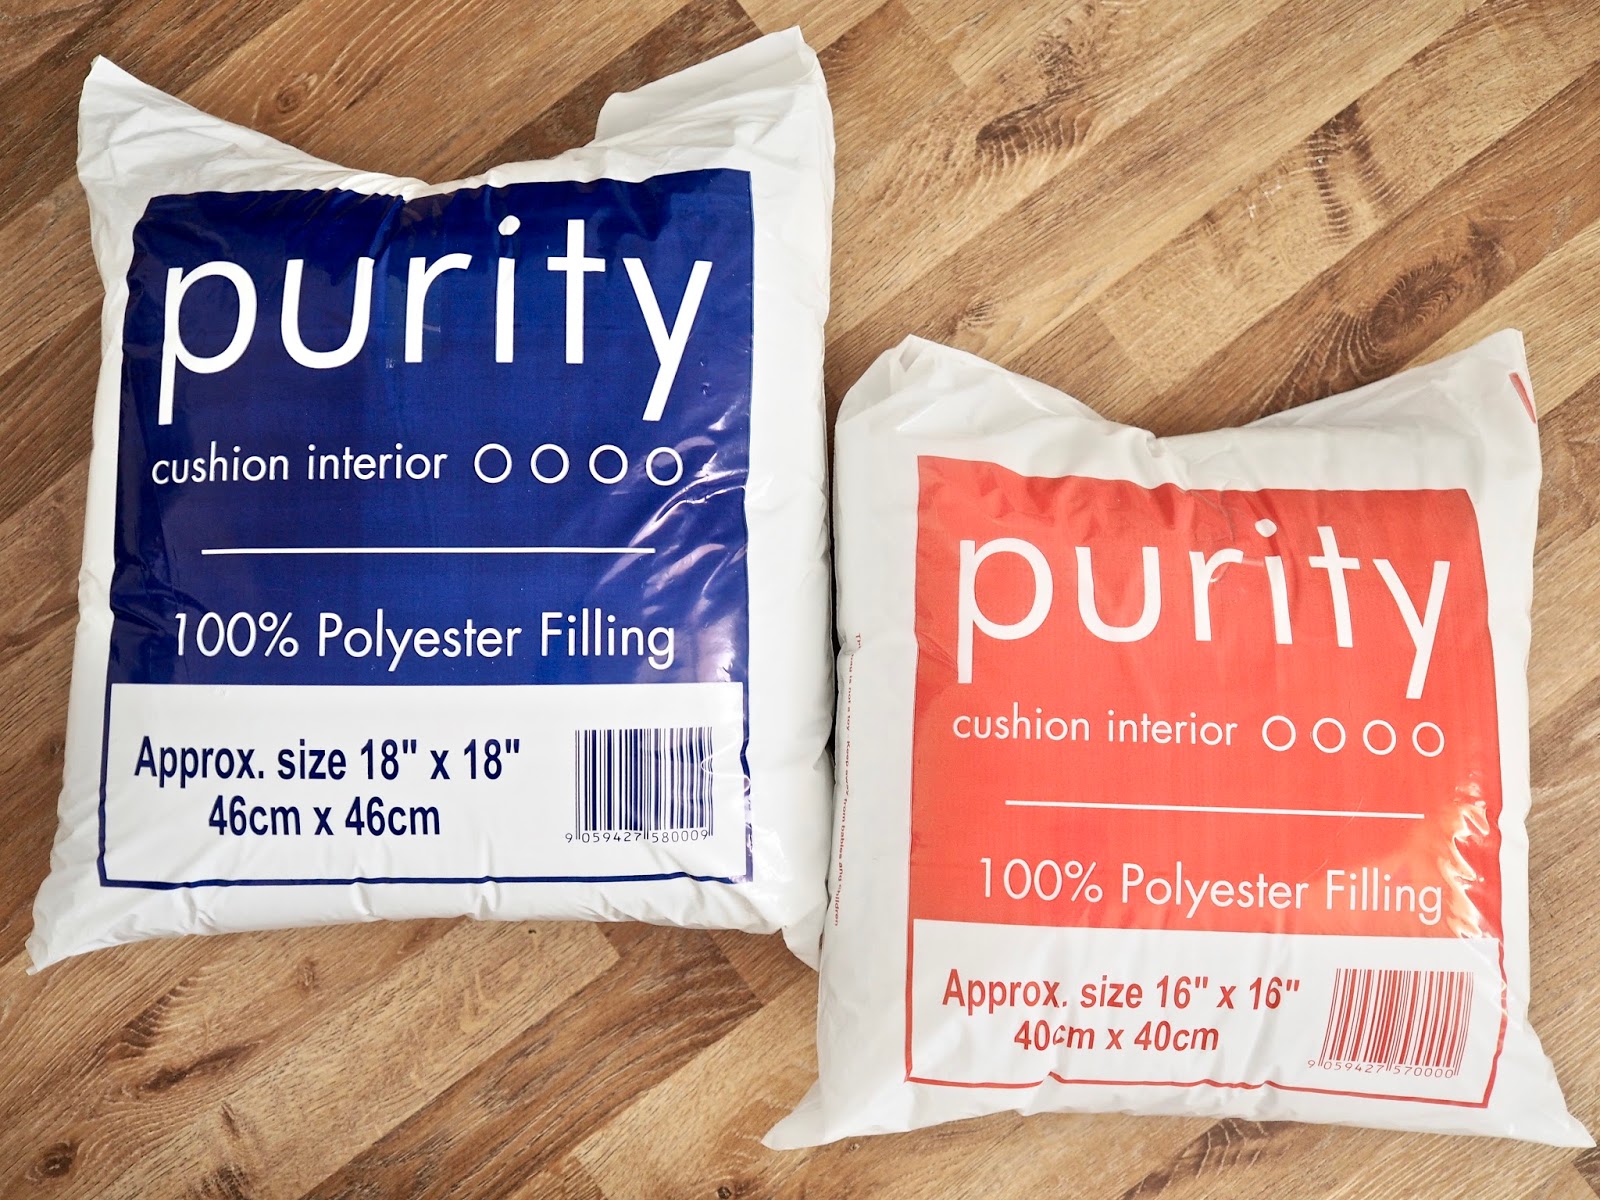
– Cushion pad in the size you want to make
– A good iron
Fabrics I used in the video and in this post
Ava Jacquard fabric
Jardin Pink Blue fabric
Alora Dusk fabric
Always use good quality thread
When it comes to thread, I highly recommend using good quality thread and avoid the threads that come in sets. Keep the cheaper quality threads for hand sewing.
When I was learning to sew I had trouble with poor quality threads bunching up in my sewing machine and leaving me with poor stitches.
Nowadays, I always use the Guttermann threads in my machine and these are of great quality. Hickeys Homefocus stocks the Guttermann threads in-store and online so you can easily pick up a contrasting thread for your fabric.
Make a template/pattern for your envelope cushion
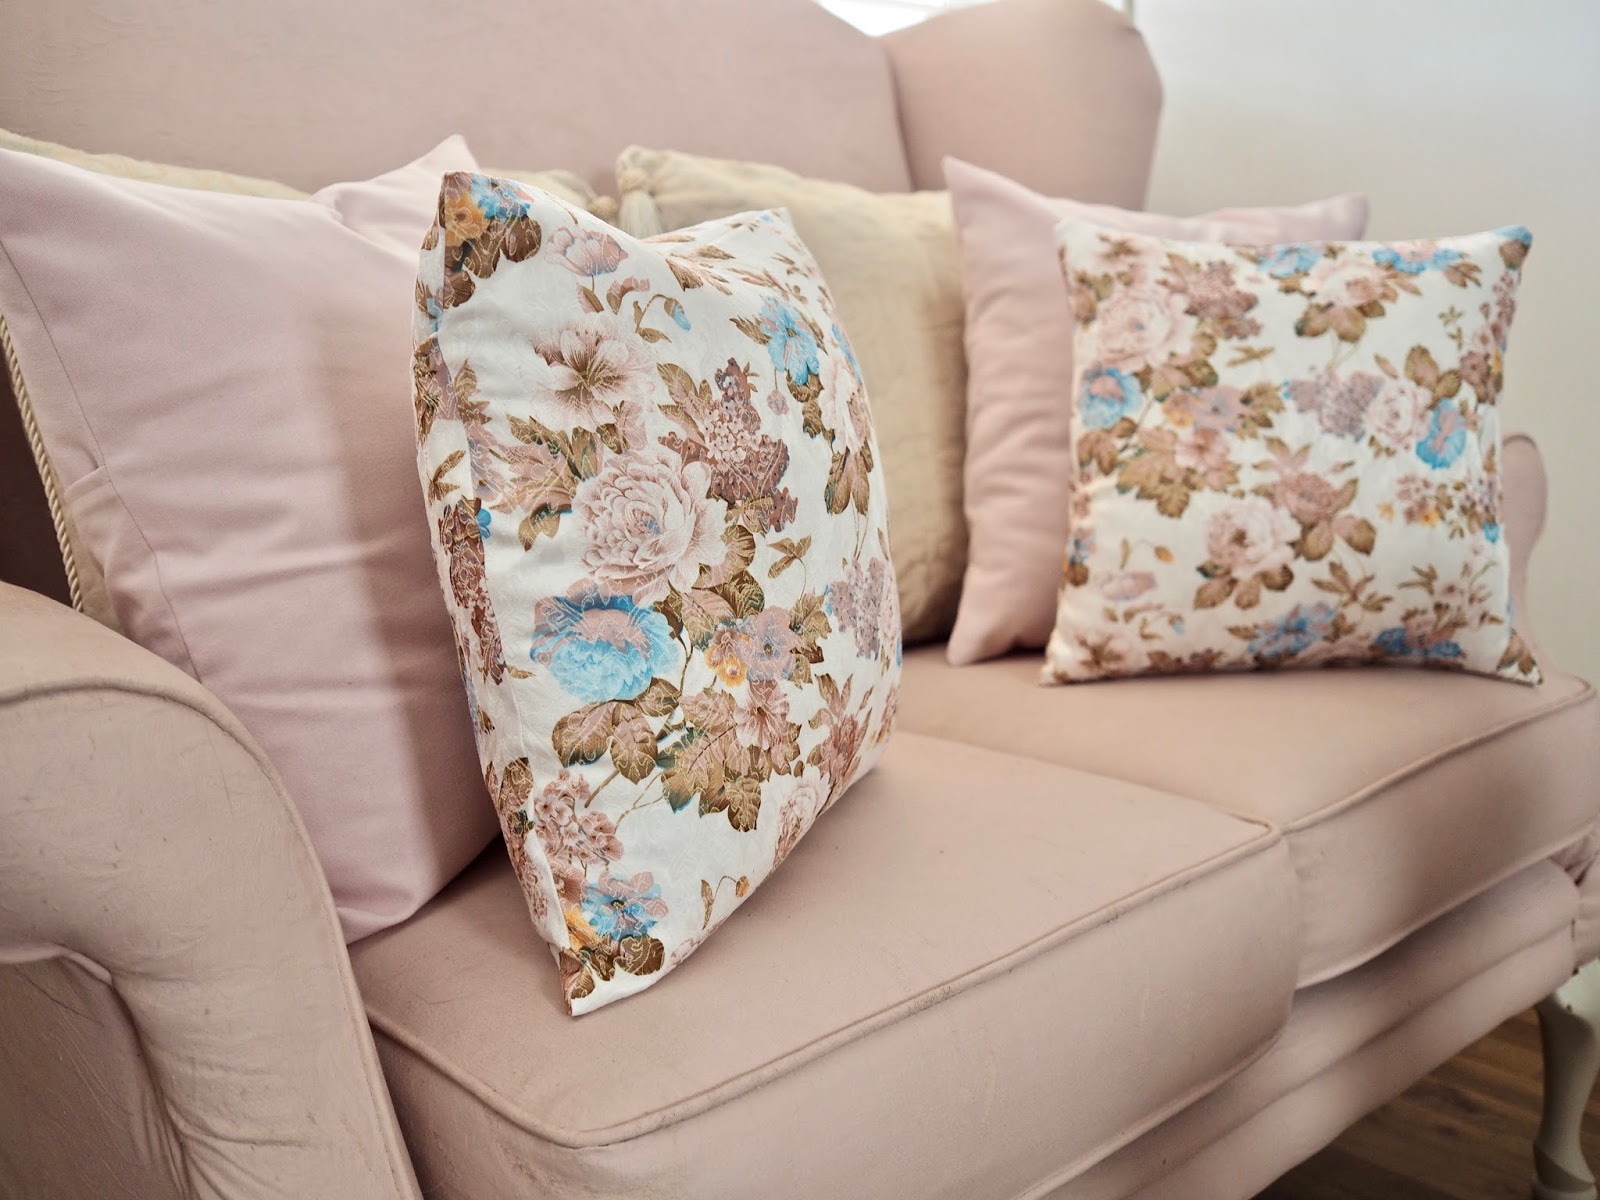
So, I find it easier to make myself a template. In today’s post, I made a 16×16 inch cushion and I also made an 18×18 inch cushion.
If you make yourself a template then you can easily take it out whenever you want to make some cushions. Also, it also makes it easier when you are making a few cushions at one time.
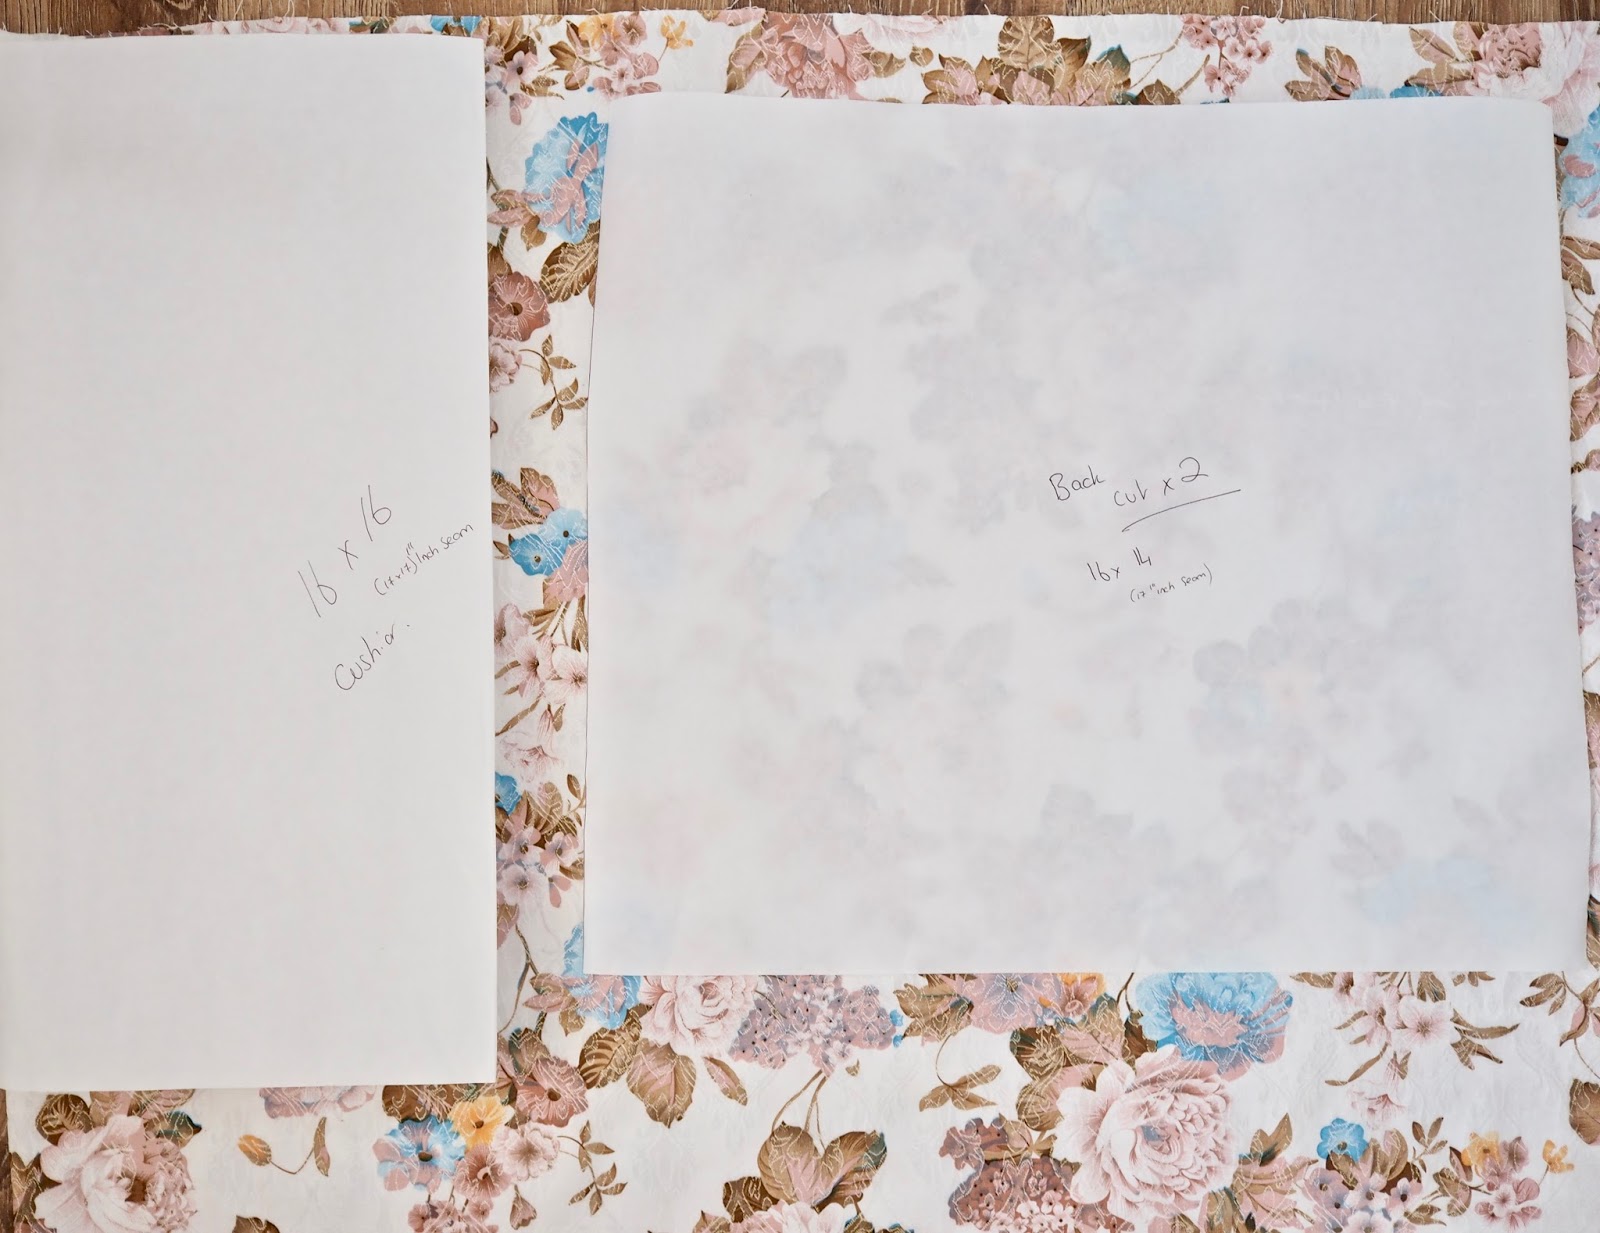
Using my tape measure and some paper I measured out a template. You will have a front and a back template for this project. For the front of the cushion, you will need to make a 16×16 inch template.
However, you need to allow for a 1inch seam allowance so you will need to measure out 17×17 inches on your paper. For the back template, you will need to measure out 17 x14 inches.

If you want to make a bigger or smaller cushion then just adjust your measurements. So, for example, my 18×18 inch cushion I cut a 19×19 inch pattern.
So, whatever the size of the cushion you want to make, just adjust it and make sure to allow for your 1-inch seam allowance.
Cut out your fabric
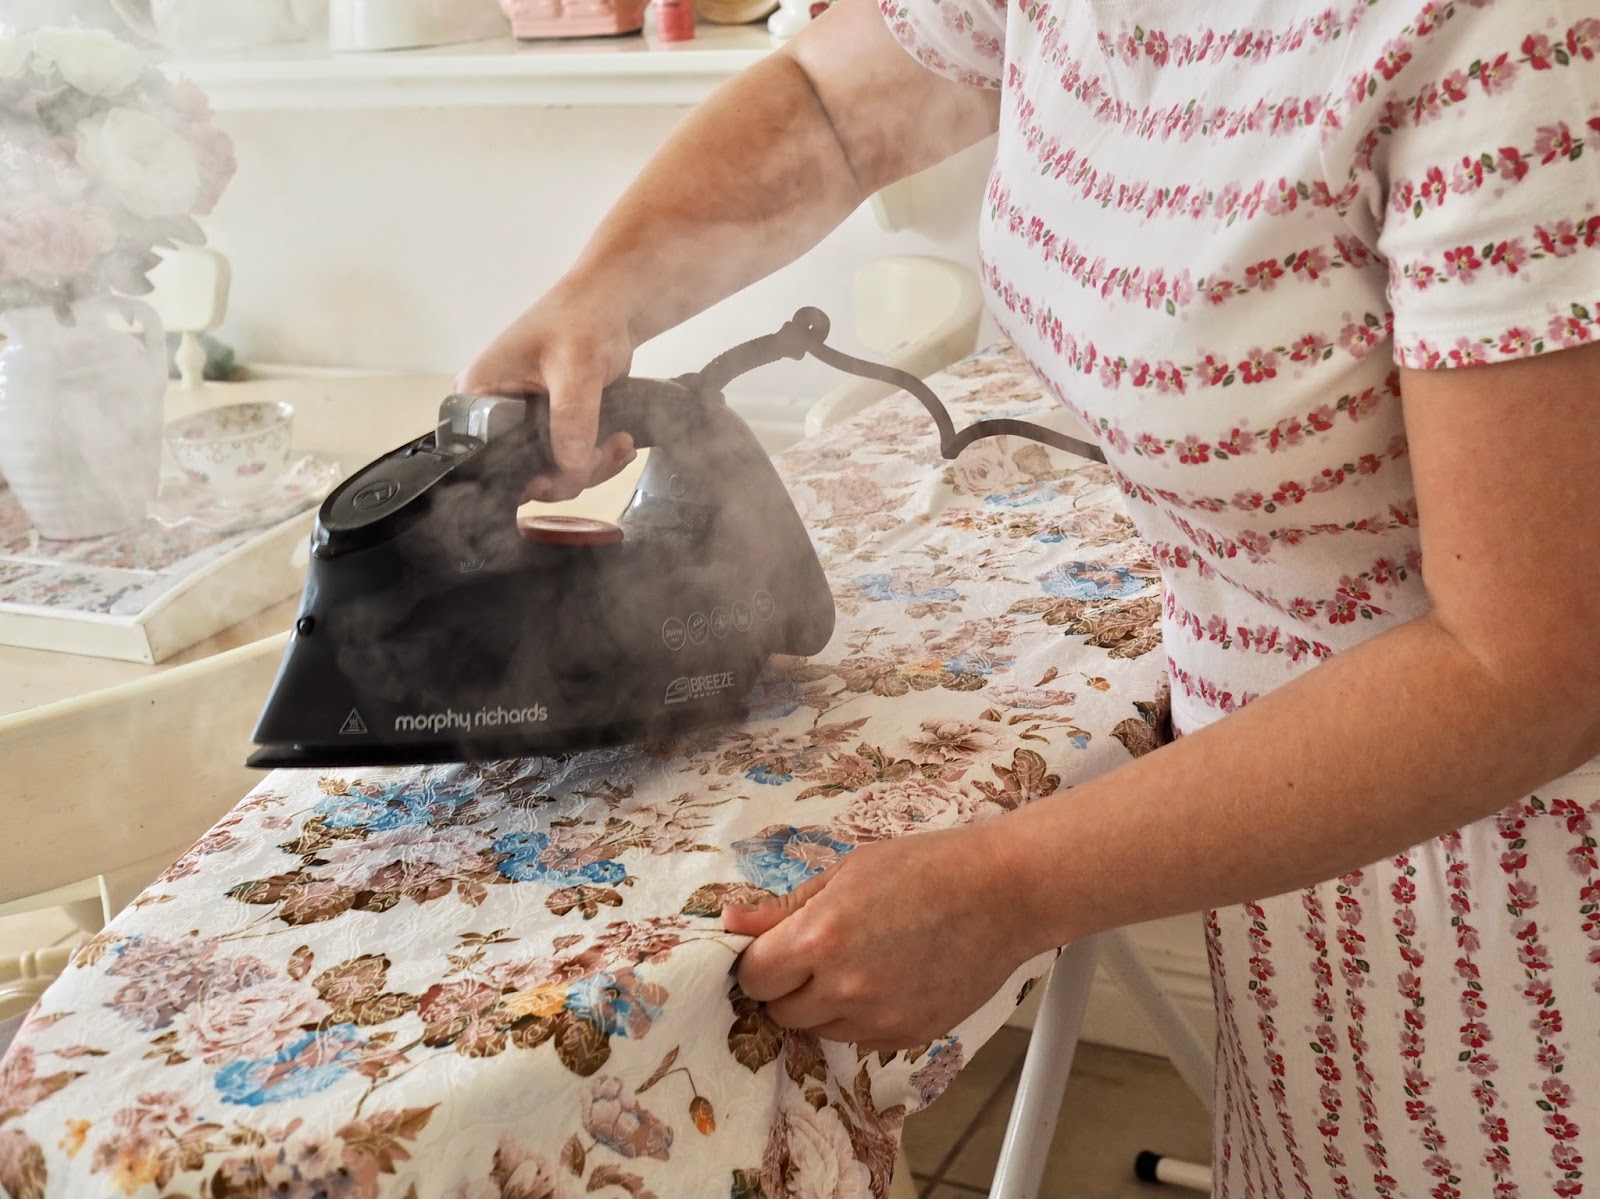
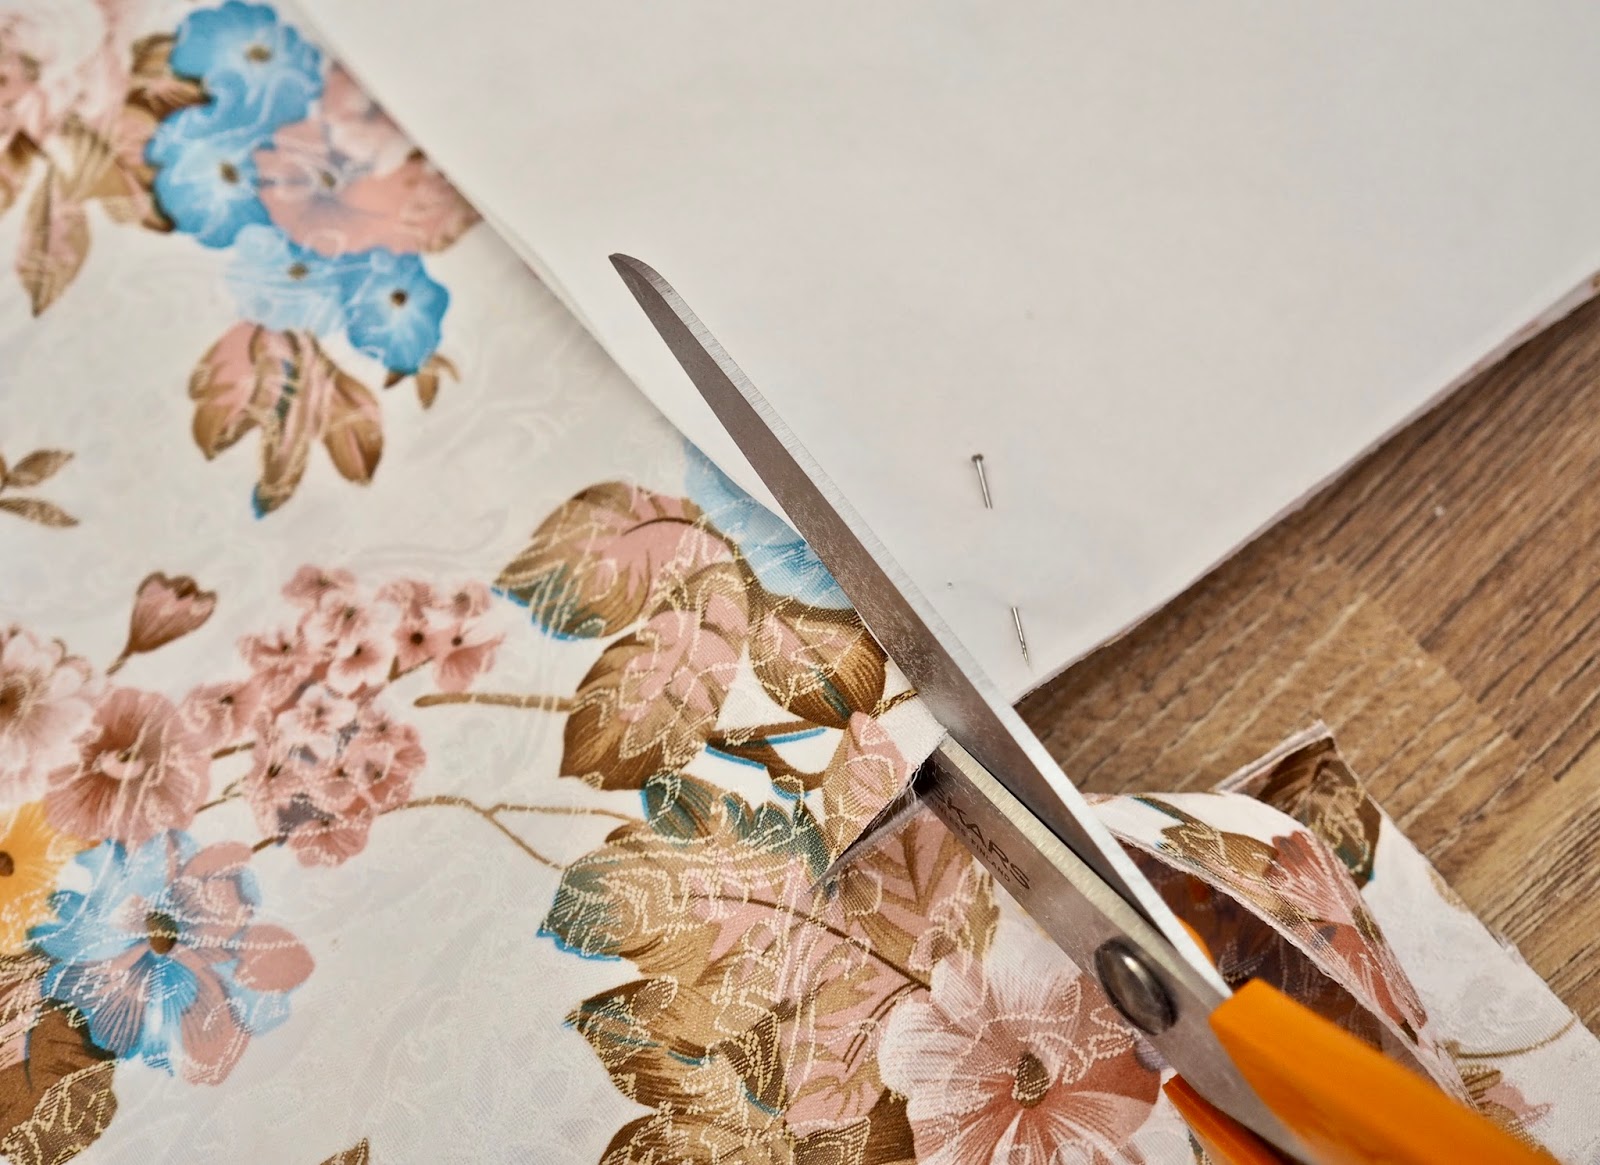
Iron your fabric before cutting it, having crease-free fabric will make it easier to cut out your template. Pin your template to your fabric.
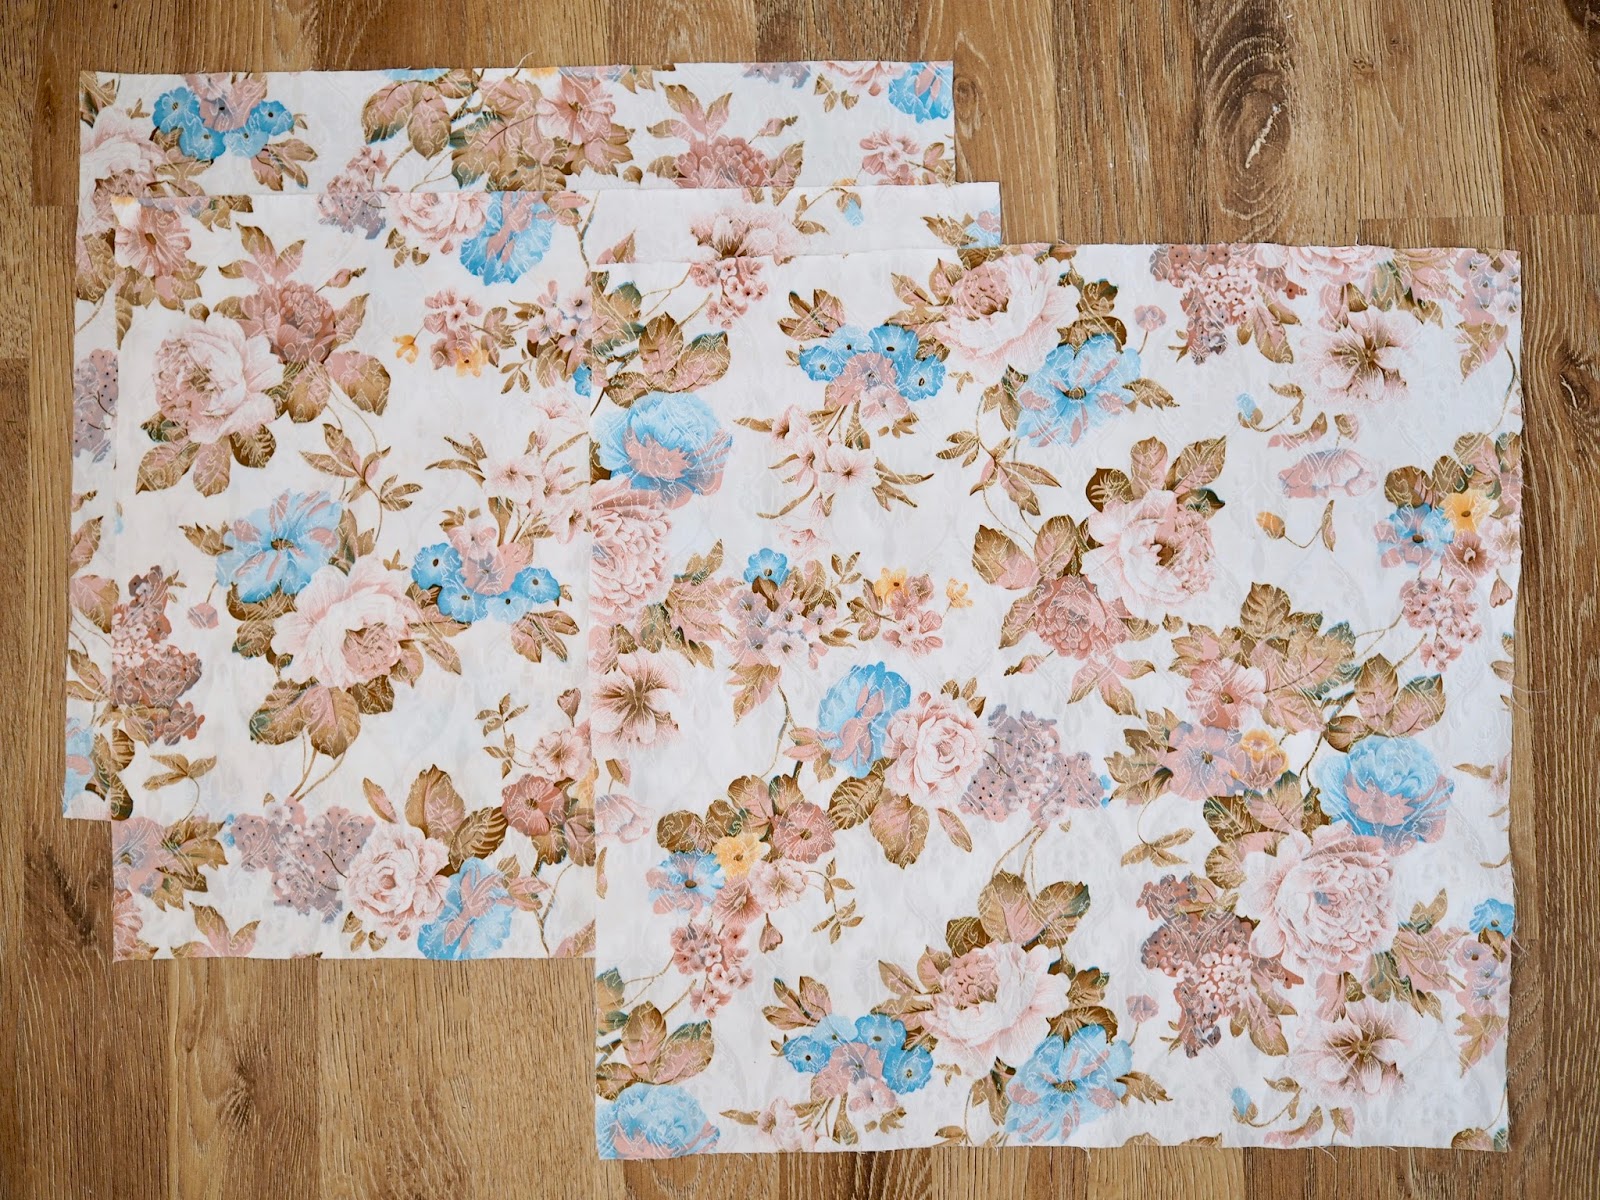
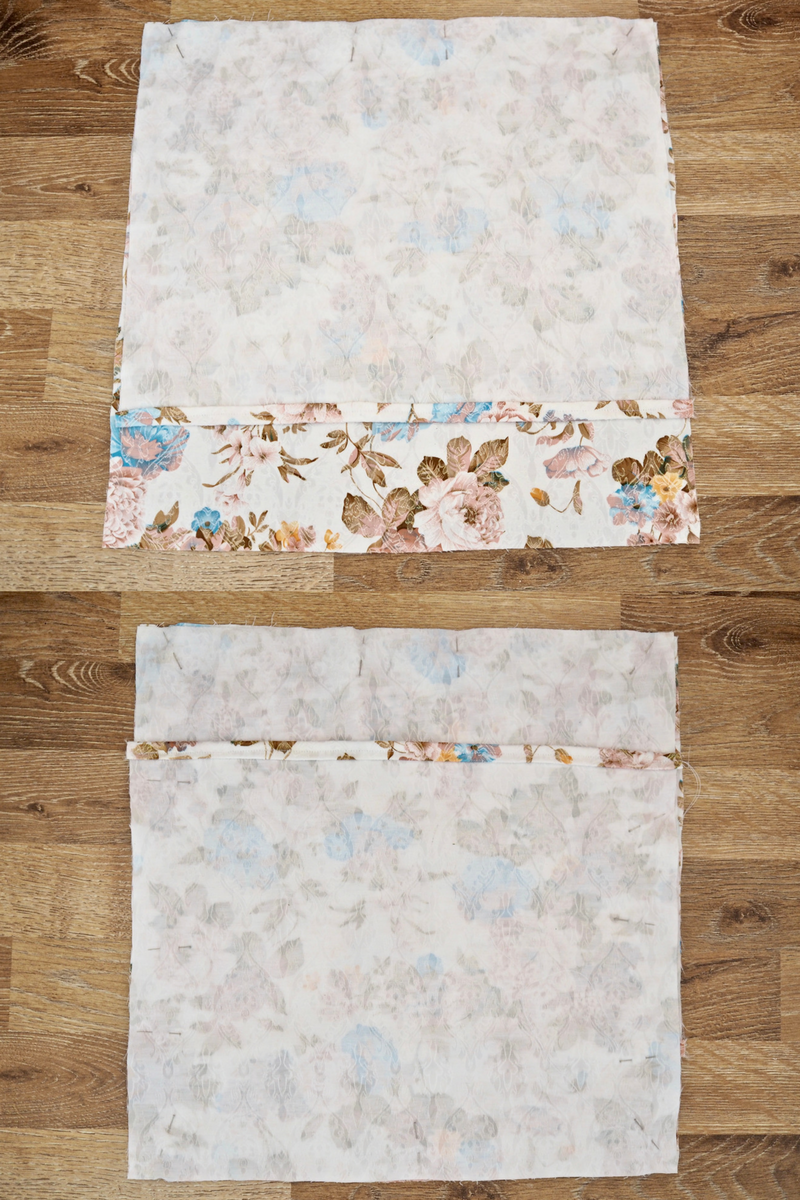
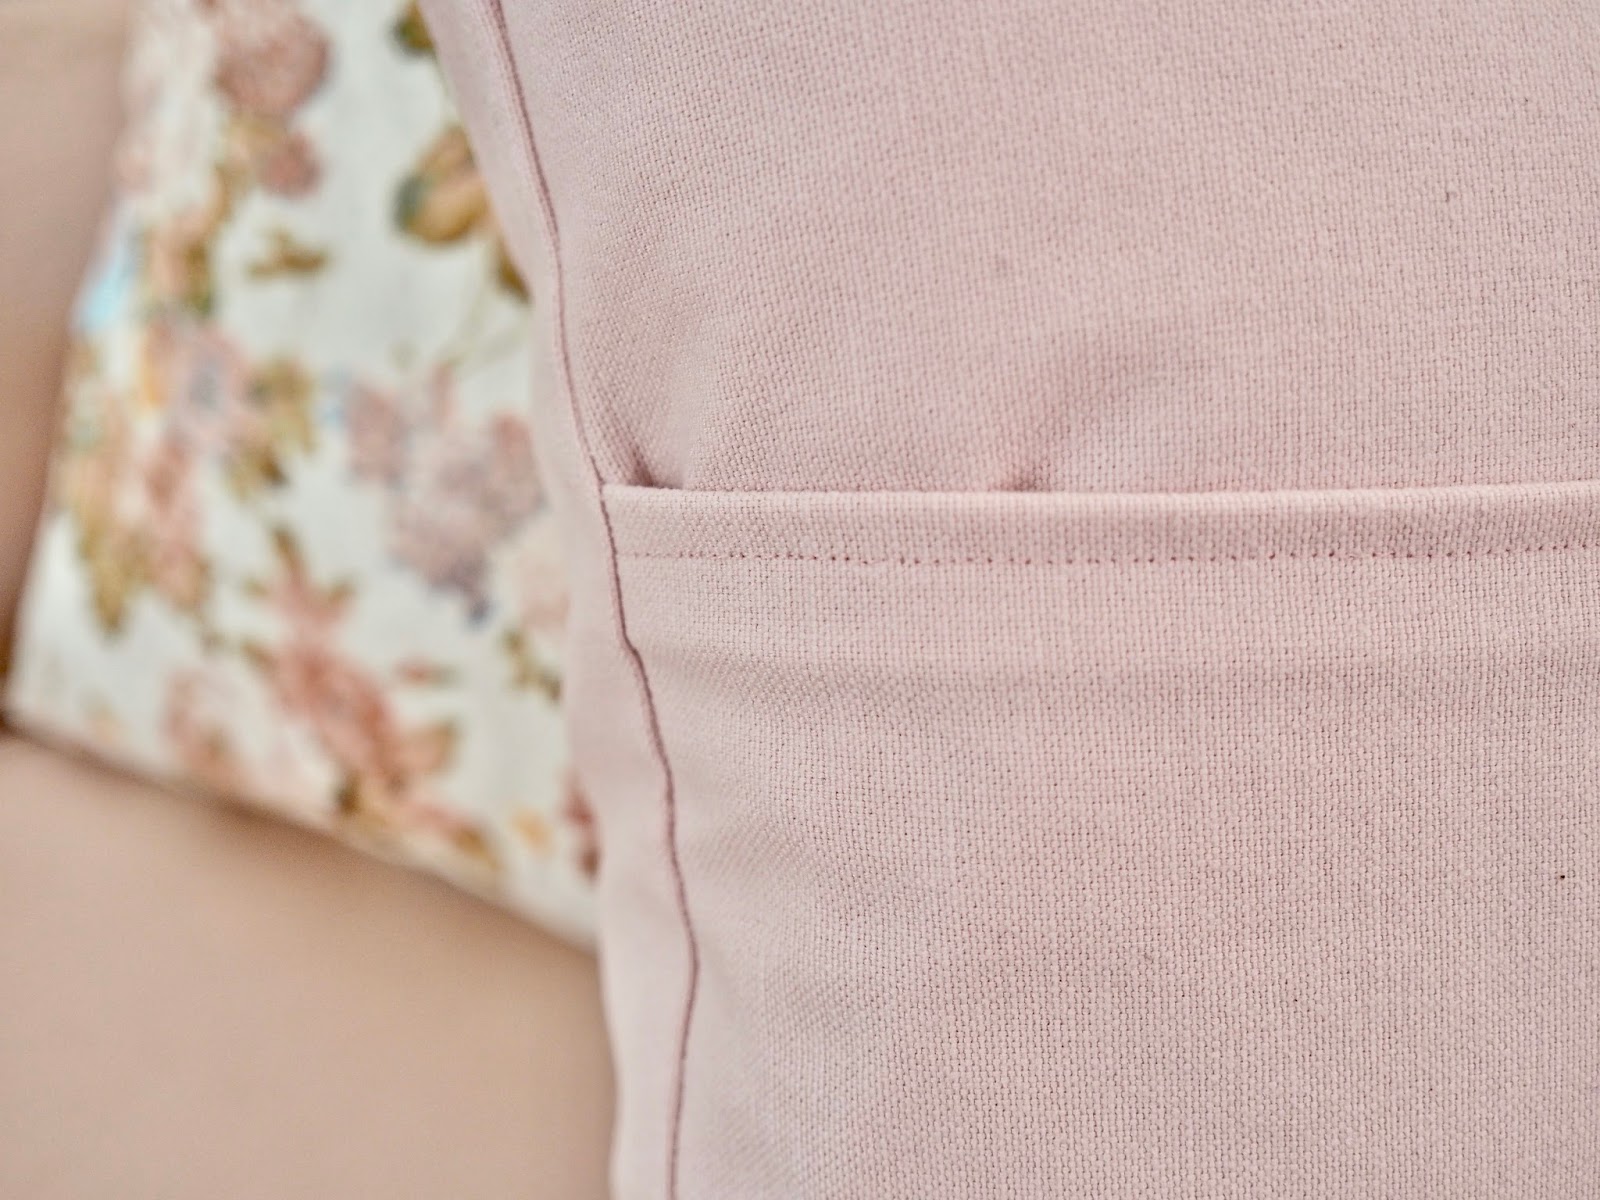
You will cut one piece for your front and then two pieces for the back. Your back has two pieces as they overlap giving the envelope shape to your cushion.
Also, always take your time cutting out your fabric, cutting fabric is just as important as sewing your piece. You want to cut the fabric as straight as you can to make it easier for you when you are sewing.
Using your fabric scissors cut out the three pieces of fabric that you will need to make your cushion. I highly recommend getting good fabric scissors as they will last year and you can get them sharpened too. The one I am using is the Fiskars universal purpose scissors.
When cutting a lot of fabric your hand can get tired and sore, these scissors are easier to hold and gives good grip making it easier on your hand. Never, ever use your good fabric scissors to cut paper.
You will ruin the blade of your scissors so always keep your fabric scissors for fabric only. When I started sewing I used cheaper tools and I ended up having to replace them over time, my best advice is to spend on good tools as they will stand the test of time and be more valuable to you in the long term.
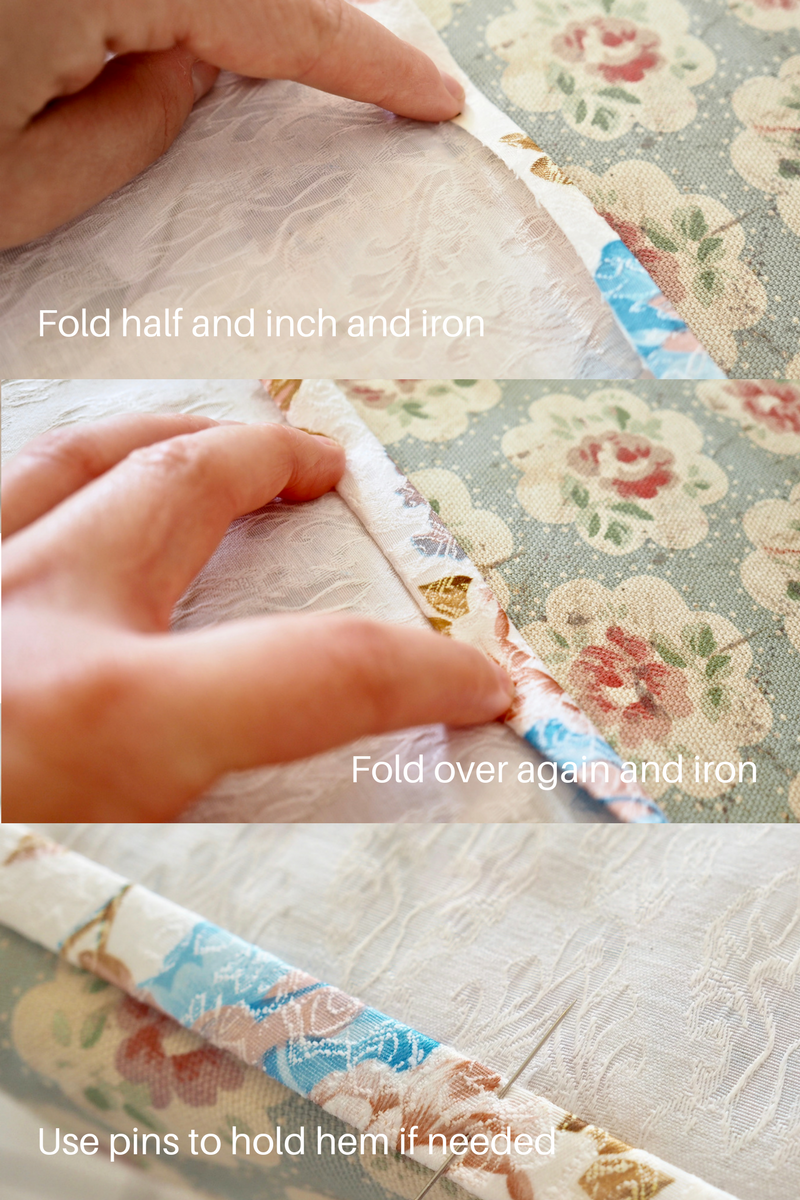
Sew a hem on your back pieces to make your envelope cushion
You are now going to sew a 1-inch hem onto your two back pieces. These two pieces need a hem so the fabric won’t fray on you. Using your iron, fold over half an inch and press.
You can use your measuring tape as a guide. Once you have ironed your half an inch you are then going to fold it over again and press.
Depending on the fabric you may need to secure it with some pins. Using your sewing machine you will then sew a straight stitch down the hem of your fabric. Start with a reverse stitch to secure your stitch and stop it from coming loose.
I have put together a Youtube video which I will link below if you want to have a look at how I did this.
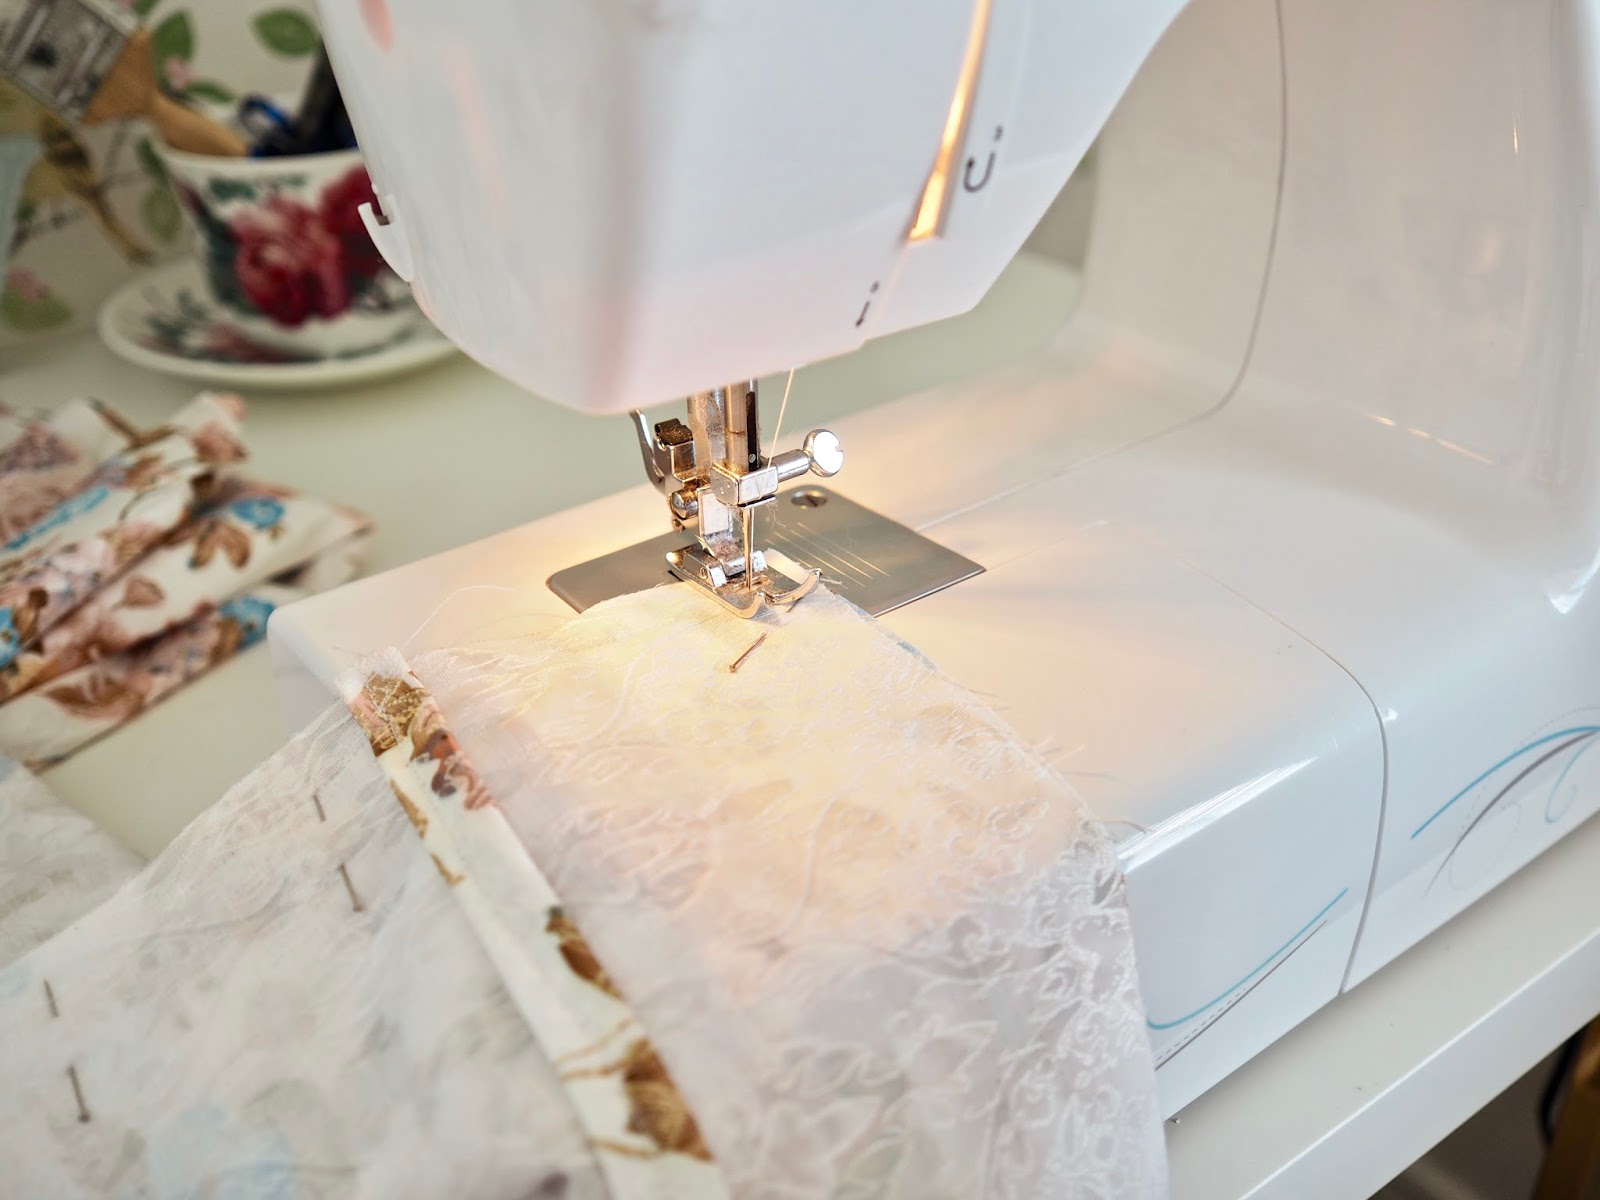
Sew all your pieces together to complete your envelope cushion
You are now going to sew all three of your pieces together and form your cushion. The most important thing here is to make sure you face the right sides of your fabric face together.
I place my front piece down on the patterned side of the fabric facing me. I then lay a back piece of fabric to the front making sure the two patterned sides are facing each other.
I then add the third piece and I pin the fabric together. I use a lot of pins to make sure the fabric stays in place when I am sewing. Place your pins facing outwards as this means you can sew over them.
Once your cushion is pinned together you can now sew it on your machine. Make sure to leave your 1inch seam allowance. You can use the guide on the plate of your sewing machine as a guide.
Make sure to start and end with a reverse stitch to stop your thread from unravelling. Sew all around the cushions. Once finished you can remove all of your pins.
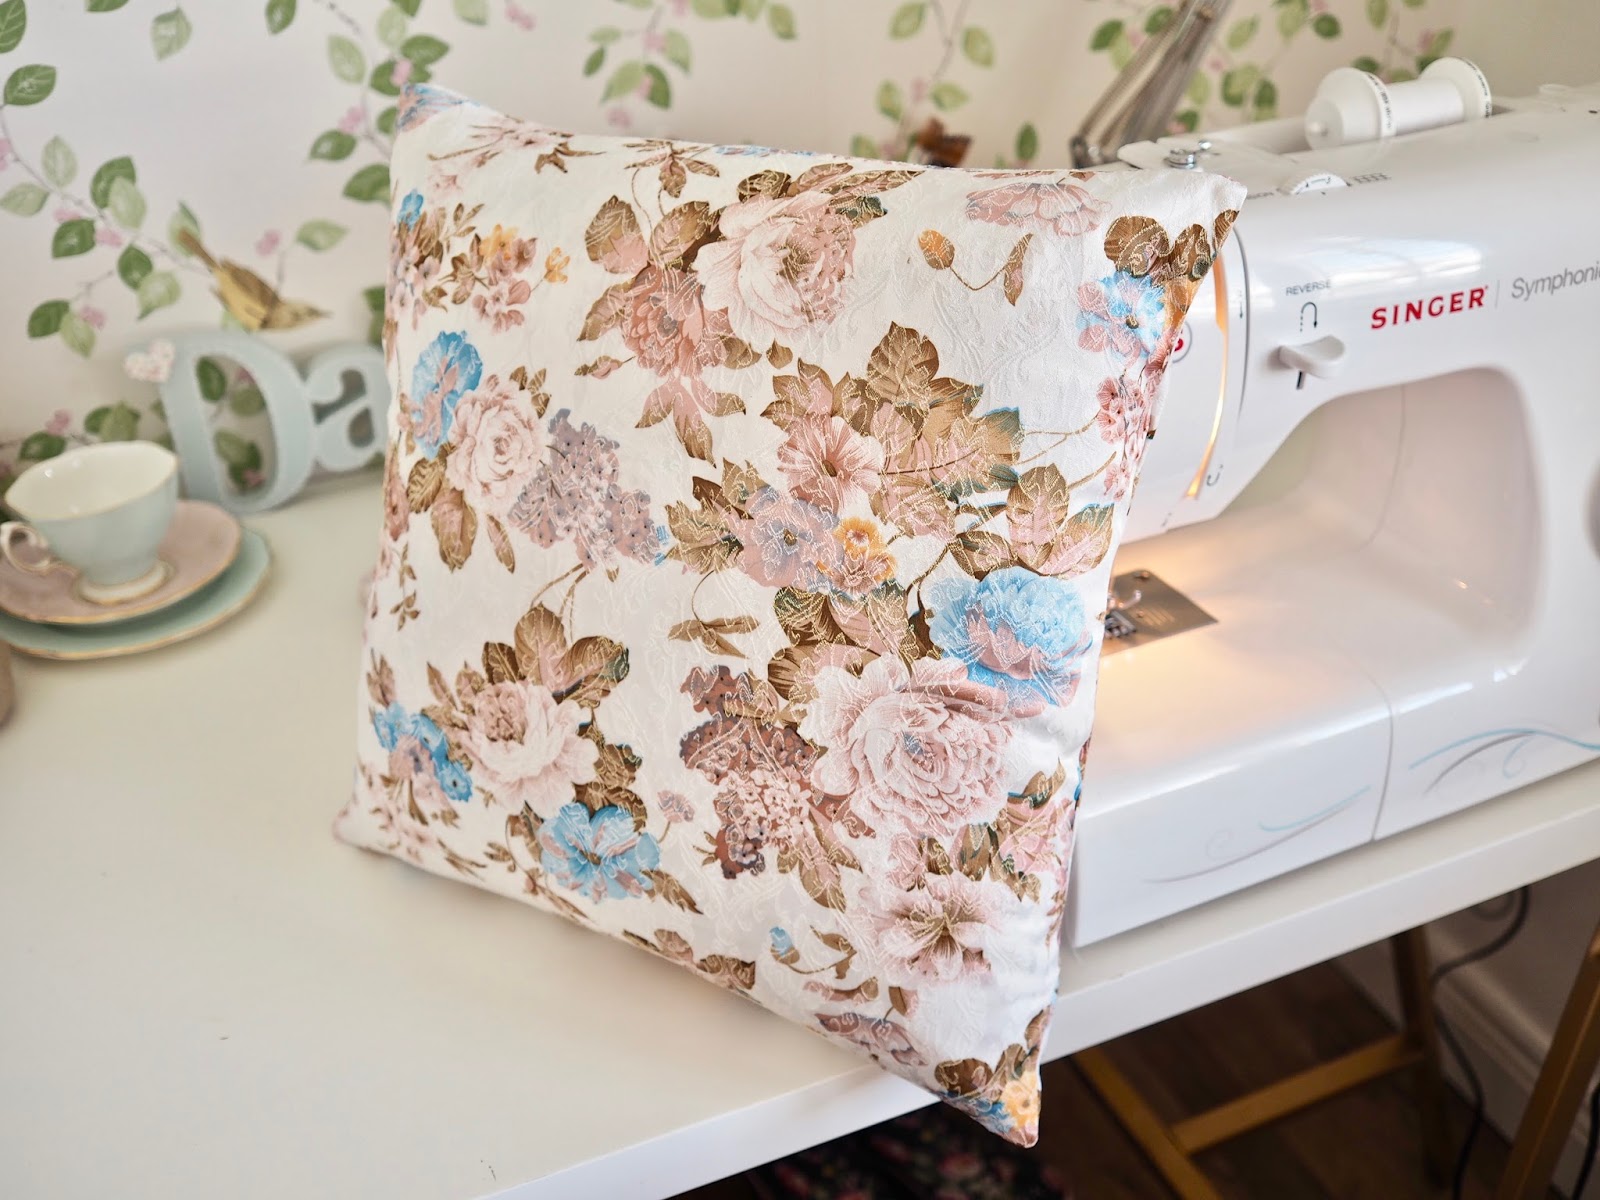
To make sure the corner goes into a nice neat point you can snip the corner of your cushion before you turn it right side out.
My favourite part of a project is turning it from inside out to right side out, I get the crafters buzz when I see my project coming together.
Once you turn your fabric over you can give it an iron to flatten the seams and finish it off. You can then add your cushion pad and have fun admiring and styling your new cushion.
Free Craft Demos
If you want to get more inspiration and guidance on projects then you can head to the free craft demos that are held in selected Hickeys stores throughout Ireland.
Classes vary from dressmaking to Roman blinds! So a project for every level. They have a timetable on their website which you can check out here and get more information on how to register for the demos.
I noticed that they have a workshop on “how to use your sewing machine and sewing tips” so, if you are not feeling too confident using your machine then check out that class. https://www.homefocus.ie/blog/free-craft-demonstrations/
Please let me know if you give this project a try, you can tag me over on Instagram in your pictures and don’t forget to check out my Youtube video down below.
You can also head over to the Hickeys Instagram account to keep up to date with details on demos and promotions.
Thanks for reading, Chat soon, Catherine.
Please add this image to your Pinterest boards

*This post is sponsored by Hickeys Homefocus, Sponsorships and affiliate links help me to run my blog, thank you for your continued support on my blog.


You are so so kind Mary! I am so glad you enjoy the videos! x Thanks for watching them!
Thank you for sharing this great idea, Dainty! Your video and post have inspired me to dust off my machine and sew a few of these pillows to spruce up my room. Your home decor is lovely–so cheerful and cozy! I think you (and your accent) are cute as a button too, if you don't mind me saying. Your videos are so inspiring: I love watching them and can't wait for the next one!
Yes, I love making some cushions to get back into sewing, so easy to do and I love picking all the different fabrics! Thanks for reading, let me know if you are any?
Ahhh. I was just thinking about how my poor sewing machine hasn't seen much action these days. This looks like the perfect fun little project to get back into the groove of sewing!