
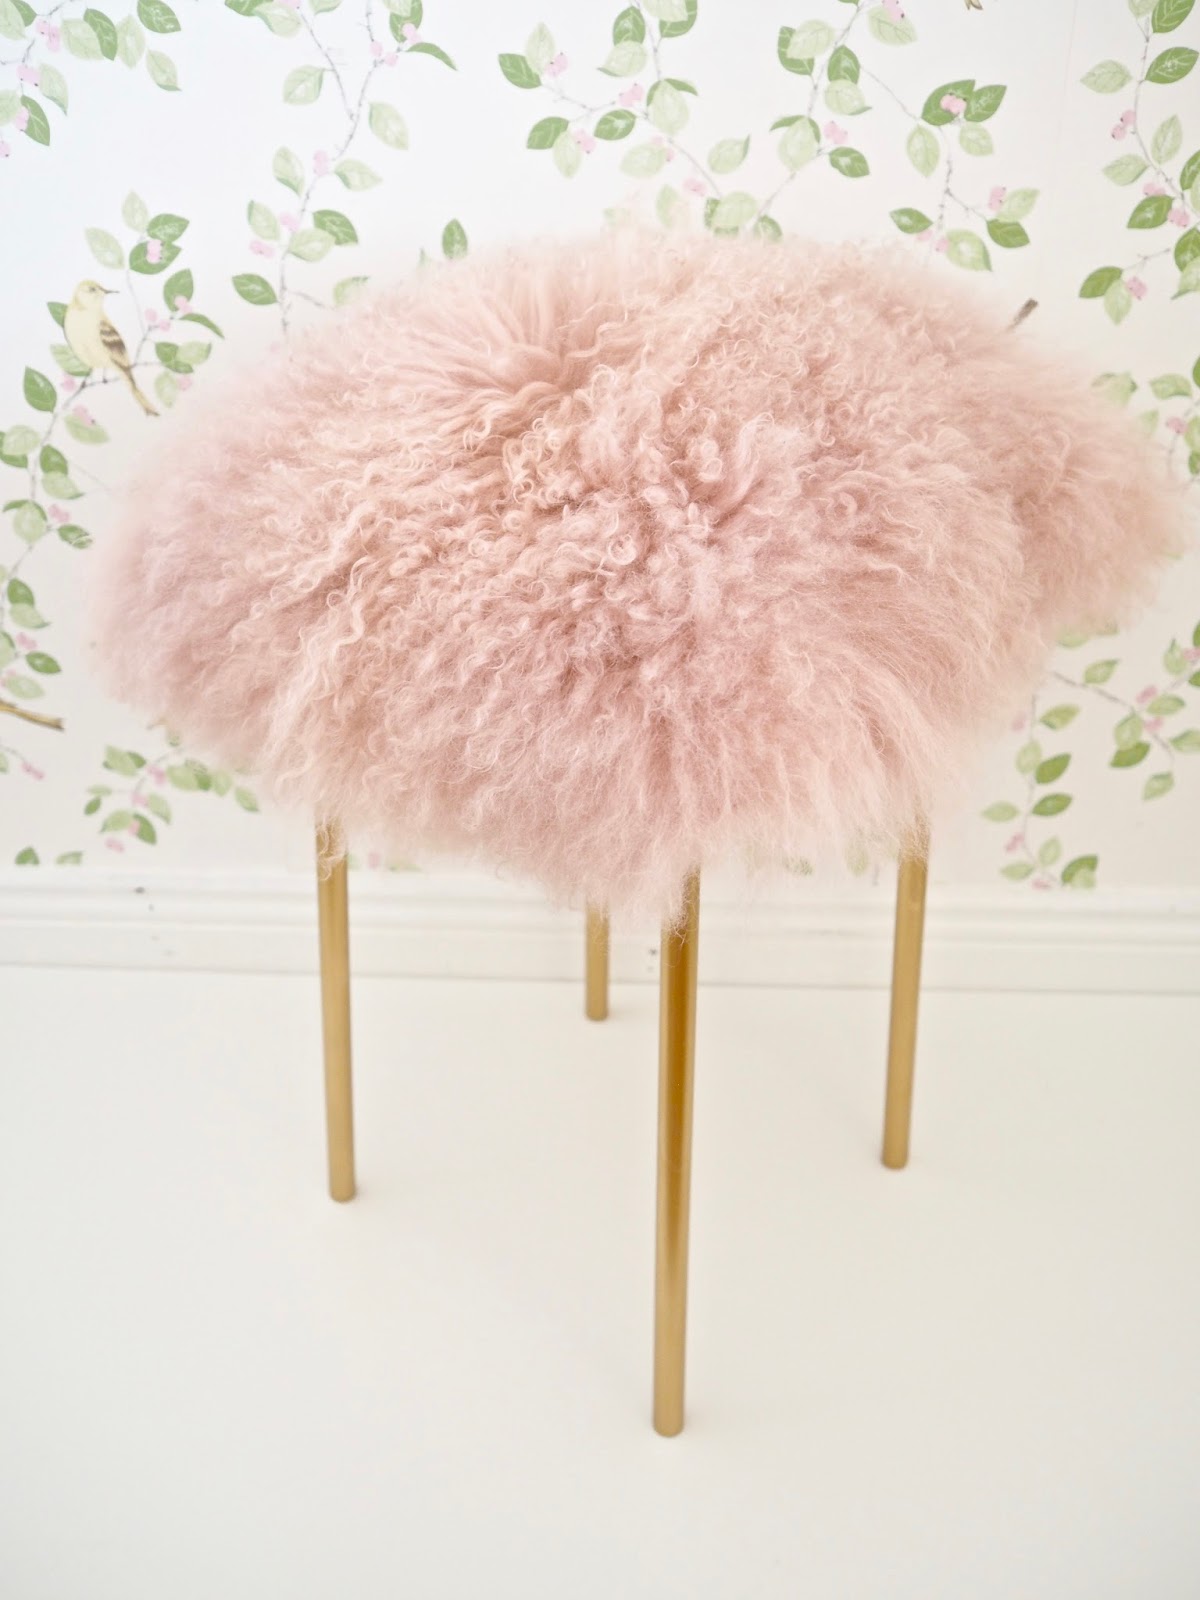
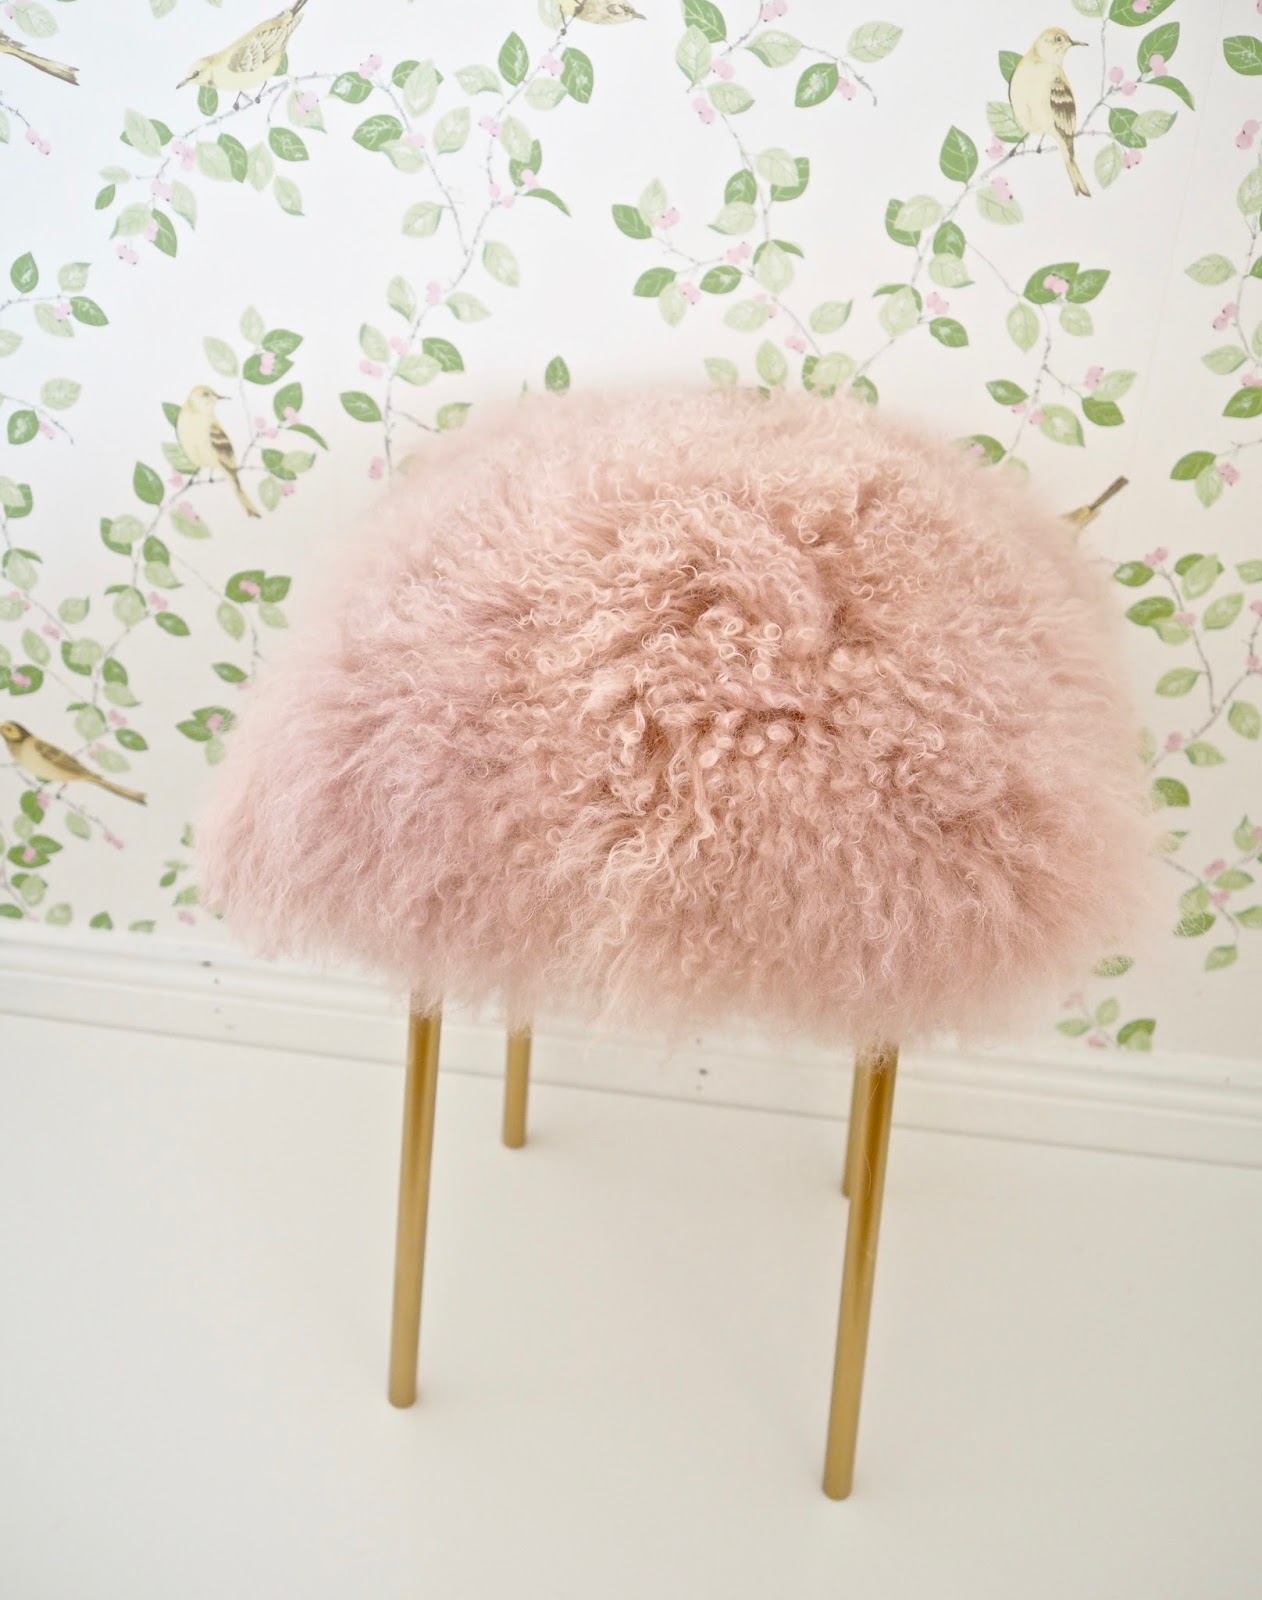
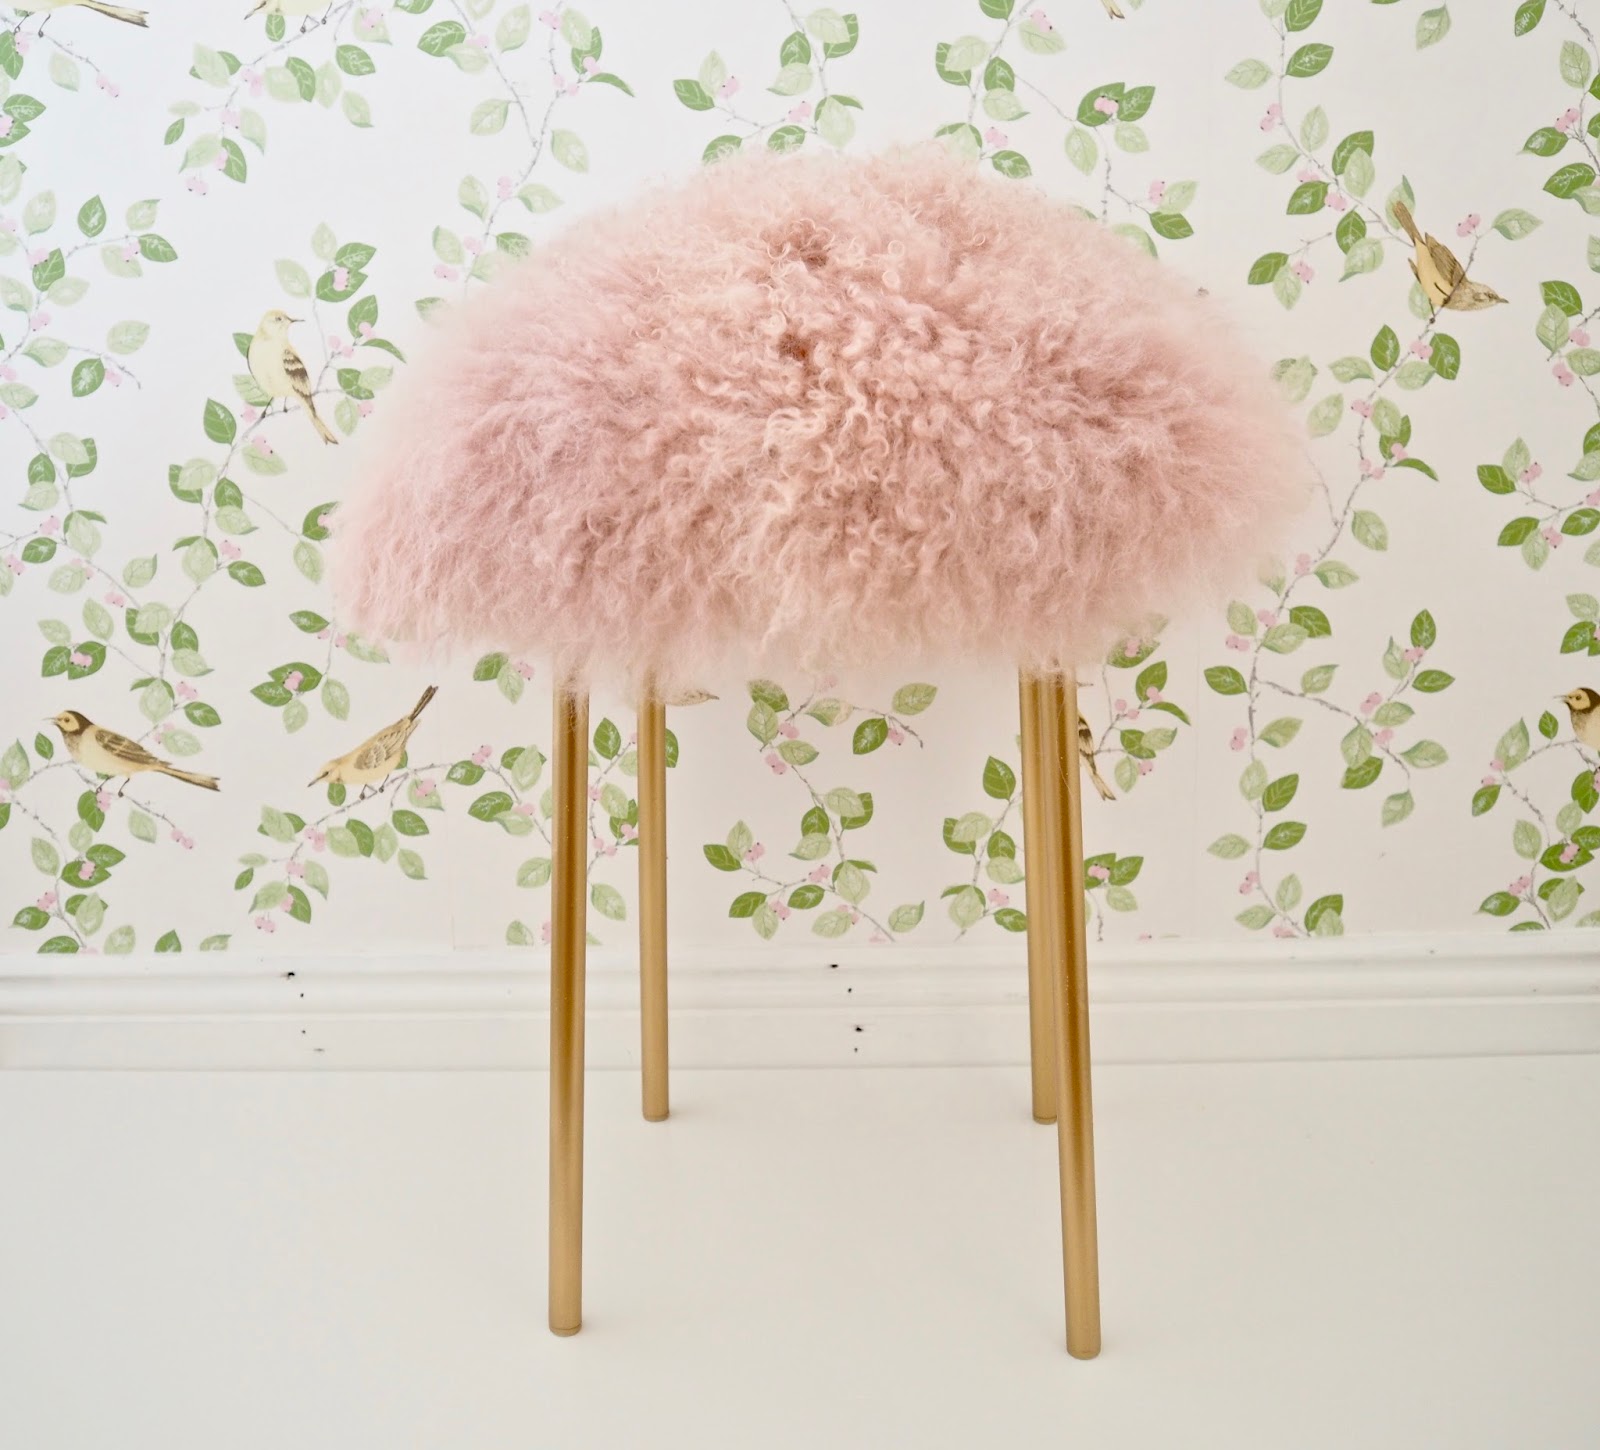
Budget DIY Fur Stool
For ages, I have been wanting to have a go at making a fur stool. I have seen these being made over on Youtube and Pinterest and I decided to give it a go for myself. Popping into Ikea, I picked up one of the Marius stools.
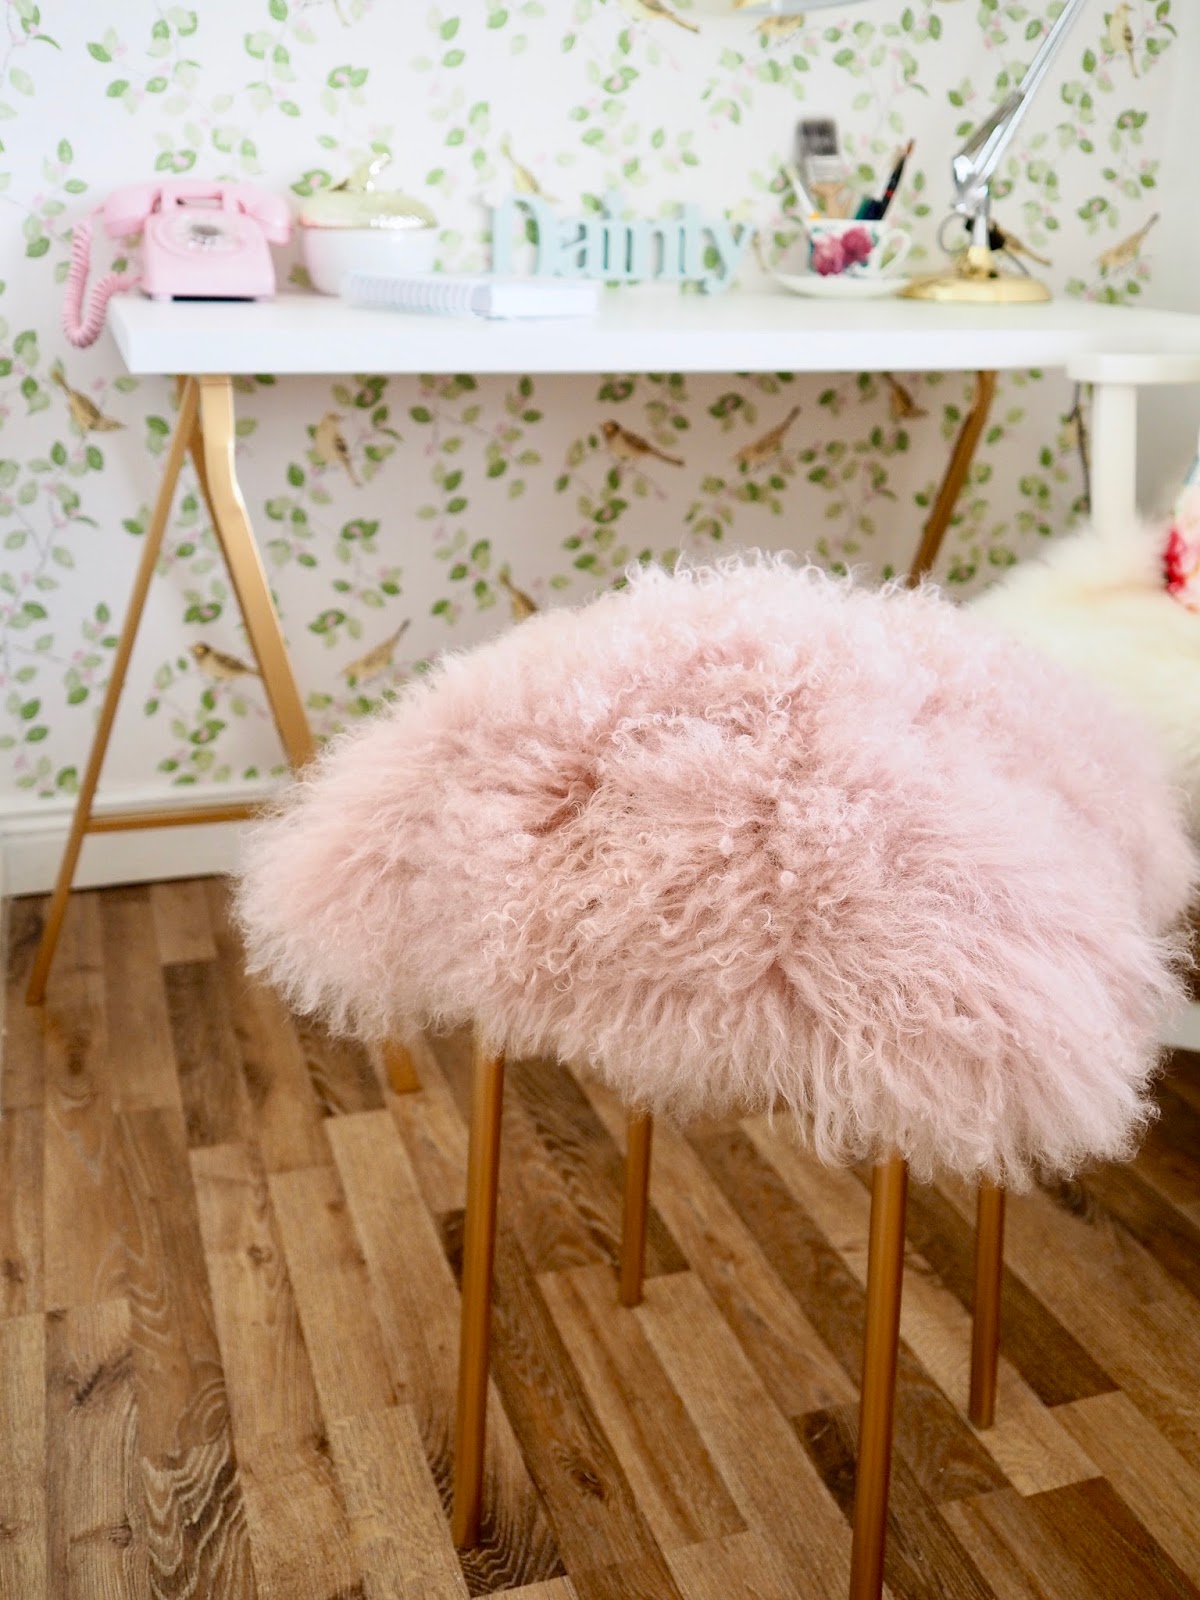
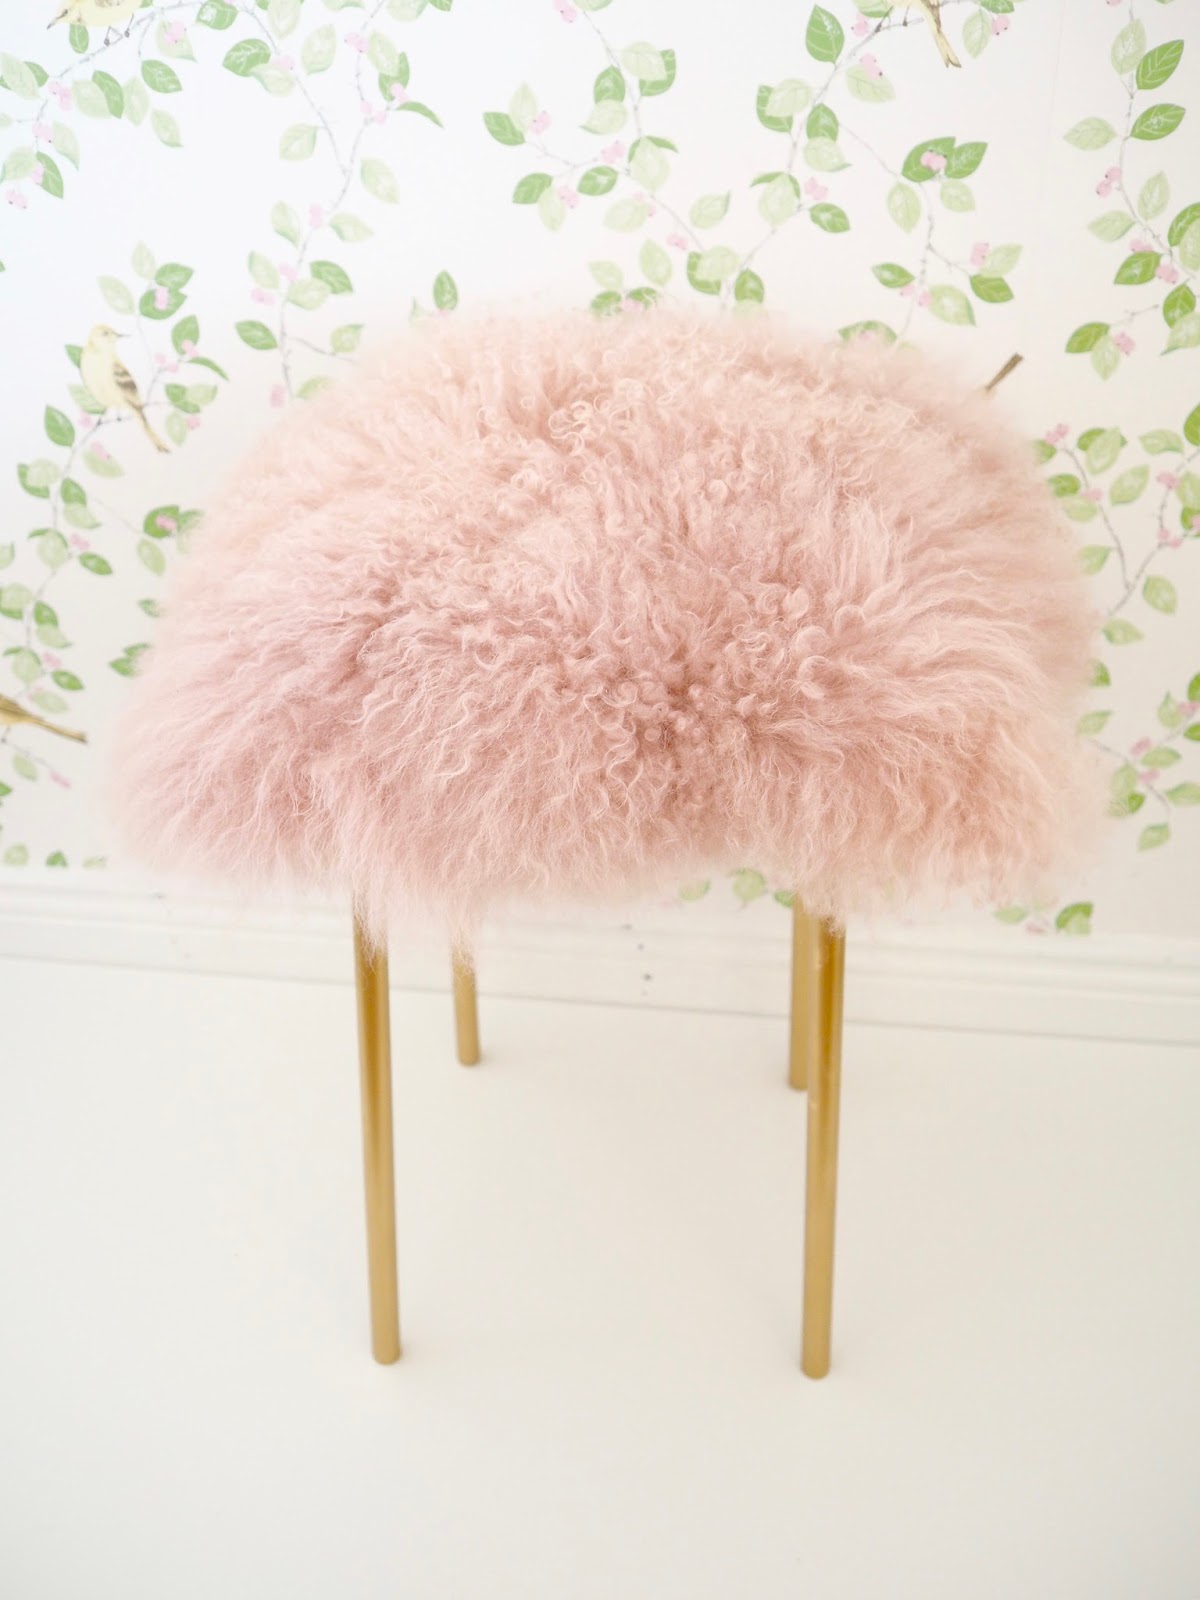
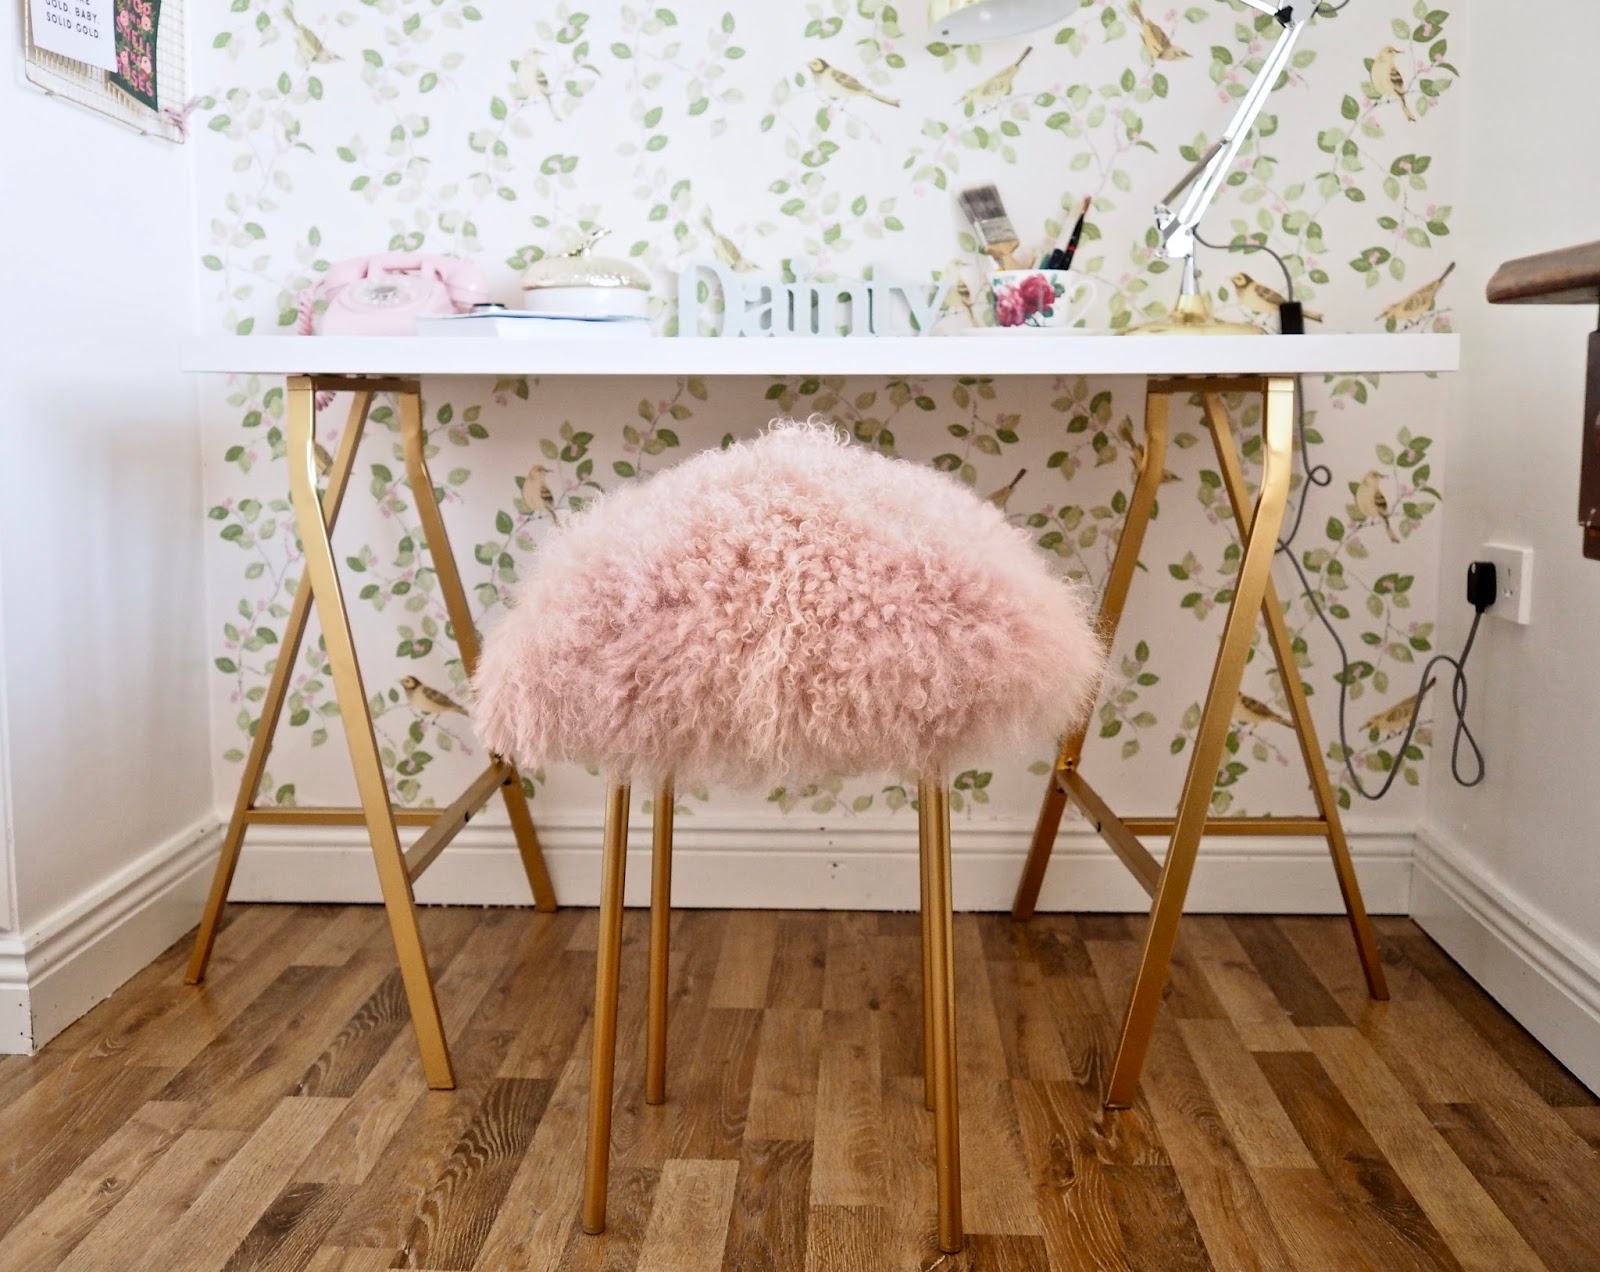
I couldn’t believe the value of the stool. The stool is a steal at €3.50, I had been searching on Pinterest for ideas for having the Marius stool. I decided to turn it into a fur stool for my office. Recently I was at a homeware press day, On one of the inspirational trend boards, I saw the colour pink and gold being used together. This gave me the colour inspiration for my stool.
In my office, I do have a lot of gold accent colours. I was torn between copper and gold but I decided on gold. I managed to get my hands on a fantastic pink fluffy cushion too. This DIY is really easy to do. It is a perfect DIY to complete in an afternoon.

What you will need
–Rustoleum bright gold spray paint
– A fluffy cushion ( mine is from TK Maxx) click for similar
– Screwdriver to assemble your chair
– Protective gloves and mask, to save your hands, and lungs when using the spray paint
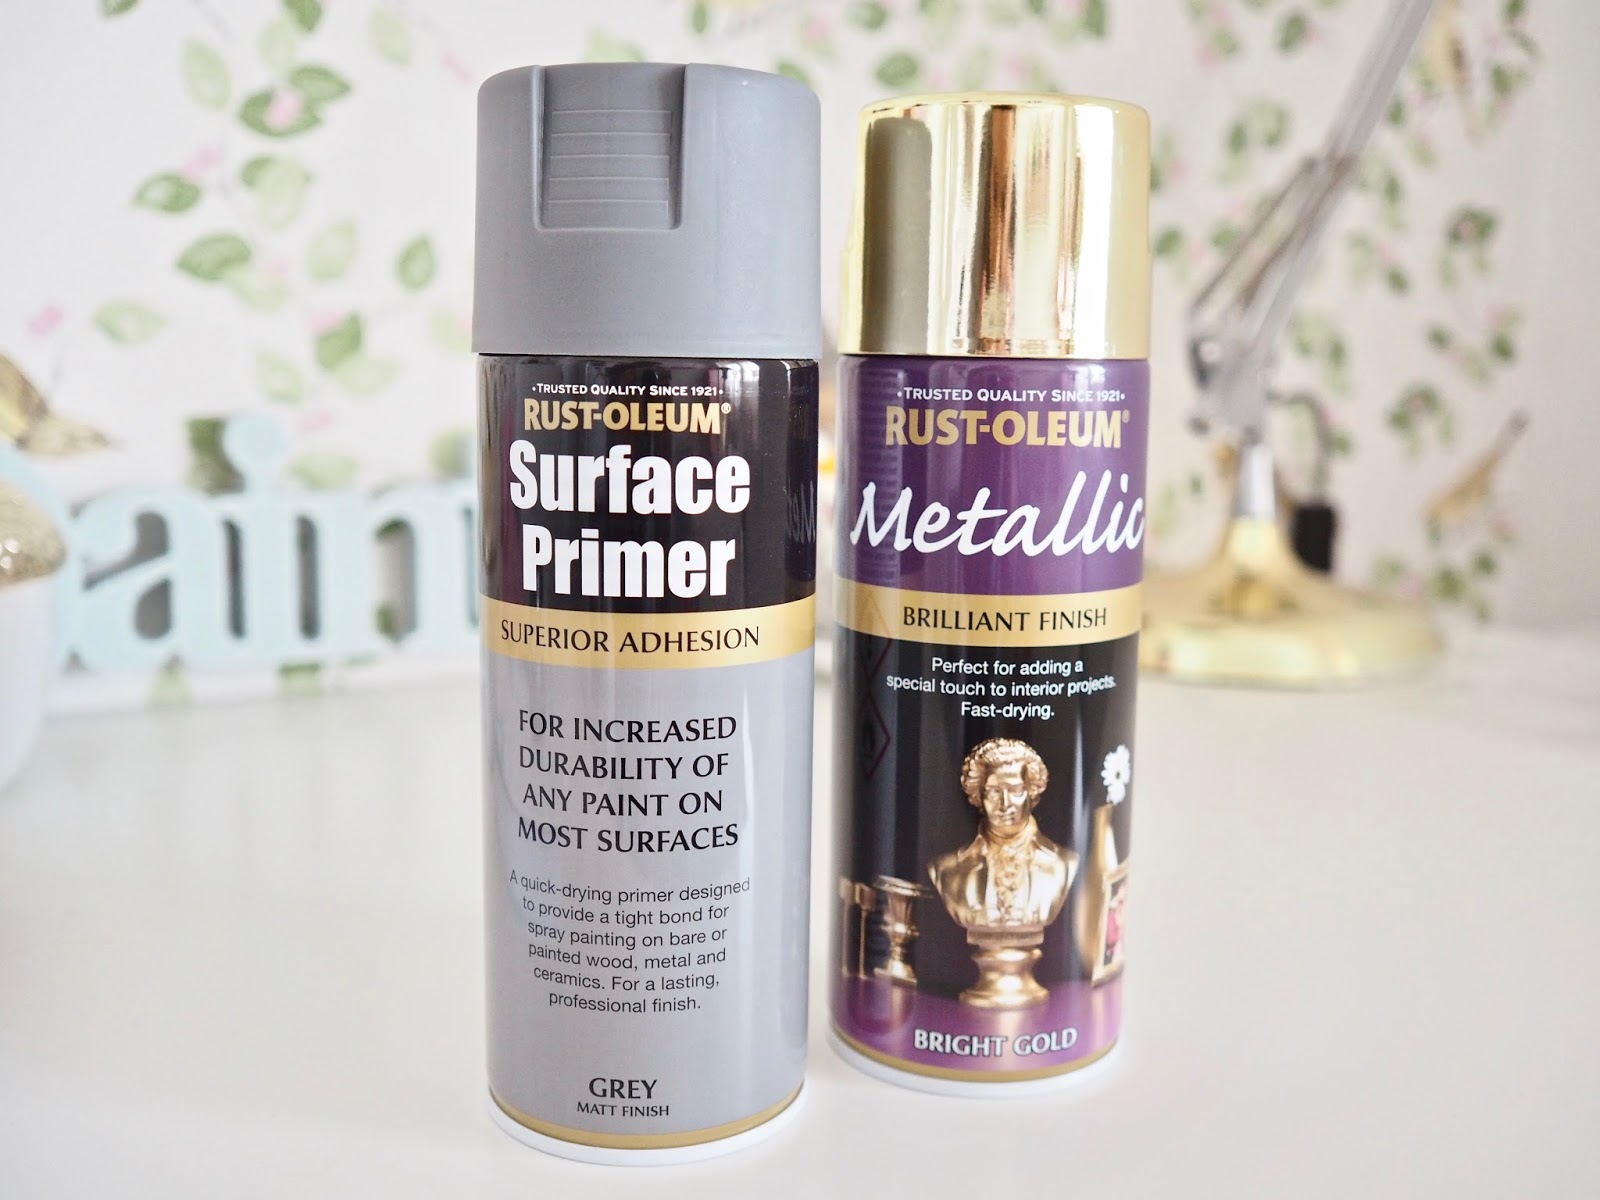
Prime and Paint
Please do not skip priming. The legs of the chair are metal, to stop your gold paint from chipping I would recommend using the surface primer. I have used this paint on a good few projects and I always use the surface primer.
I applied one coat of surface primer and allowed it to fully dry before I applied two coats of the bright gold spray paint. Your spray paint goes a long way, I had loads left in my cans so plenty left for another project.
Make sure you follow the drying time that is on the back of the can. I always use spray paints outside, you can use them out in your shed too but once it is in a well-ventilated room. Always make sure not to breath in any of the sprays from the cans. I always do two thin layers of paint.
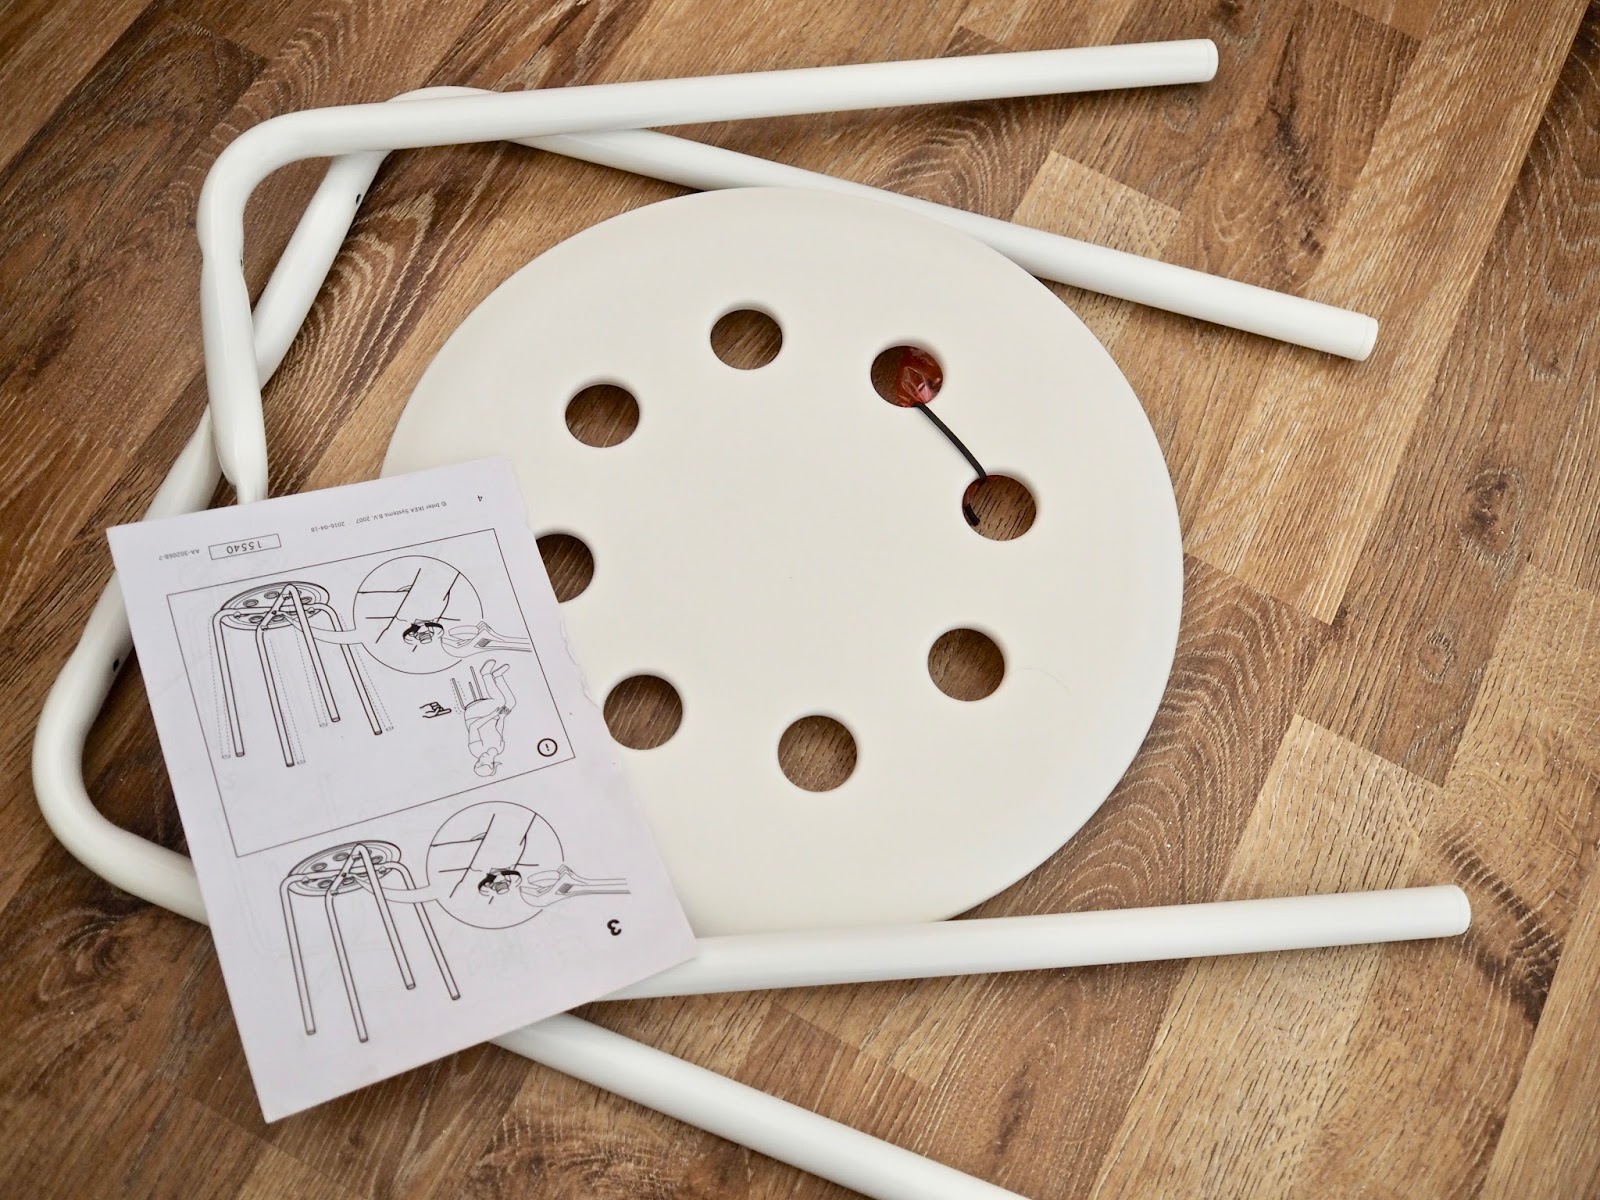
If you are new to using spray paint then have a little practice before spraying your project. You don’t want to get drips or uneven patches on your project. Take your time and be patient. I found it easier to spray my legs when they were assembled.
I assembled the legs and lightly sprayed them. This way I got fewer drips and I was able to spray quicker. I didn’t have to wait for one side to dry and flip over.

The Fur Cushion
The hunt was on to find the perfect fluffy cushion or fabric for this project. I had seen a pink fluffy mini rug in Dunnes Stores, however, It seemed fiddly to try and wrap a fur rug around some cushion pads so I decided to go and look for a fluffy cushion instead.
I tried my usual homeware shops with no luck. Then I remembered seeing fab fluffy cushions in TK Maxx and HomeSense. I popped into my local TK Maxx in Blanchardstown and I found the perfect pink fluffy cushion.
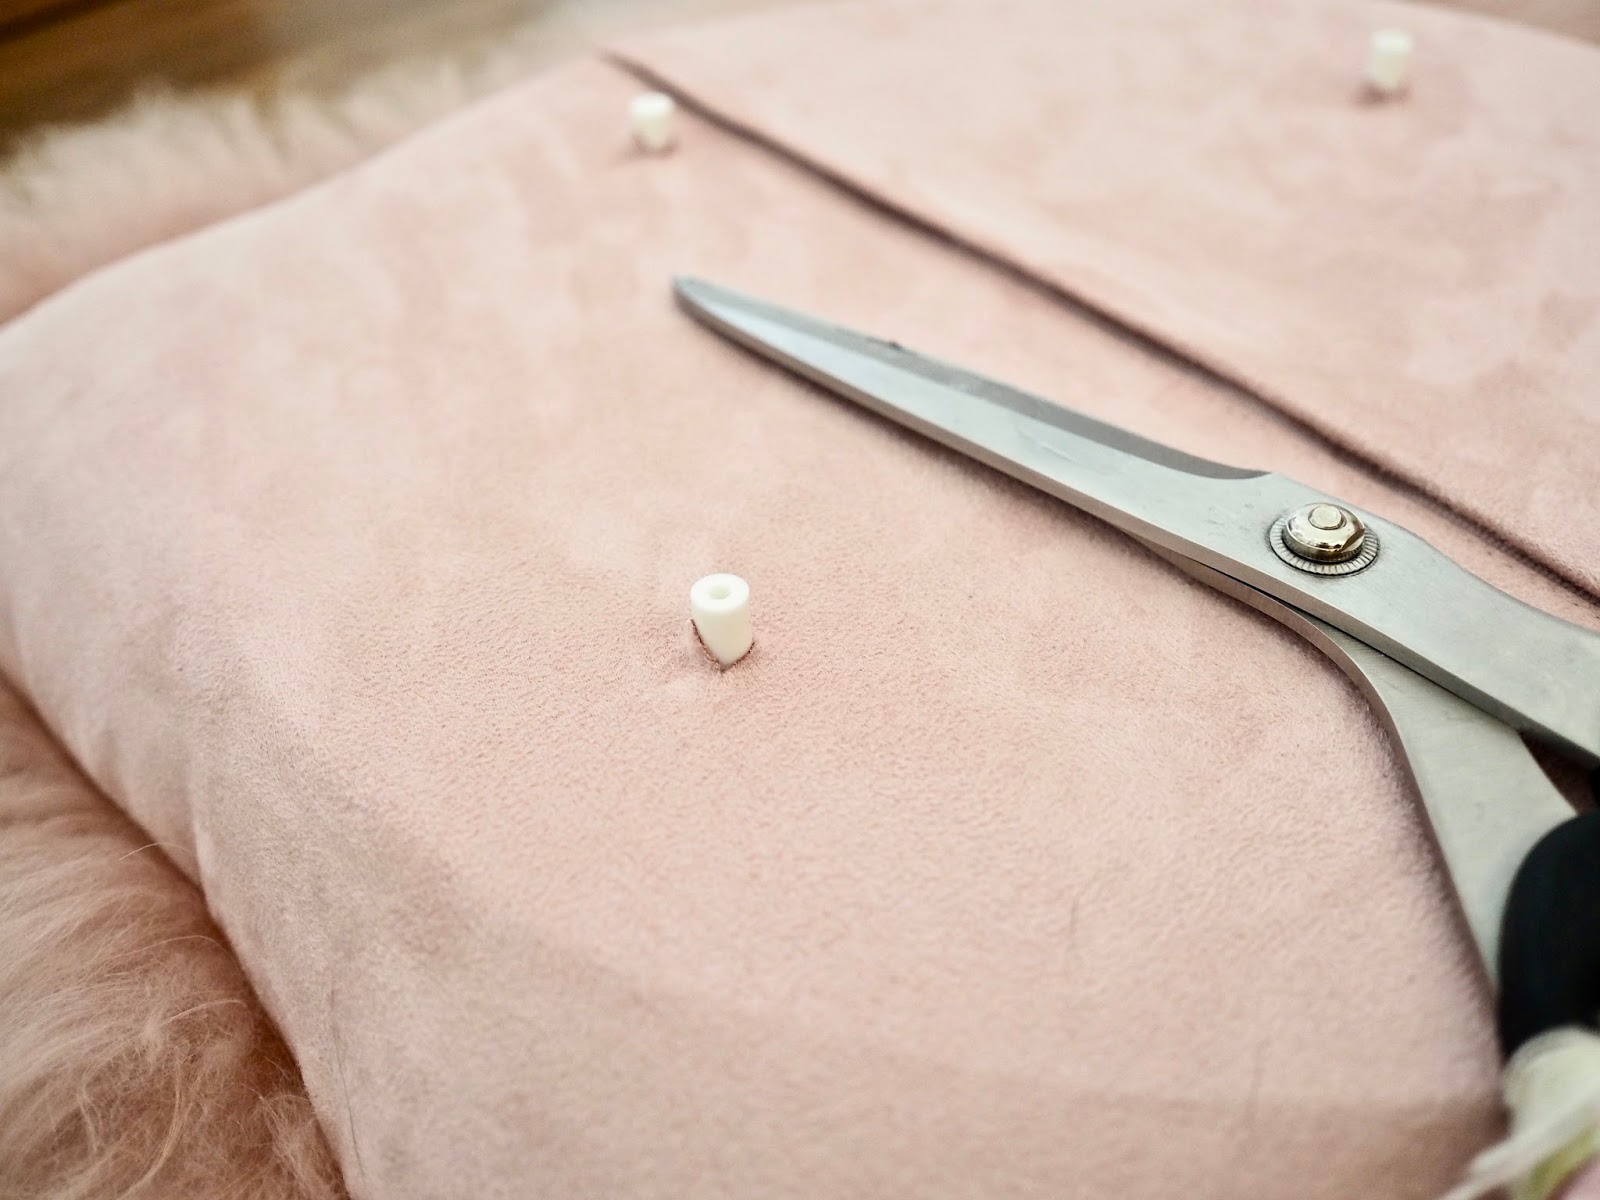
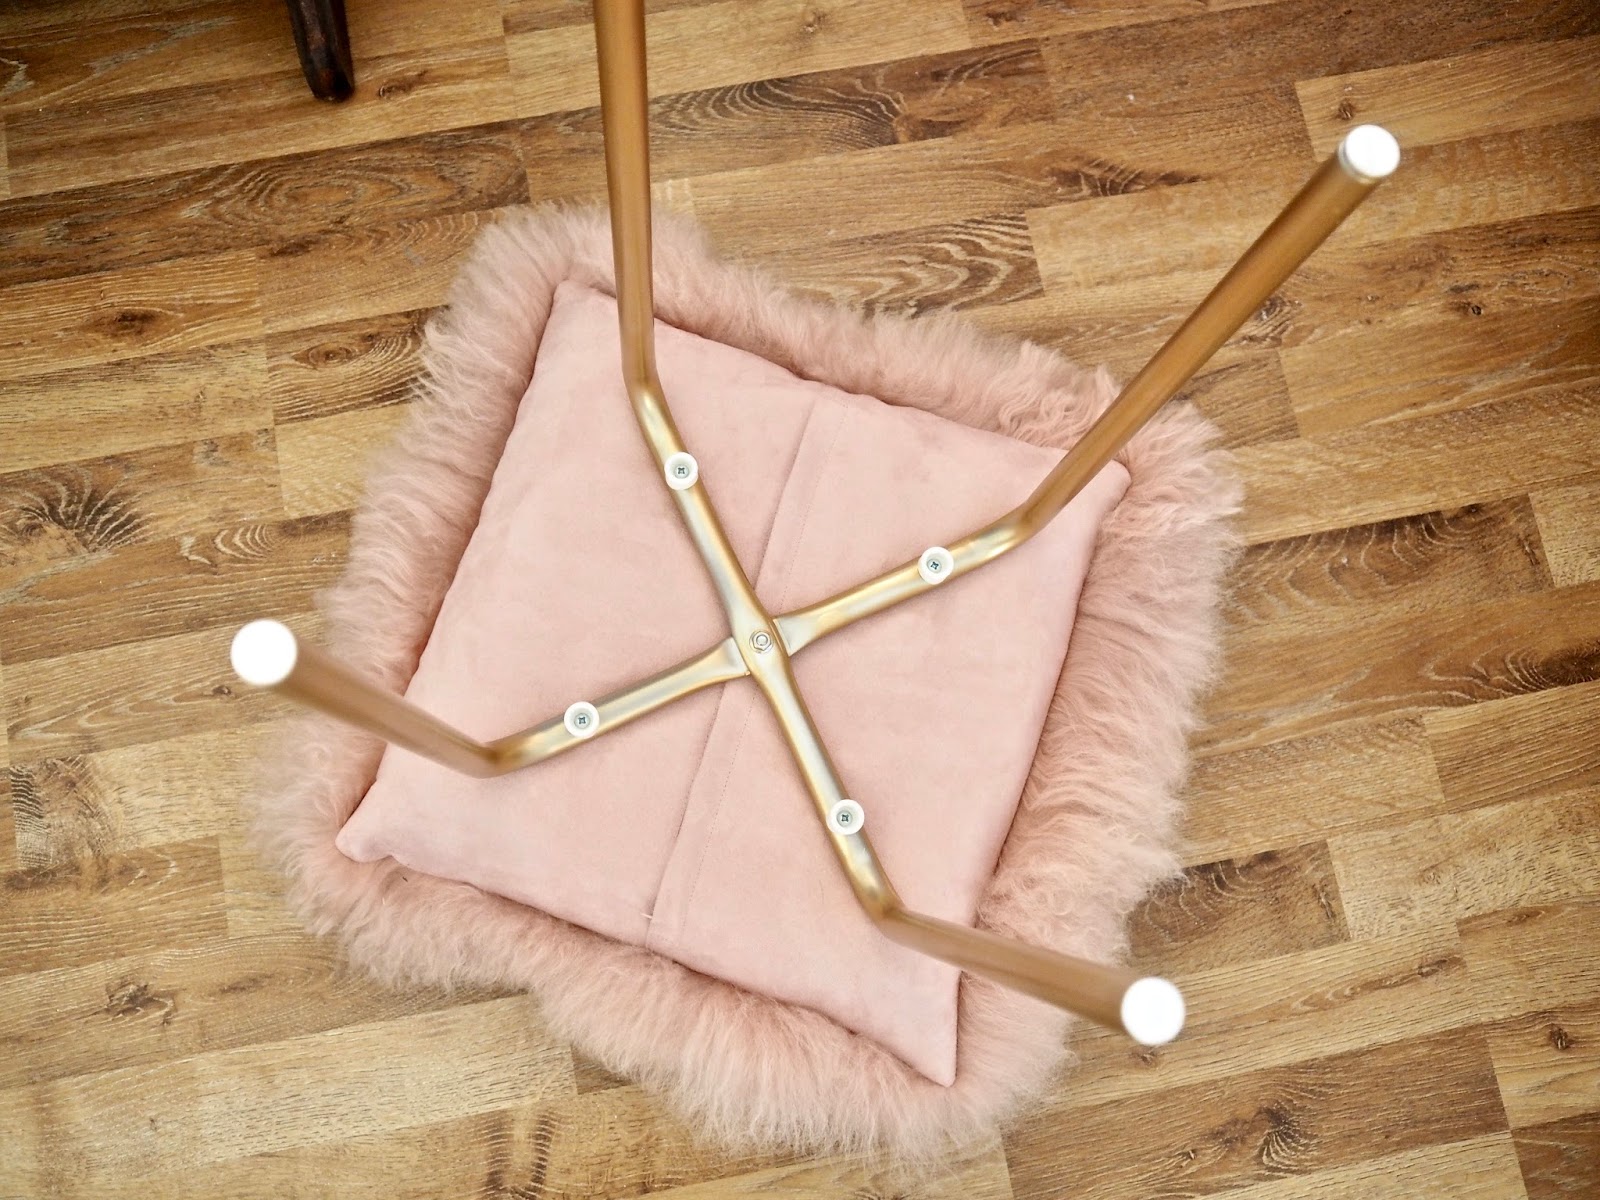
The cushion was roughly 20 x 20 inches, this was the perfect size to slot the top of the stool into the back of the cushion. I then used a sharp knife to cut out the holes where the screws go to add the legs to the top. Please click on the Youtube video below to get a better idea of how I did this. I will also add images below to give you a better idea of how I did it.


Styling Your Faux Fur Stool
Once you are happy with your paint job and you have successfully added your fur top to the legs, then you can have fun and style your new chair. At the moment I am loving experimenting with colour and texture in my home.
I love the slightly retro feel to the stool. Lately, I find I am using more colour in my office. I think the pops of gold and pinks keep me energised when I am working in the office.
Please let me know if you give this DIY a try. Don’t forget to check out my Youtube video below to get an idea of how I achieved my finished look.
As always, tag me in your DIY and interior projects over on my Instagram. I love seeing what you guys are getting up to, I get so much inspiration and ideas from you.
Thanks so much for reading, Chat soon, Catherine.
Please PIN the image below on your Pinterest boards


Love this project! Where did you get the desk?
Author
That is from Laura Ashley, I think they still stock it x
Never mind the stool, where is your wallpaper from!?
Hiya, Yes I get what you mean, No it has been fine so far. The main reason for doing it this was was so the fur could be cleaned as stable gunning it to the chair means it cannot be easily removed to wash x
This is gorgeous! I am curious though-Has it held up well? I love the clean manner in which the fur lays on this, but I’m wondering if it has shifted over time since this tutorial..?…I’d like to do this for my daughter’s dorm, but I’m wondering if would be more secure to separate the back and front side of the pillow cover first, staple the fur in place evenly around the seat, and then to finish the underneath with the back piece????
Aw, thank you Caiena! Thanks so much for watching my videos!
This video is how I found you on Pinterest and now I'm in love with your videos, diy projects and Blondie! Your videos inspired me to keep searching for new projects in my home. Thank you ����������������
Yes, so many possibilities, I was even thinking of a retro round vision for it too x thanks for reading xxx
Yes! I love the 70’s feel from the chair, thanks so much for reading and commenting x
Hi Anglea, thanks so much for reading, il keep you posted, it could be a risk of tearing. The fabric is a heavy fabric so should be okay. Il let you know if I have any problems. It’s heading to it’s new home today x
What a neat idea! I like the pink fluff, but there are so many possibilities!
Absolutely beautiful! It’s like a pink flamingo Catherine! 🙂
I'll be interested to see how that cushion cover holds up with only 4 screws through the fabric. Looks super sweet but I think that might be a concern.