
A mini mosses face lift.
Hi everyone,
So for those of you who are following me on Snapchat and Instagram you will know I am getting a nephew, baby items are ridiculously expensive so I wanted to give a present that would be special and sentimental. This is the first grandchild and the first of us to have babies in the family so I wanted to make something that was timeless and that could be used again.
I don’t like baby items that are branded and overly printed, I like simple classic styles and nice fabrics and things with a vintage feel.
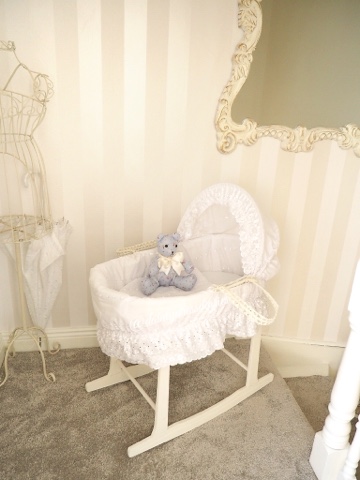
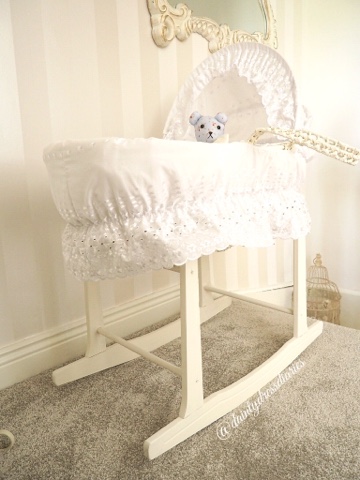
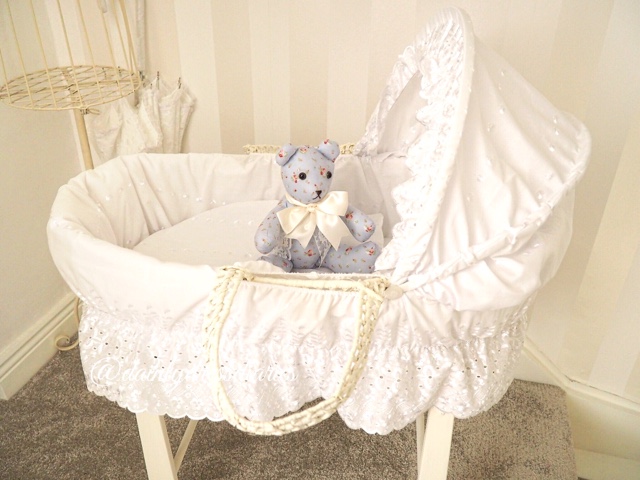
The lovely Claire gave me this mosses basket as she was finished using it, As my brother is having a boy I changed the whole fabric set to a neutral white.
Have a read below for a how to and a list of products I used.
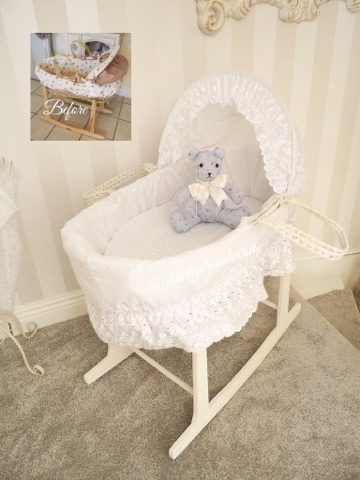
The before,
If you want to give this a go then have a look on adverts.ie or donedeal for a free mosses basket, lidl and aldi also had some for sale recently.
The great thing with baby items is that a lot is going for free as they get outgrown so quick and people don’t have the space for them.
I also got a free cot but keep your eyes peeled for that upcycle post soon
Baby Jack is due around the June bank holiday so I had to get my skates in just in case he decided to come early.

What I used?
Autentico is my go to paint, I went with a chalk paint for this project as it was my first time to paint wicker,
I used the colour Vanille, You might remember I painted my bed and bedroom furniture in that colour to, have a peep at that post here.
The colour is a light cream, its a stunning shade and I got great coverage in the chalk paint.
I get my Autentico from Ursula who owns nookhome.ie, Ursula sends paint by courier in Ireland so if your outside Dublin drop her a message on Facebook and order some paint charts and get your paint delivered to your home or if you are a beginner to painting why not attend one of the workshops, that is how I got started.

The how to.
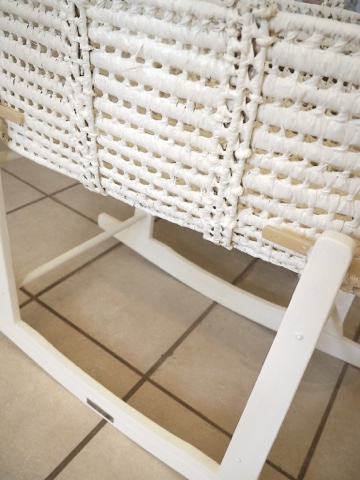
Step one:
I washed the stand and wicker in sugar soap, normally I would primer but as this was really clean with no stains I didn’t use any primer, the wood was a light shade so I didn’t have to worry about stains bleeding through.
Step two:
Paint!
I gave the whole basket one coat and I used an old make up kabuki brush to work in the paint in circular motions,
I gave the outside of the basket a second coat as the inside is covered by the fabric so I didn’t want to waste my paint.
I gave the stand two coats also.
Step three:
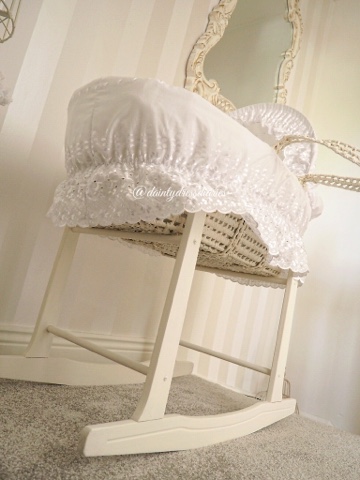
Seal it!
I went for the autetntico clear matt varnish to seal, I prefer varnish to wax but I know a lot of people love the wax, if I am being honest I am too lazy for wax as it is like exercise all that buffing and shining.
Step four:
Fabric!
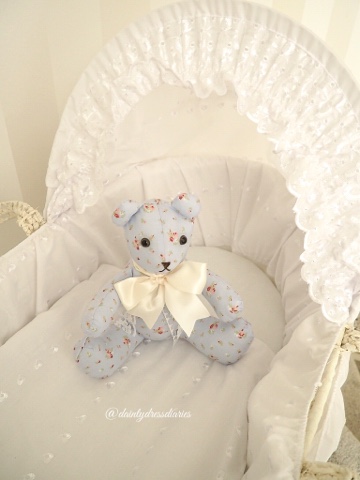
Okay so I cheated here, I bought a replacement fabric set as it worked out cheaper than me making it, I did make the bear though lol.
Here is the link to the set I got which was on ebay.
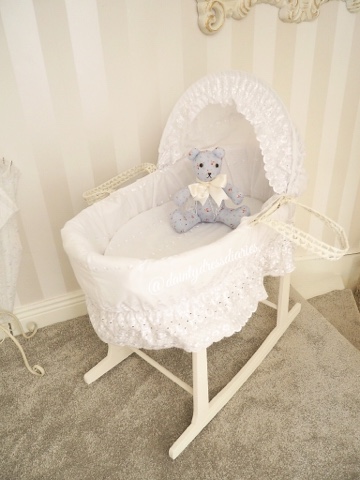
And that is it everyone.
This was actually a really quick upcycle, I think it took me two hours in total (not including drying time)
Now all I have to do is try keep the cat out of it until baby Jack arrives.
Have a peep below at the finished pics.
Keep any eye on my Instagram and Snapchat for updates on the new arrival.
I have still a few bits to sew for him but I am getting there.
Any questions just leave them in the comments section below and I will get back to you.
Chat soon,
Catherine.


You are so kind thank you for reading X
I think this is the most adorable upcycle you have done, it's just so cute. ❤️