
*This is a sponsored collaboration with Hickeys Homefocus
Diy wrap dress with Hickey’s fabrics | *Ad
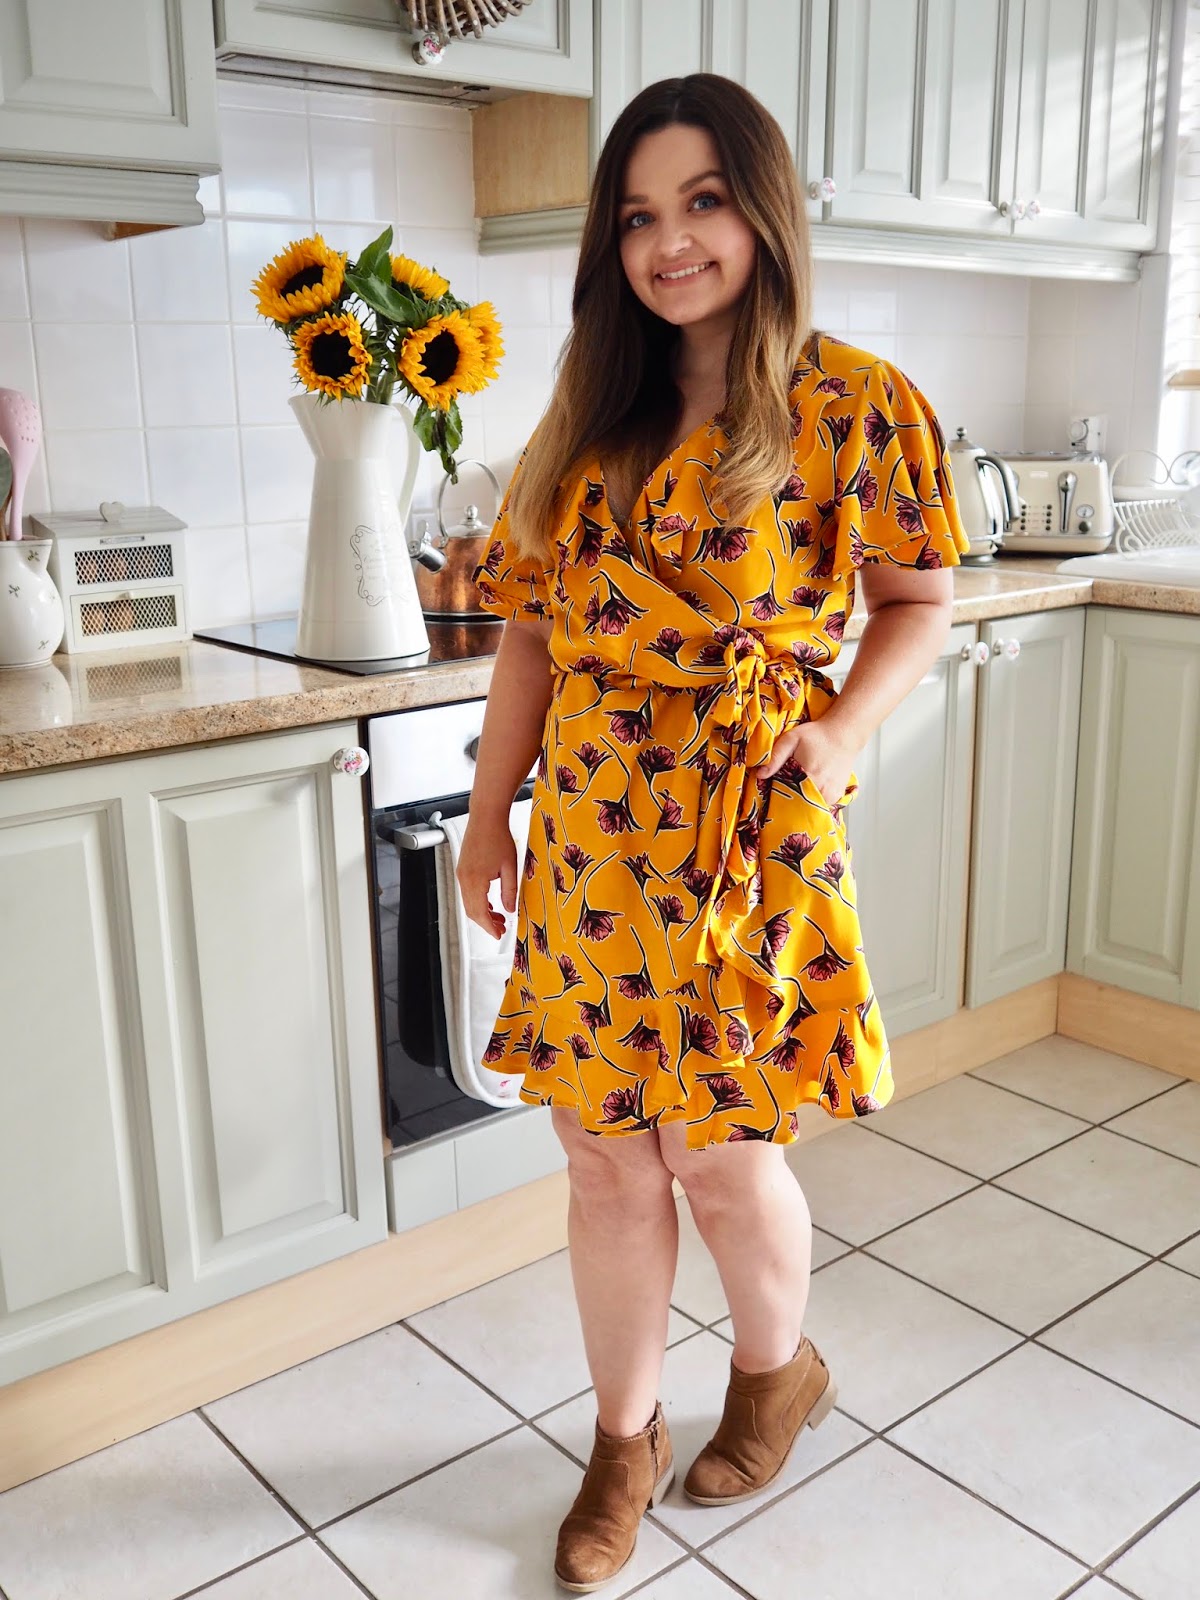
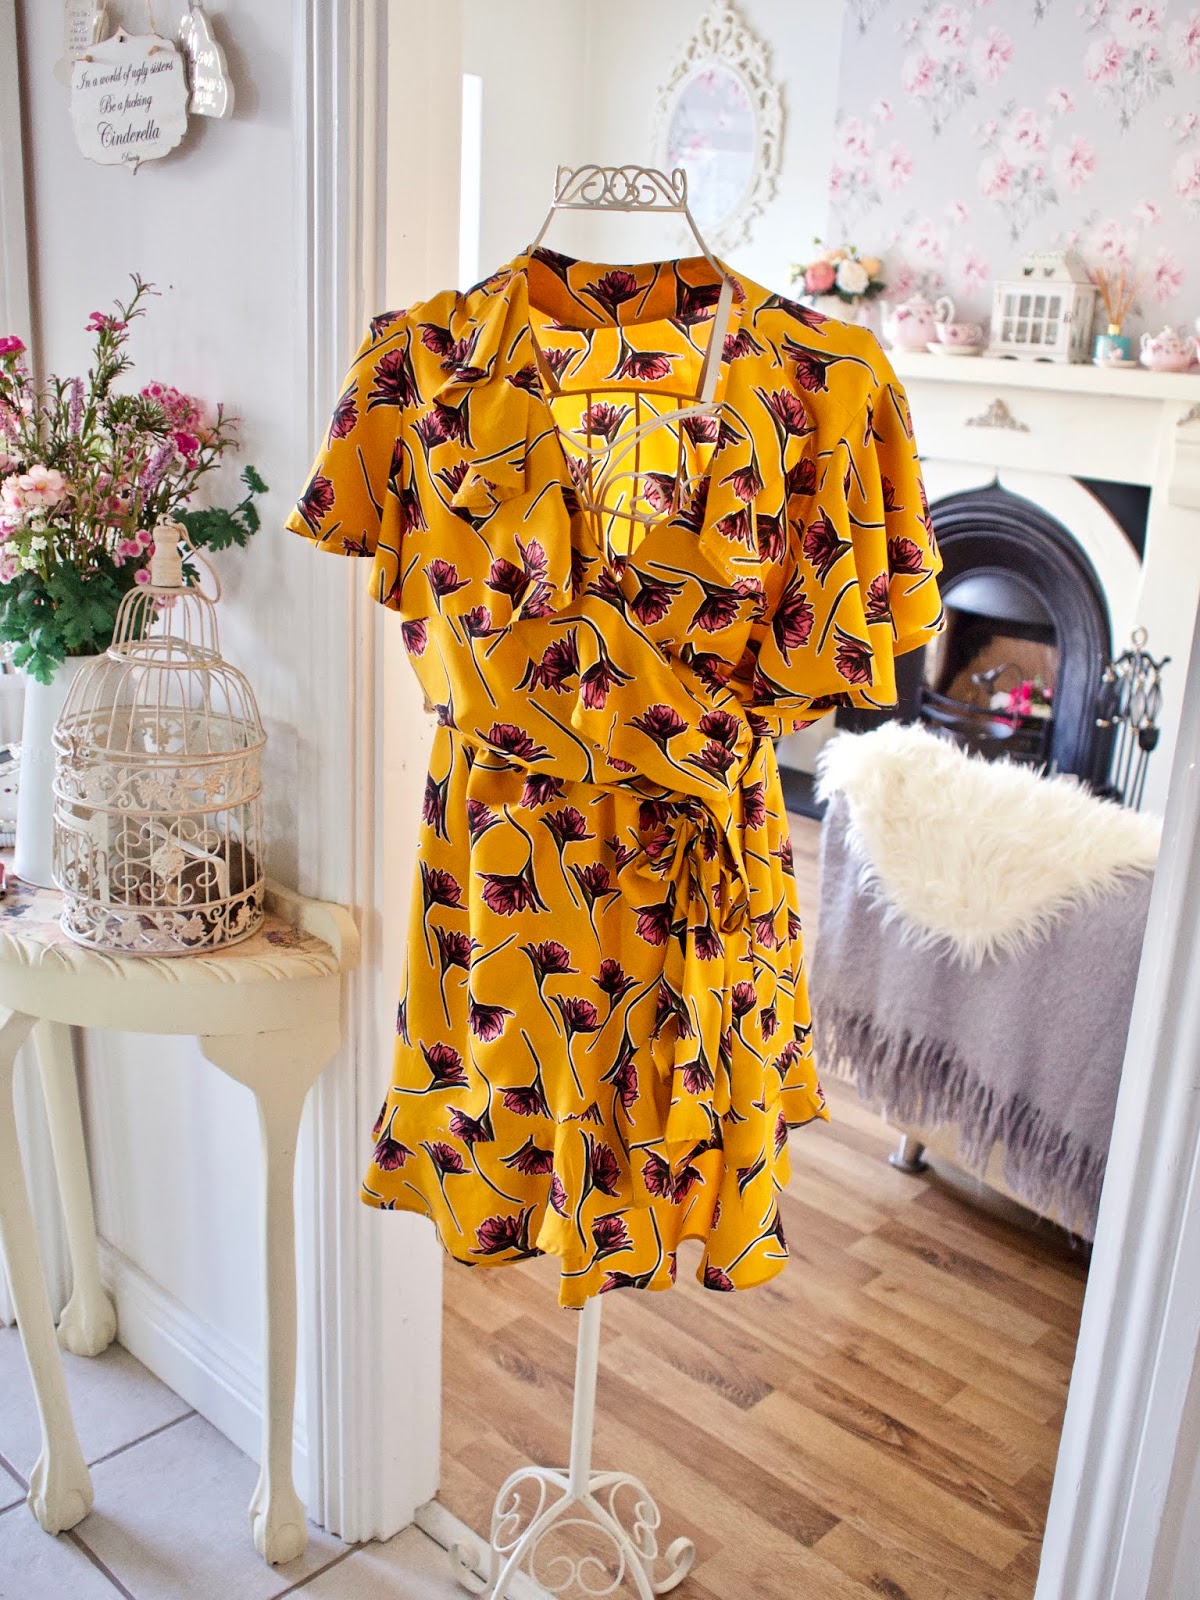
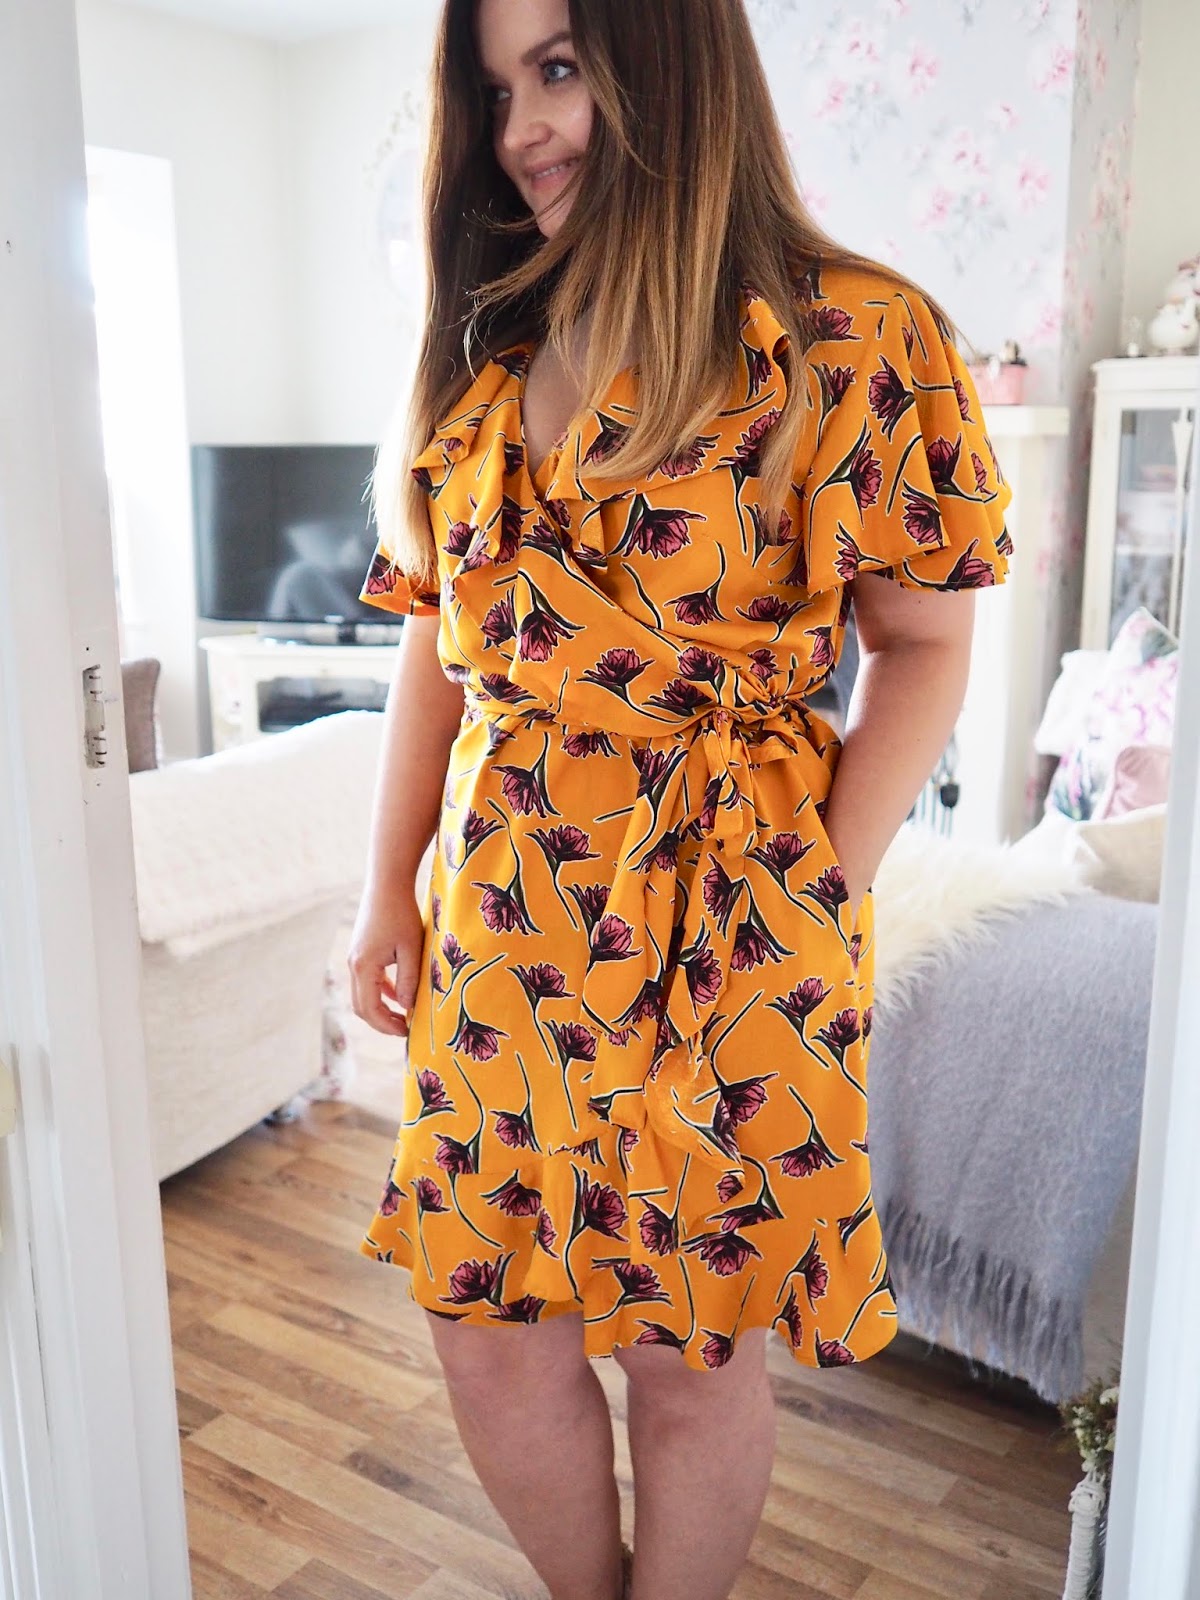
I have achieved my goal to make my very own dress unsupervised and I am buzzing. You might remember last year when I made a dress with Angeline Murphy. I wanted to tackle making a dress by myself and see if I could follow a pattern myself. I teamed up with the guys ay Hickeys for today’s post and I used the simplicity 8608 patterns for this project. I love working with the team in Hickeys as I am learning new skills with each project. I learned a lot with this dress pattern, I inserted my first dart, added flounces, inserted pockets and I stitched a lot of narrow hems. You can catch my Youtube video here and see in more detail how I made my dress.
The Pattern and Fabric
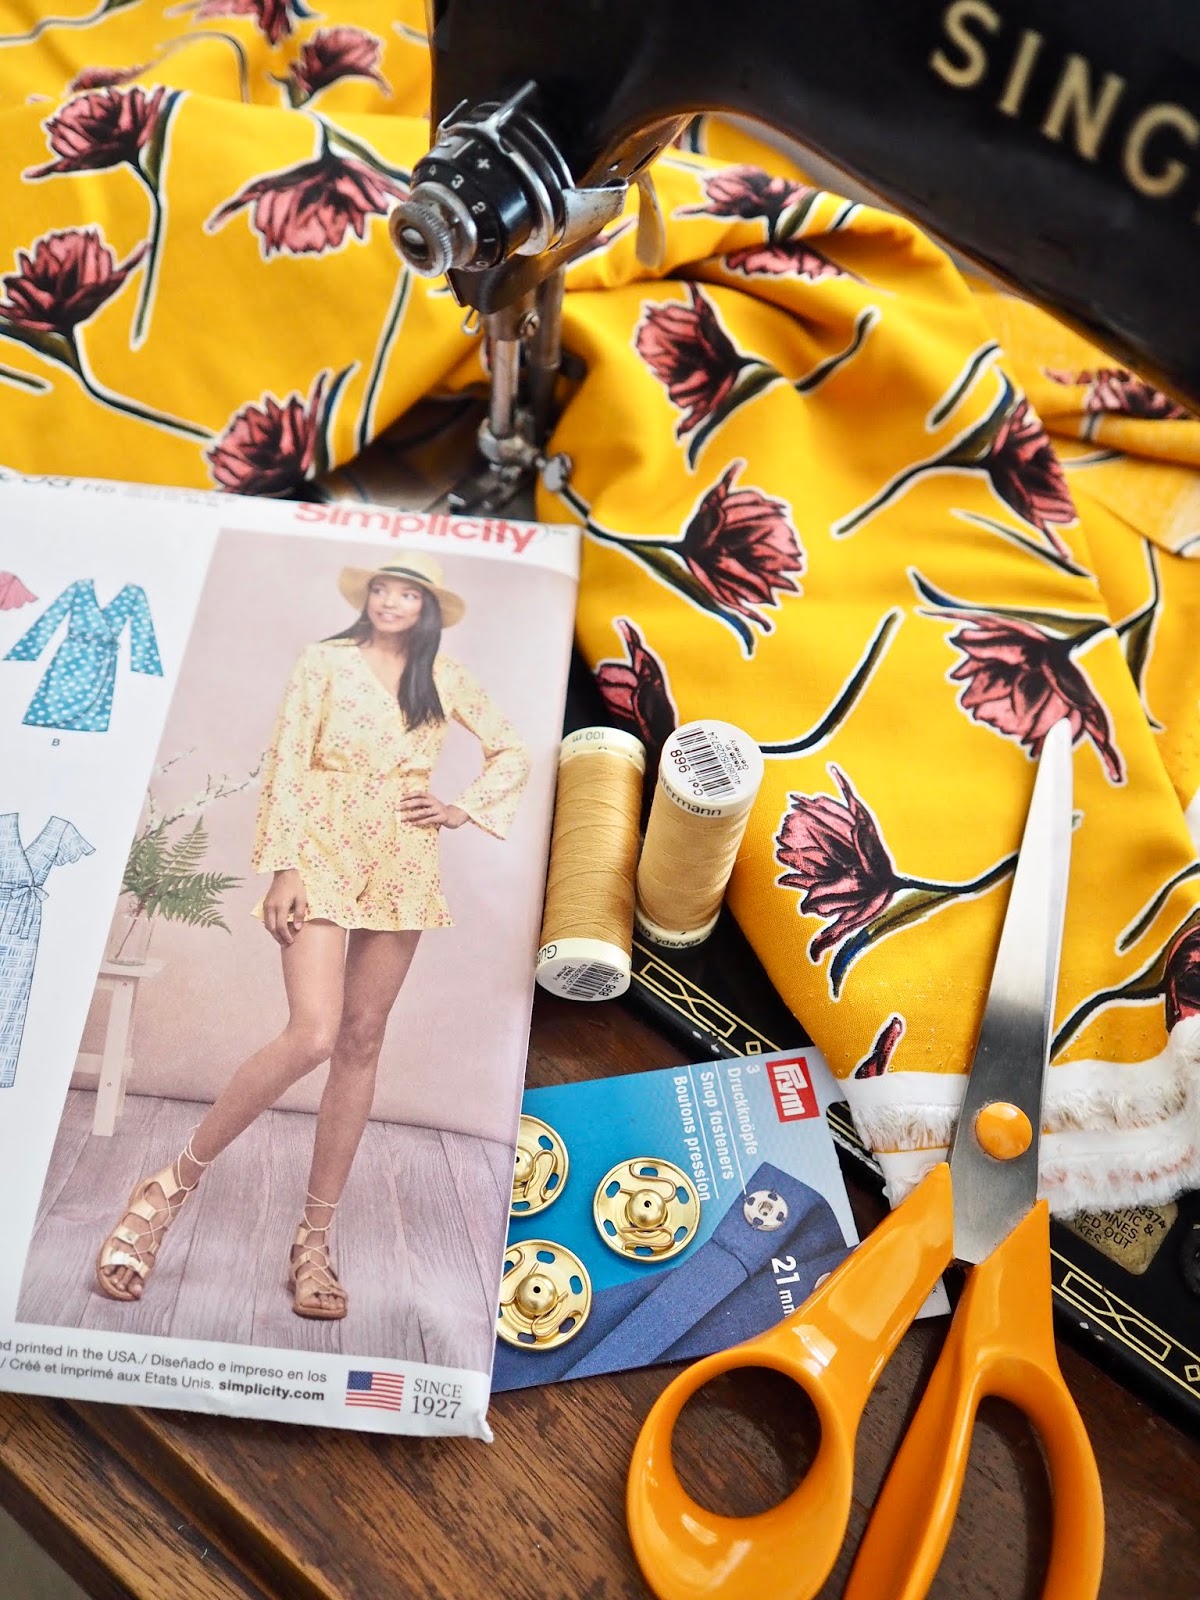
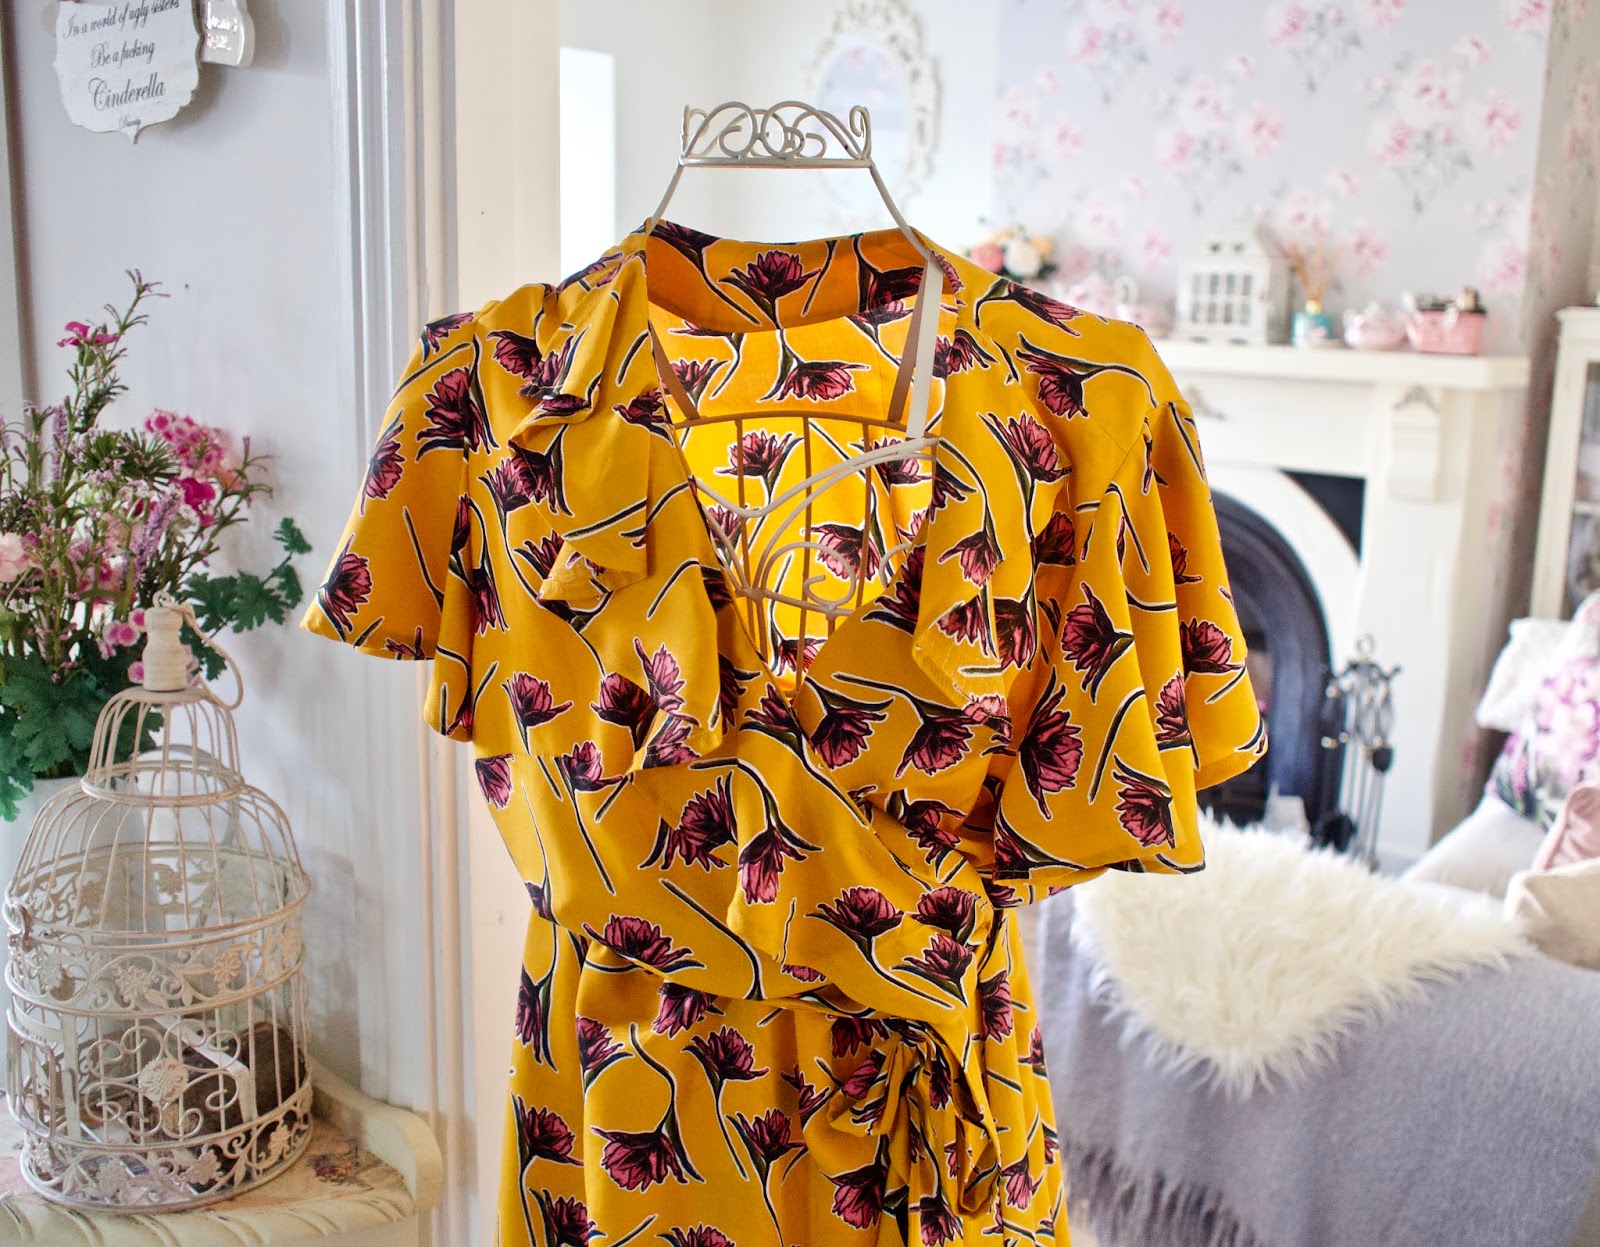
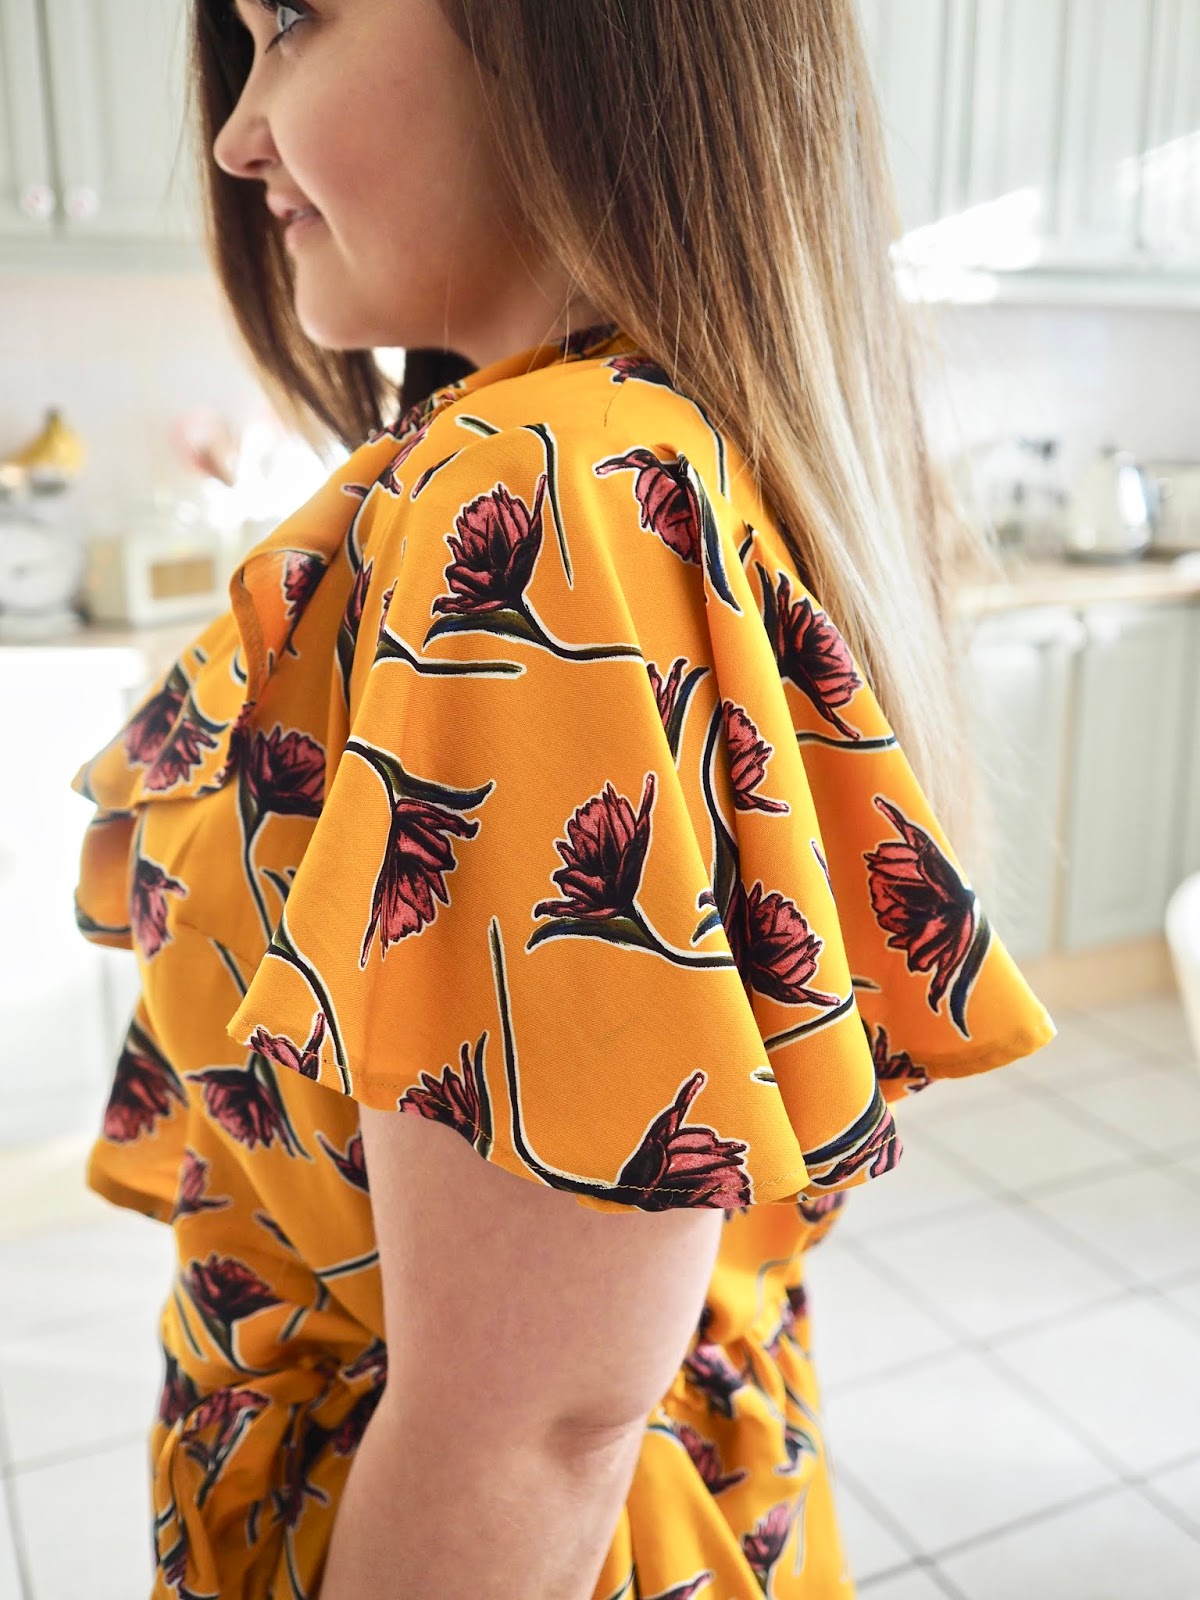
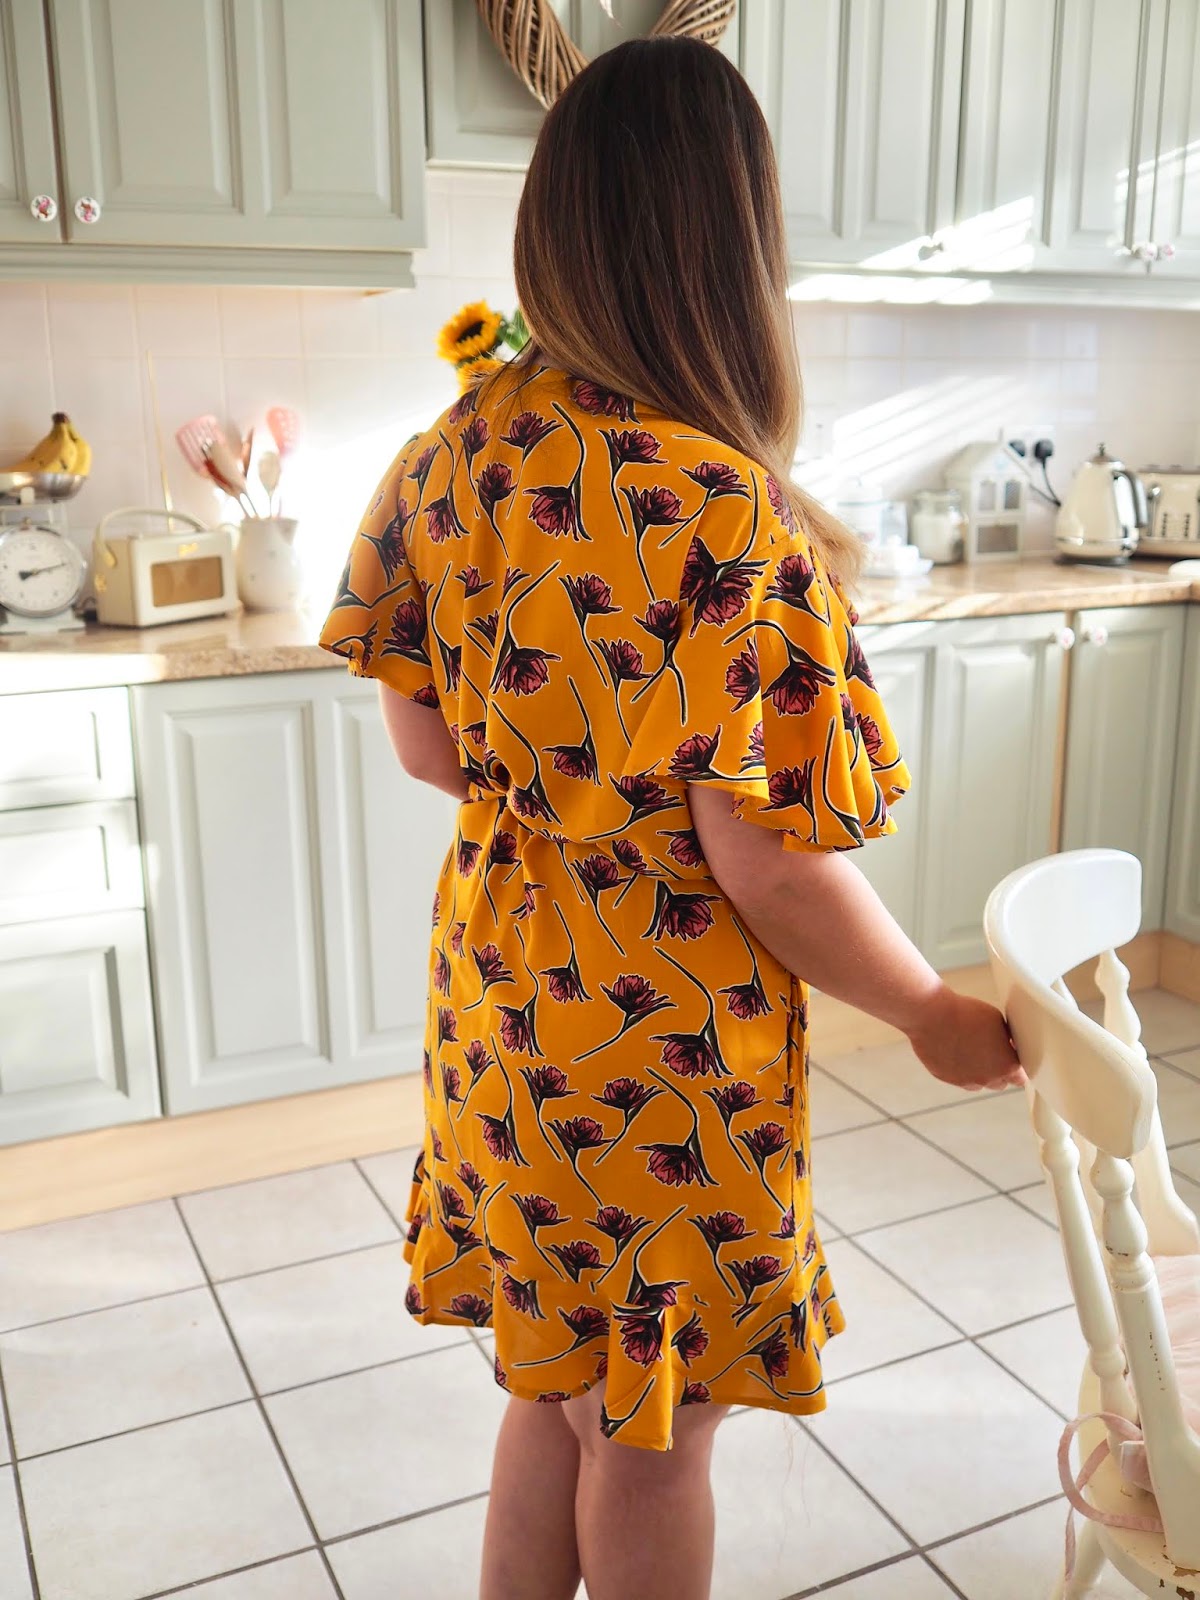
As I had used a Simplicity pattern when I made the wrap skirts earlier in Summer I decided to stick to that brand as I find them easy to read and follow. I went for pattern 8608 and I made option A for this project. This was a faux wrap with elastic waistband. So, no zipper! I still haven’t tackled my fear of zippers yet. Option A was a fun challenge for me but if you are brand new to dressmaking then I would try option B from the pattern. The dress I made had a lot of flounce to it and that might be hard for beginners. This pattern also came with a playsuit and jumpsuit option so lots of variety in the one pattern. I got my pattern and my fabric in the Hickeys store in Mary st in Dublin, they have loads of pattern options in store and you can sit and have a look through the books to find a pattern to suit you. The staff are also full of knowledge and a lot of them have dressmaking and craft skills and have lots of knowledge to share. I went for a nice mustard floral fabric as I wanted something I could wear throughout Autumn and Winter. This dress is perfect with tights and boots and something that I can get lots of wear from year after year.
I used the Mila Ochre fabric and you can find it here.

Cutting your pattern and fabric
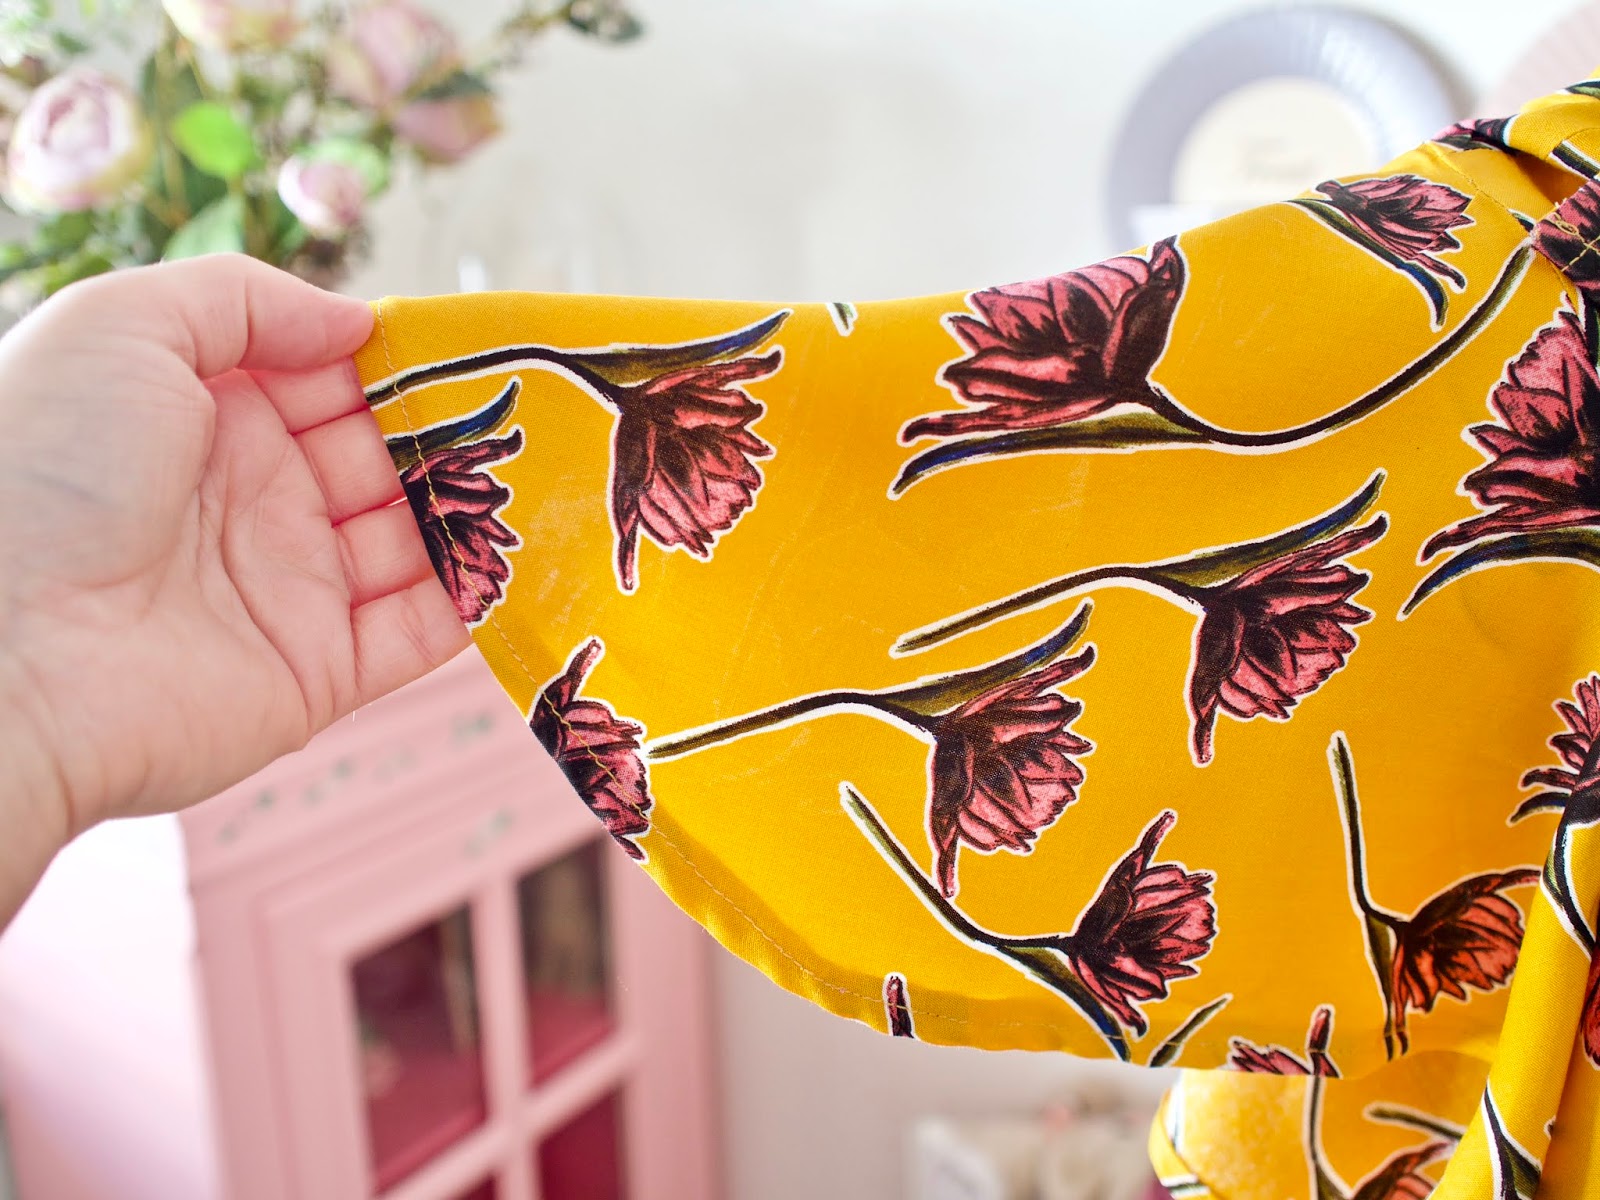
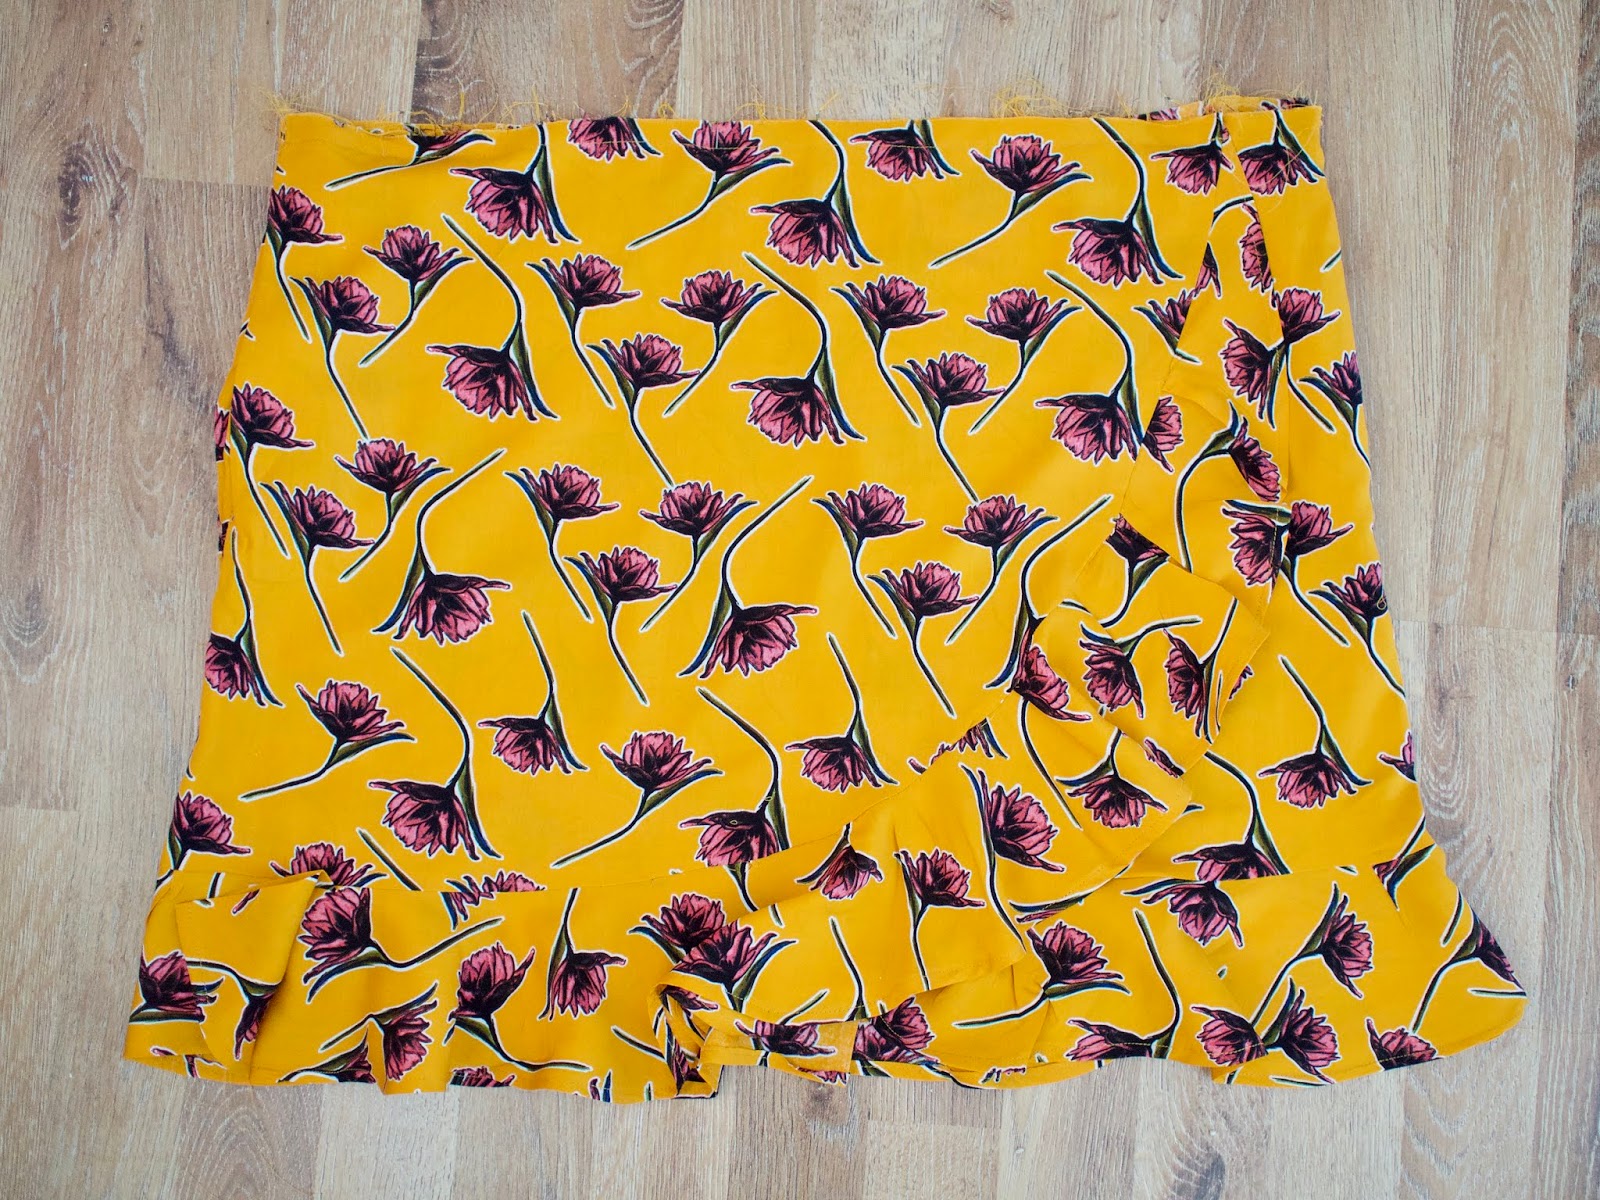
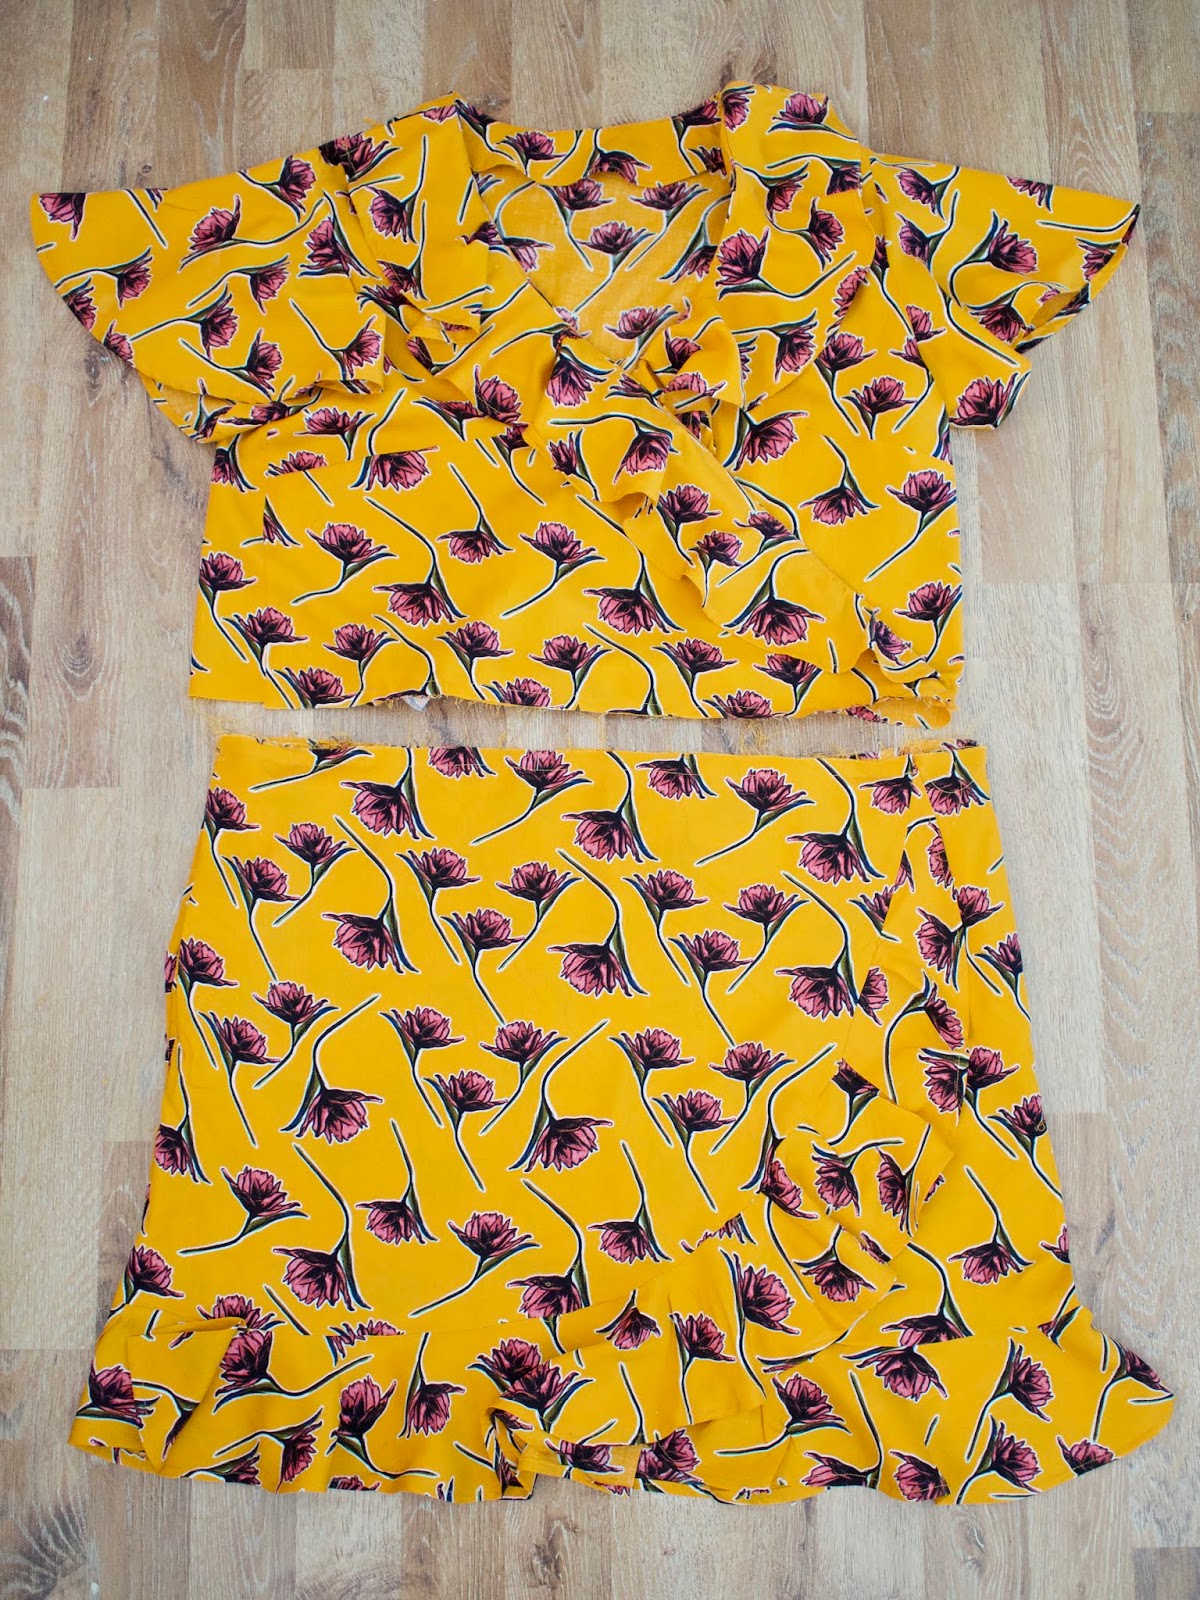
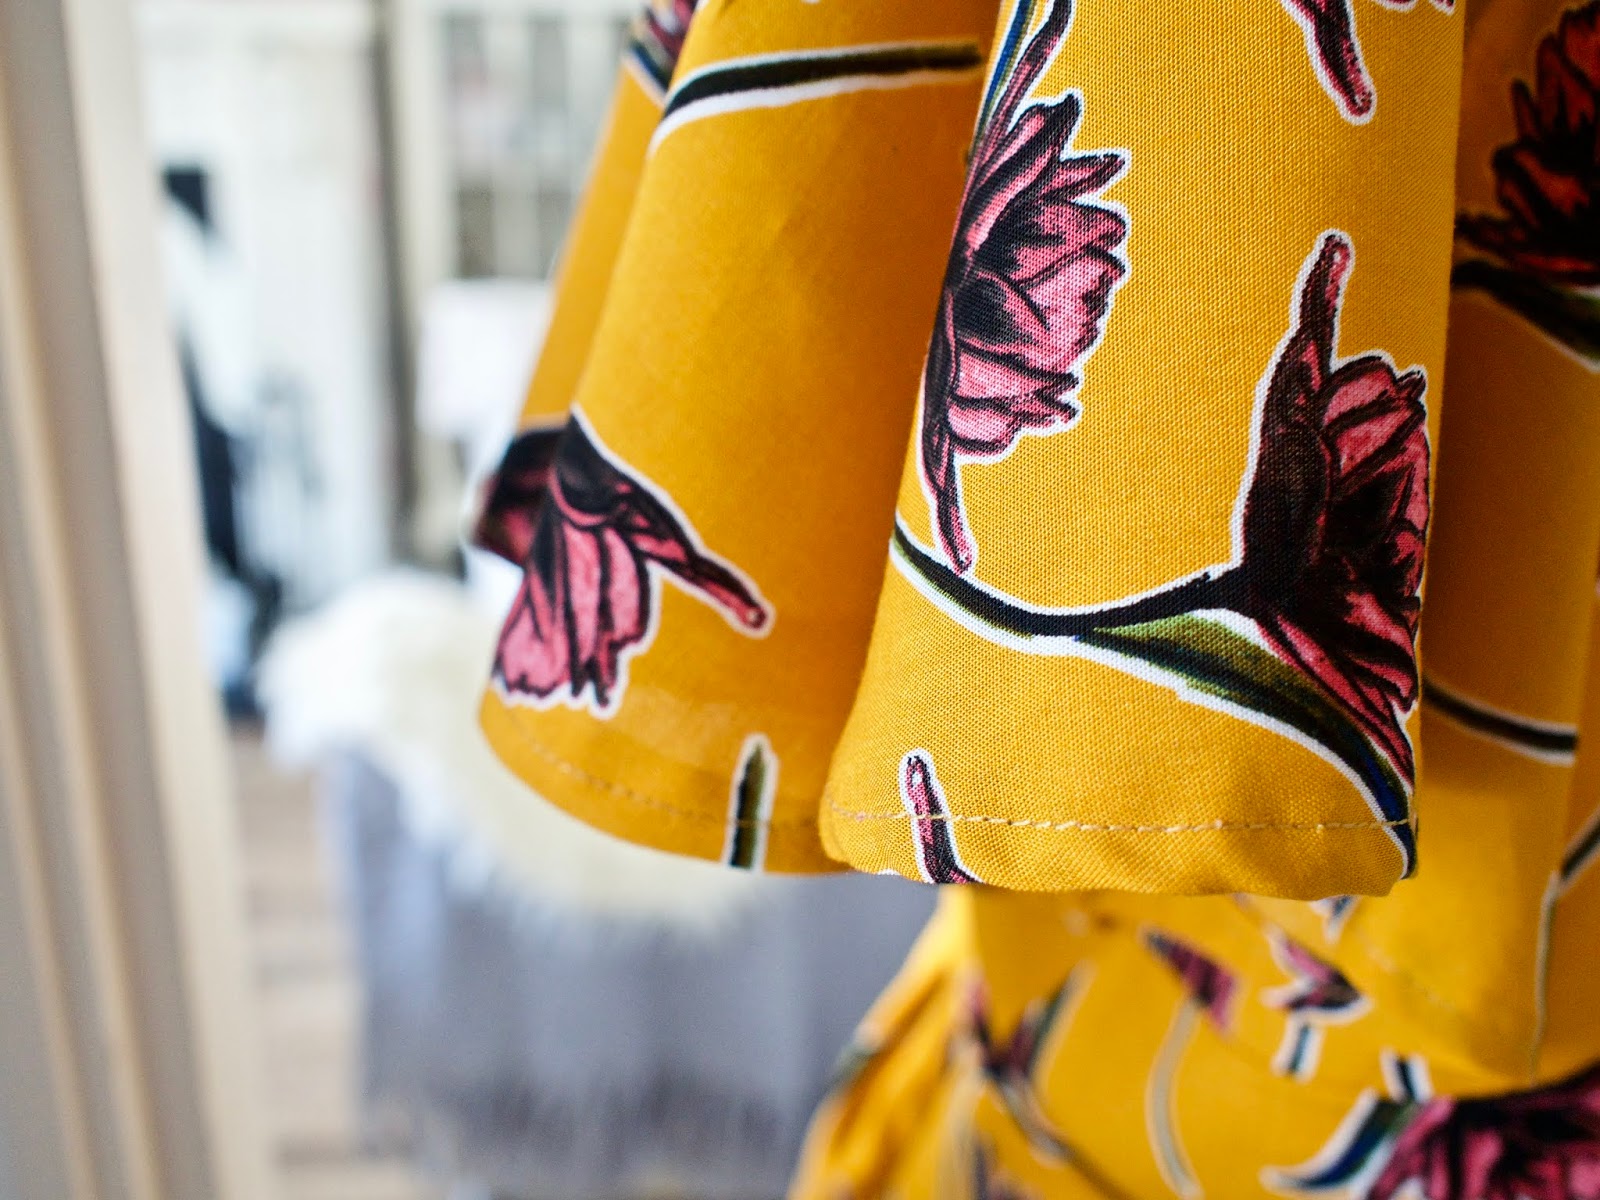
I took extra time to cut my pattern pieces and cut my fabric. There were 15 pieces in the pattern for option A. All of the details for fabric amounts and notions are on the back of the pattern. I used roughly 3 metres of fabric for making my dress. I find the cutting instructions really easy to follow and I got the most use from my fabric. Don’t forget to mark out your notches and dots when cutting your fabric. Notches and dots are really important for when you are matching up your pieces. You will find an instruction sheet inside your pattern as well as your pattern pieces. These instructions are so important and have all the steps and details for making your garment. Also, remember to take the time to measure yourself correctly and always go by your pattern size and not the size you are on the high street.


Assembling your bodice
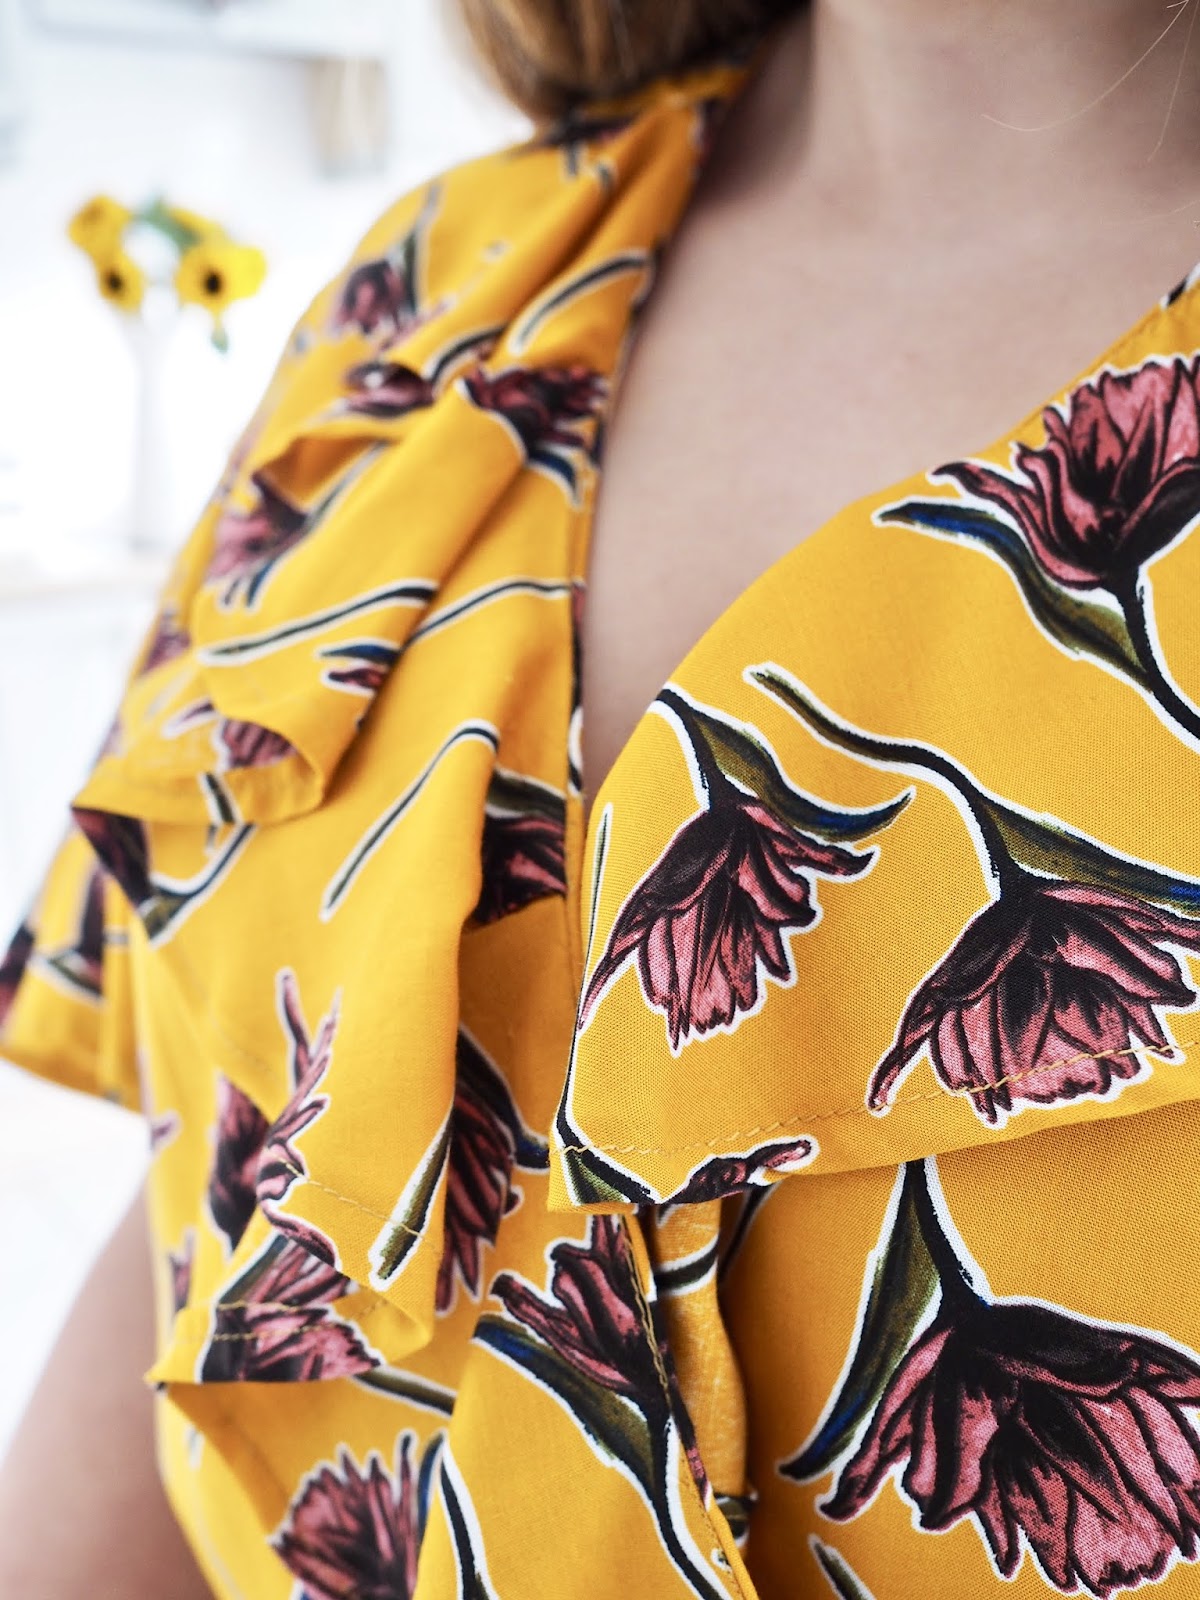
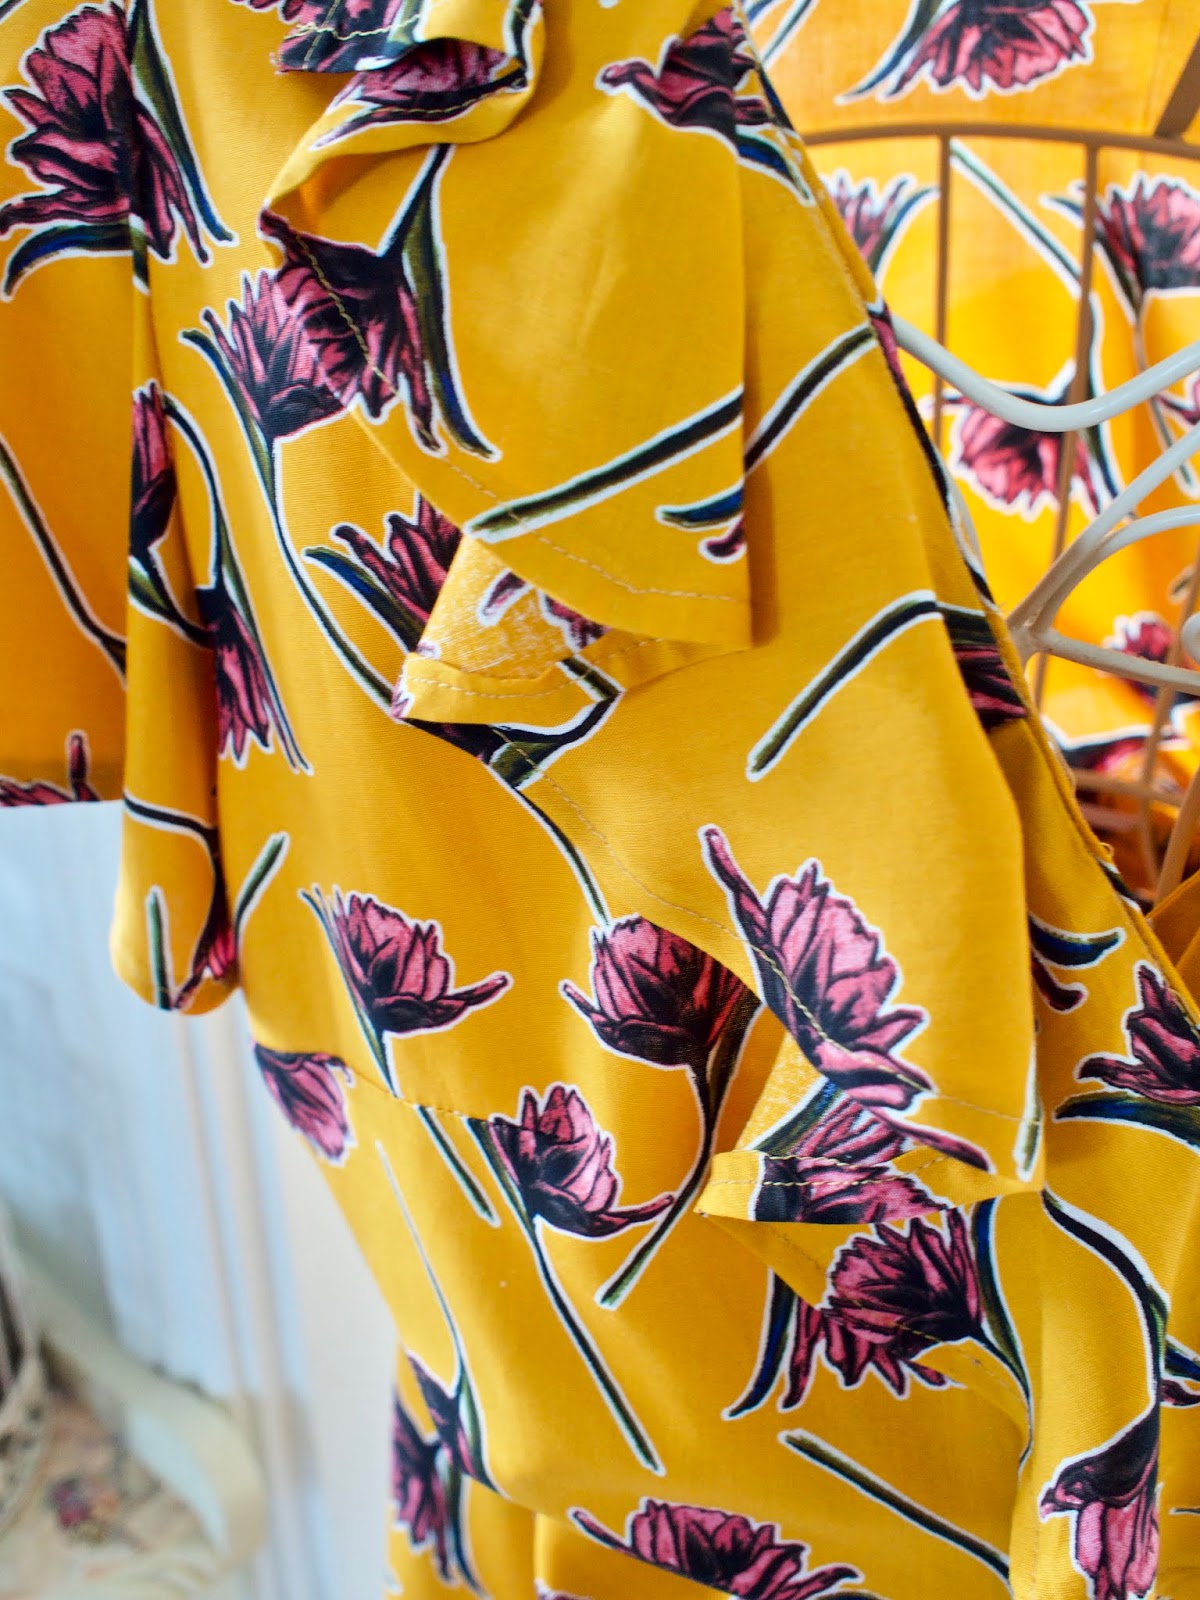
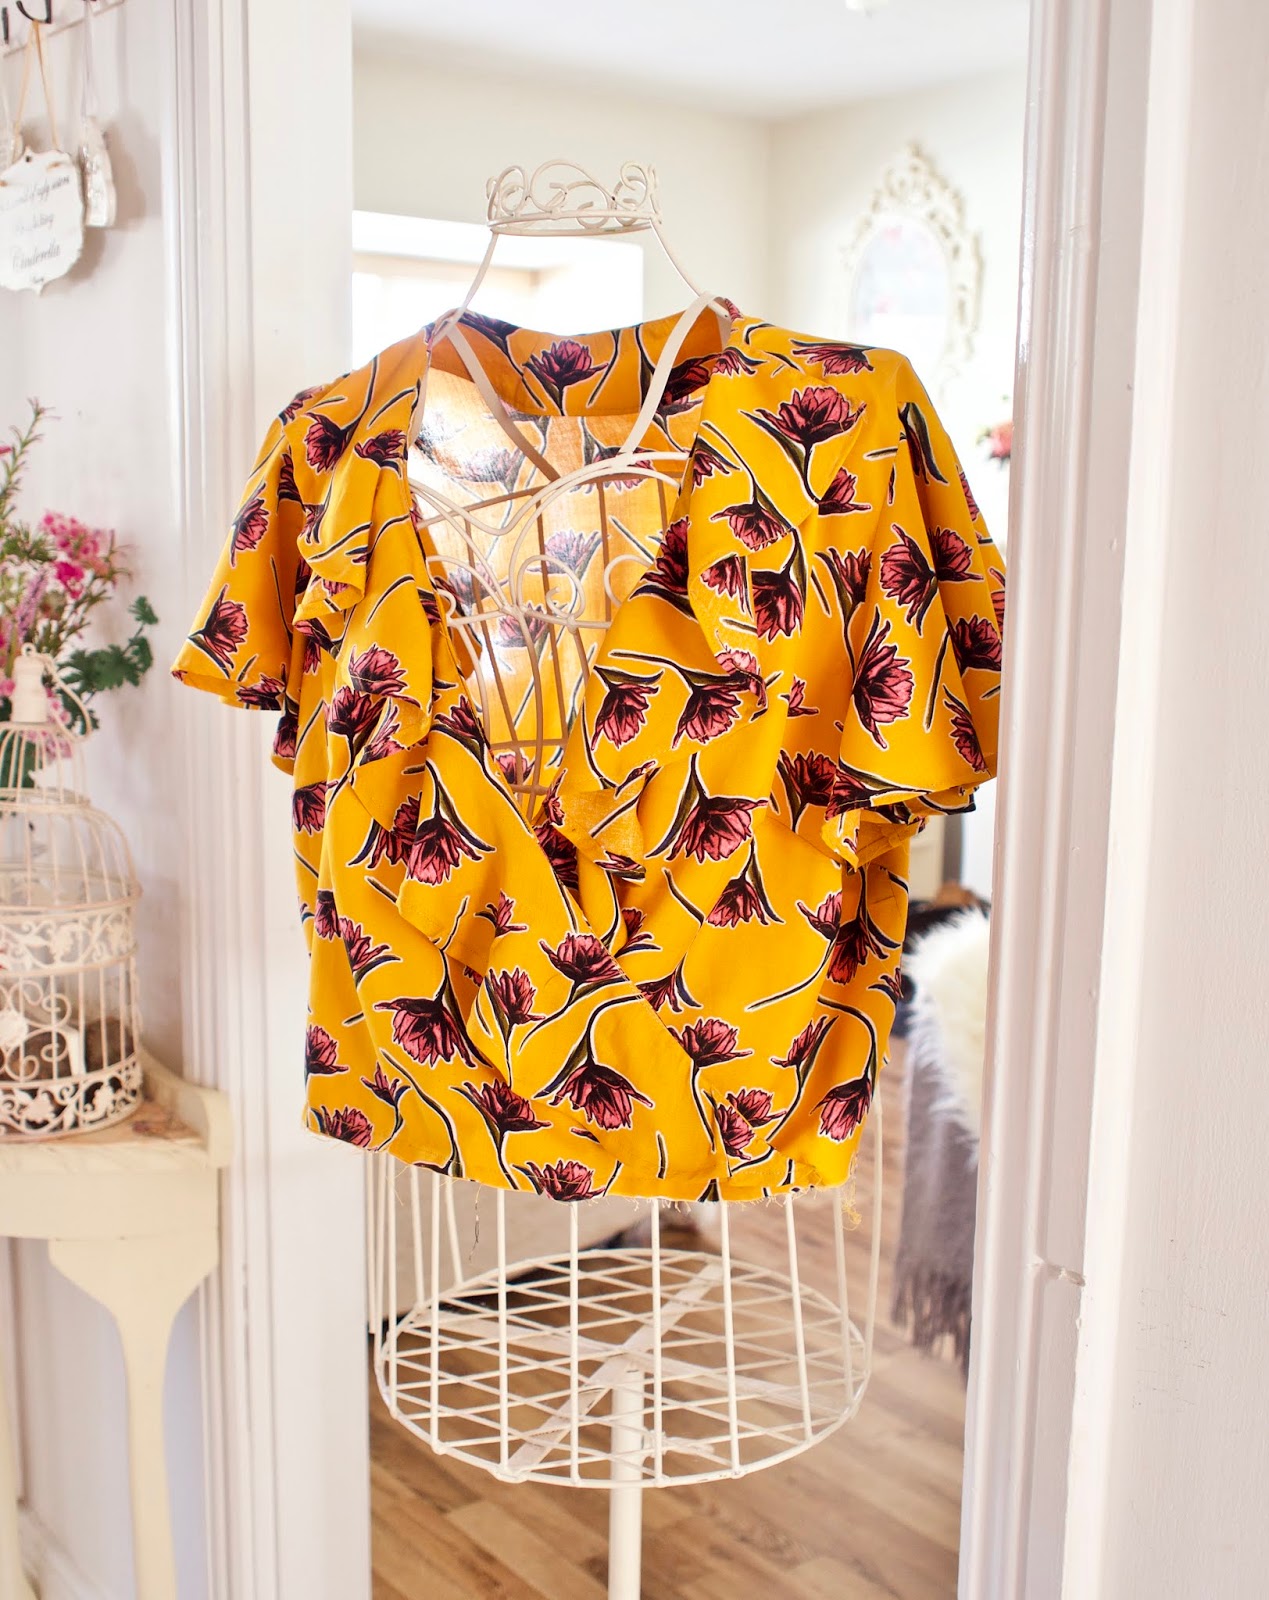
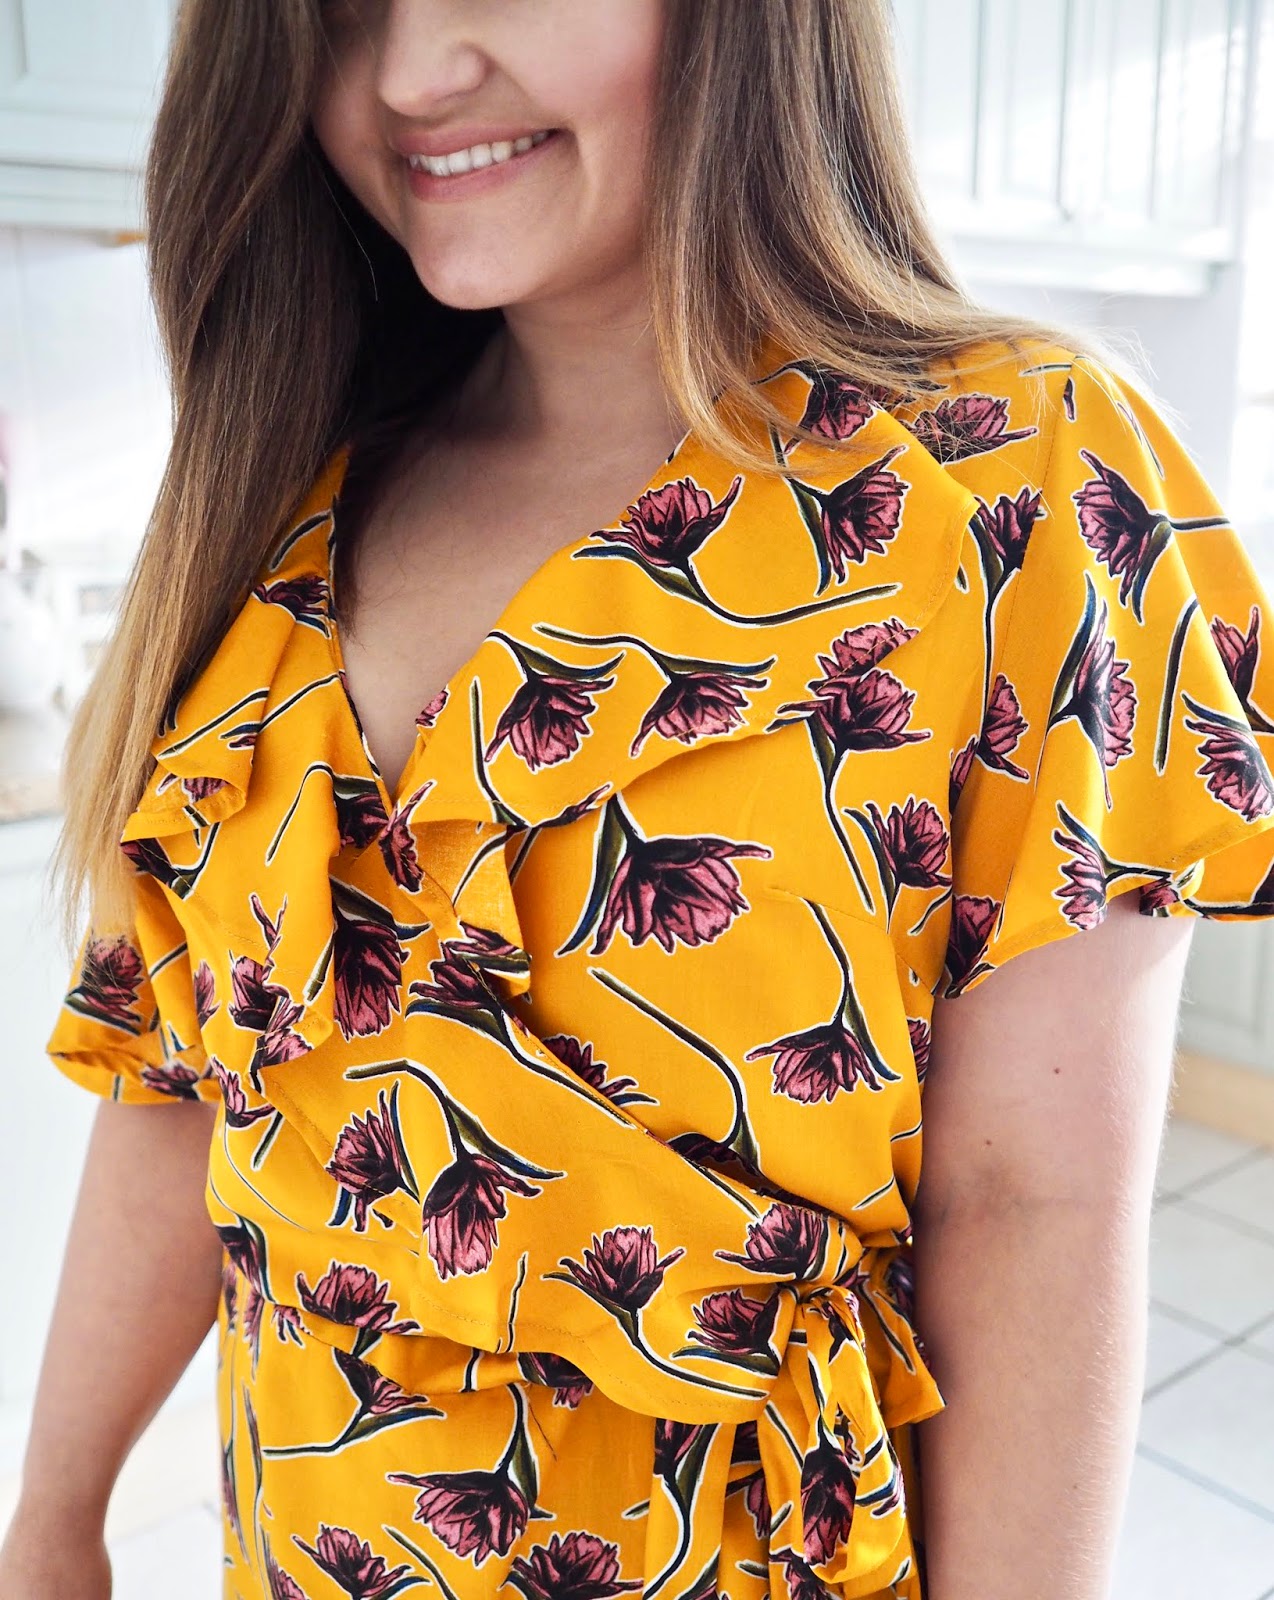
I started by working on my bodice. I took this projects in steps and I didn’t try and sew it all in the one evening. One evening I cut the fabric, another evening I worked on the bodice and then I finished the skirt over the weekend. I found taking it in steps made it less overwhelming. The bodice was easier to assemble than it looked in the instructions. Sometimes the instructions can look scary and overwhelming but I just take it one step at a time. This was my first time to add a flounce to a piece. Take your time when sewing your narrow hems as these sit to the front of the piece and you will be able to see your stitches. I also added darts to my bodice, this was my first time to add darts. I simply followed the dart lines in the pattern and they turned out fab. I was really pleased with my first attempt.
Assembling the skirt
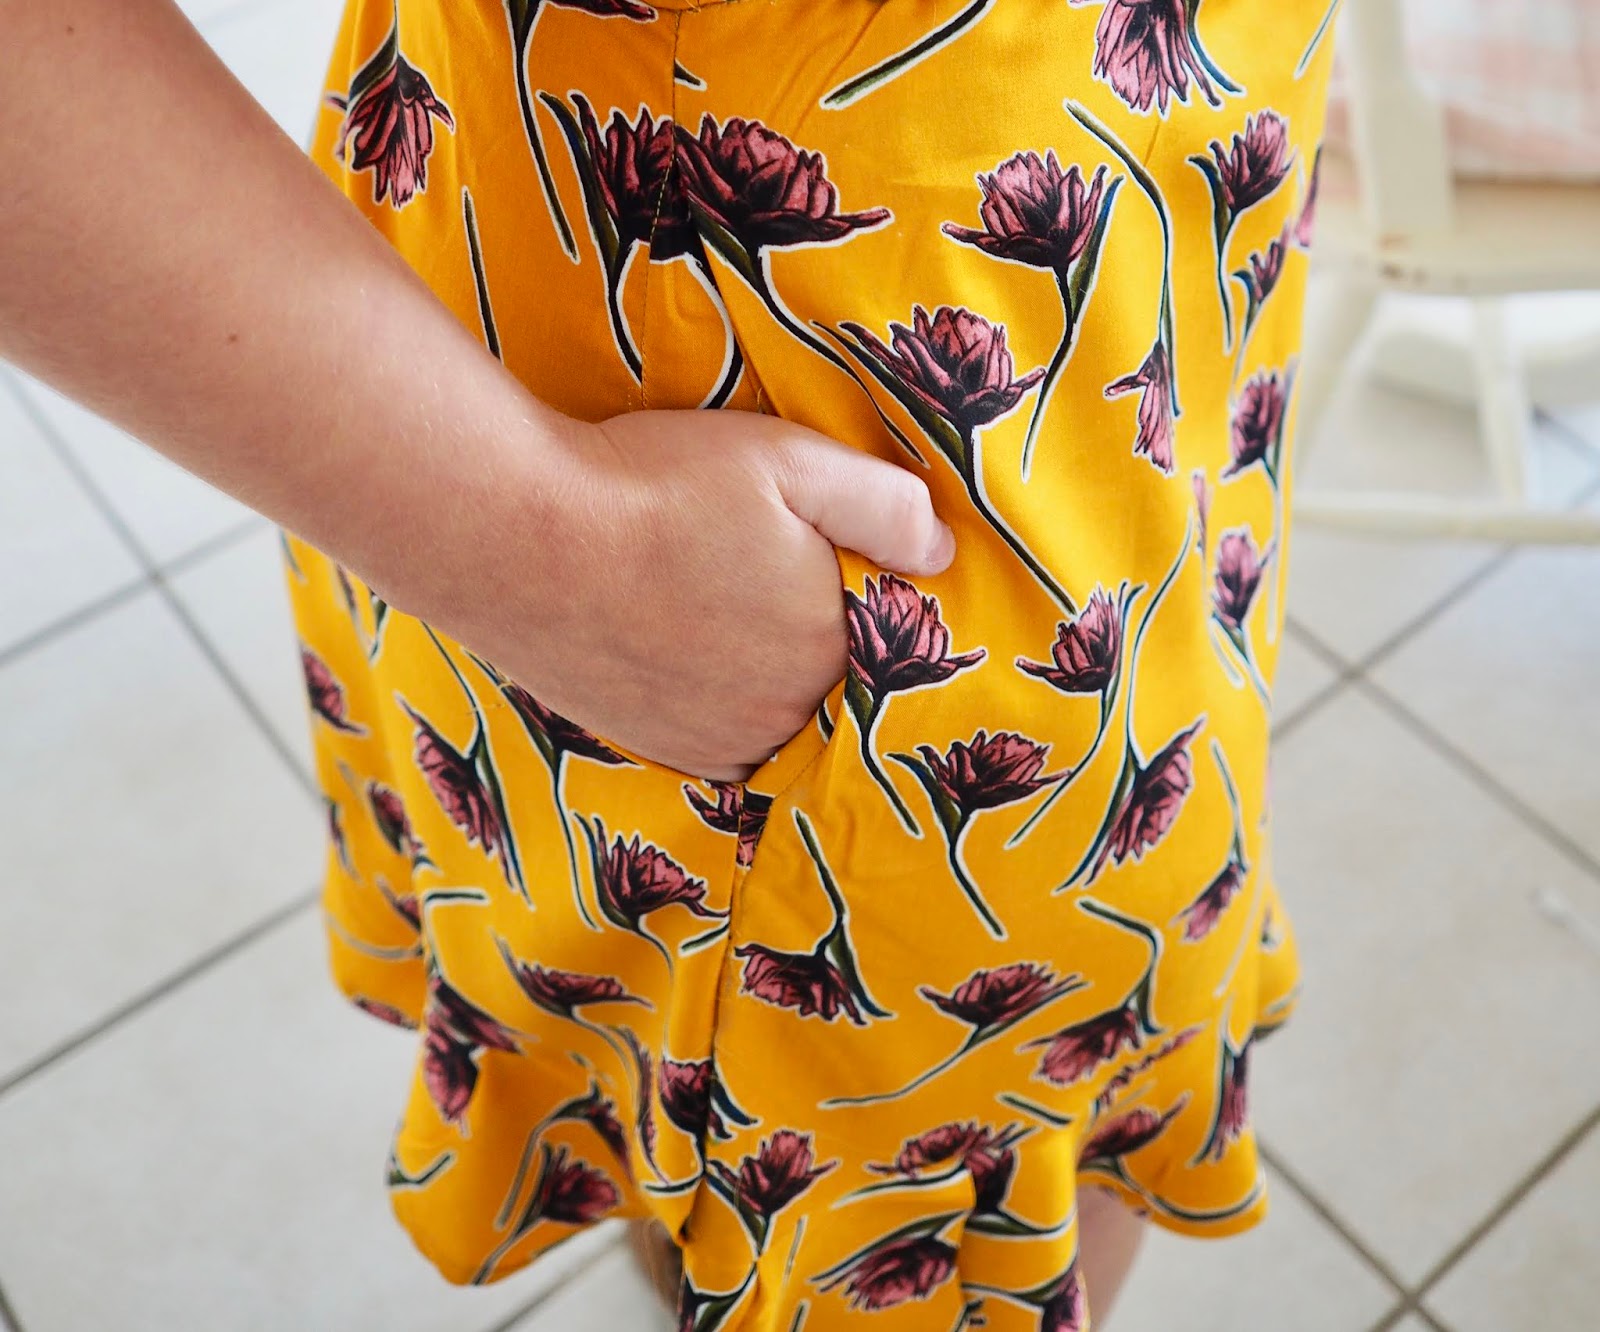
The skirt has pockets! Yes, you heard me. We all love a dress with pockets. Now, I did mess up a little here and I went on to Youtube to see how the pockets worked. I had to unpick some of my work and start again with the pockets. I was determined to complete a pocket. I also added a long flounce to the front and bottom piece of this dress. This required a lot of hemming but I was a pro by the end of it.
Bringing it altogether
Once the bodice and skirt were complete I matched the notches along the waistband and pinned them together. I then stitched them together and I then added elastic to the seam. This was also my first time to add elastic to the waist of a garment. I learnt so many new skills in making this dress. I then made the belt which was really easy to do. I had made long belts in my previous wrap skirt post, so I was familiar with making these. Once my dress was all assembled I trimmed away any loose threads and I styled it up.


I hope you enjoyed today’s post. I know a lot of you guys have sewing machines that might be gathering dust so I hope this post gives you some inspiration. You can also check out my other sewing posts, I have a wrap dress post and an easy envelope cushion post as well. You can also check out the free Autumn craft demos and classes on the Hickeys website. You can find details here on upcoming classes.
Let me know if you give this project a try, you can tag me in your Instagram pics or comment below and link to your work.
Thanks for reading,
Chat soon,
Catherine.
*This post is sponsored by Hickeys Homefocus, Sponsorships and affiliate links help me to run my blog, thank you for your continued support on my blog.


Love your dress it tuned out super – Bravo. Did you get your Vintage Singer working? I have a great suggestion for a book on Fitting is Nancy Zieman Fitting Finesse – or the new version Pattern Fitting with Confidence – her way of measuring to pick your pattern size and the fitting of patterns started me on a 30 year path of successes instead of frustration. Great to see you getting into more sewing – love your style.
Aw fab! Thank you so much or recommending that! So helpful x
woooow that's awesome <3
Thank you! So glad you liked it x
Whoa!!! That is your first dress by yourself…I am very impressed….your dress is amazing 😉
Author
AW thanks!